
Create & Manage Application Forms
Customize the candidate application experience by controlling what information you collect, how it’s structured, and whether it can be reused across jobs.
Overview
Application Forms in Discovered let you decide exactly what candidates must submit when applying to a job. You can build forms using default sections (like Experience and Education), add custom questions, and even split long forms into multiple steps for easier completion. Forms can be saved as templates, applied across jobs, and updated in bulk when company requirements change. This ensures consistency for recruiters while keeping the candidate experience streamlined and professional.
How to Create & Manage Application Forms:
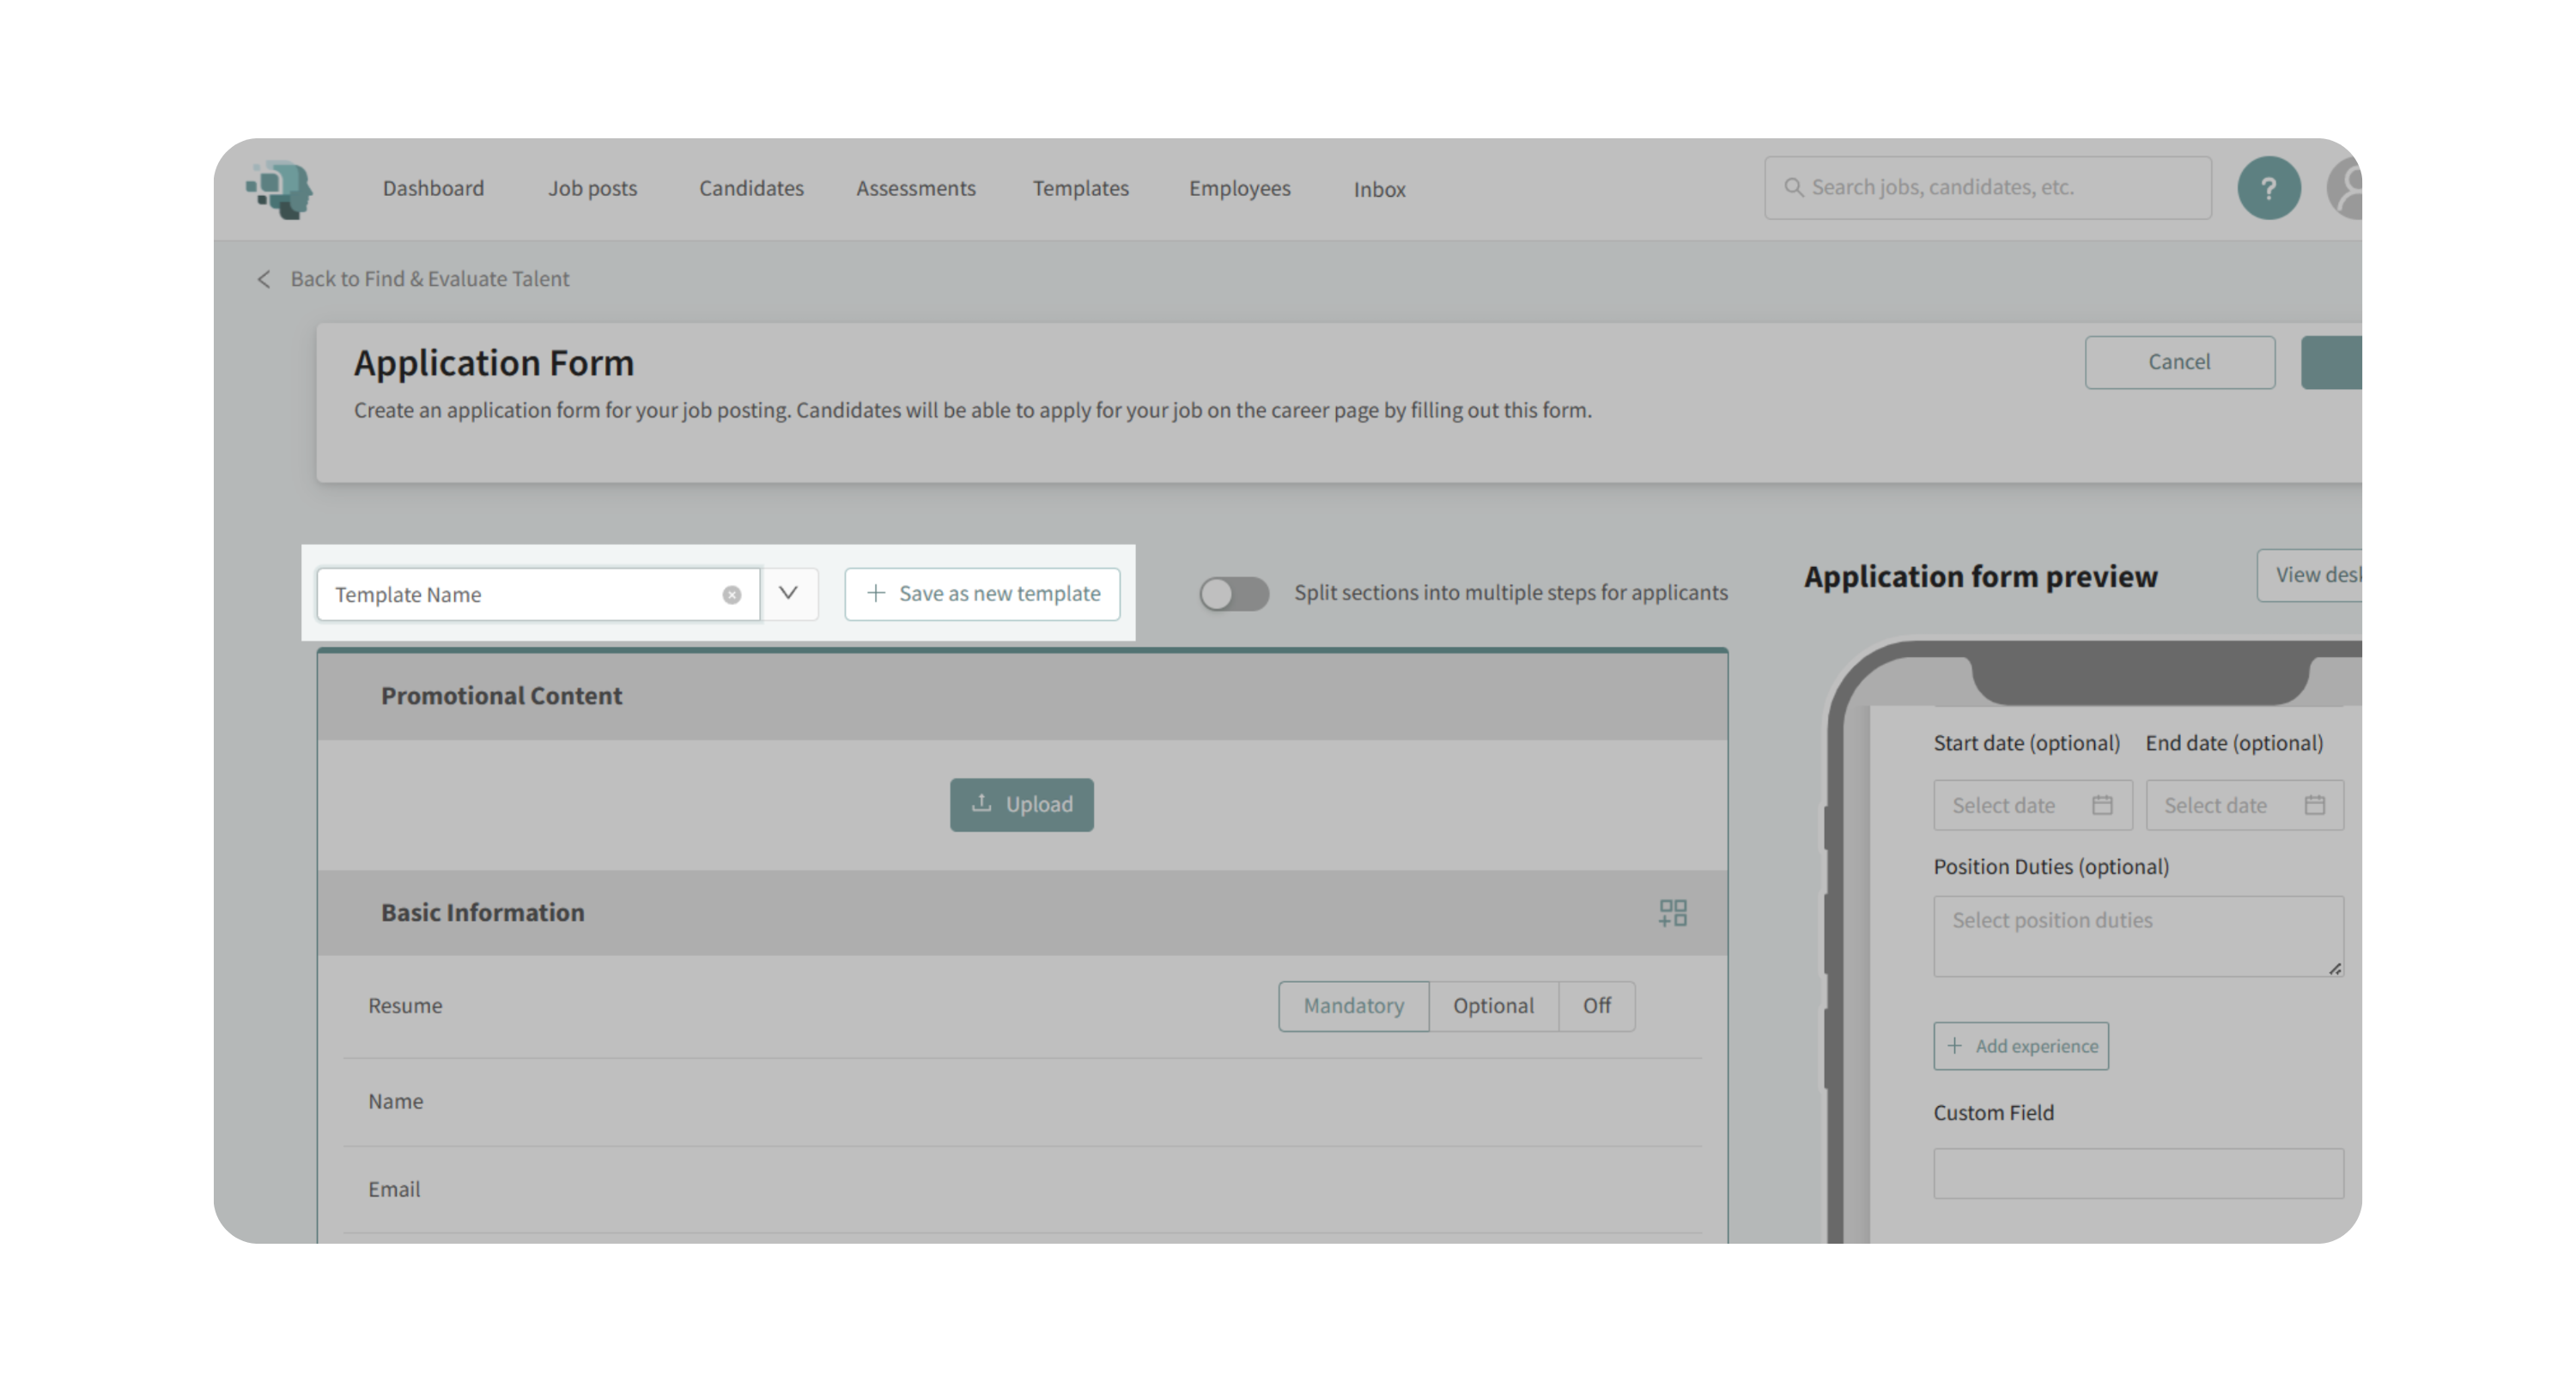
1. Open the Application Form Builder
- Go to the Find and Evaluate Talent tab of your job posting.
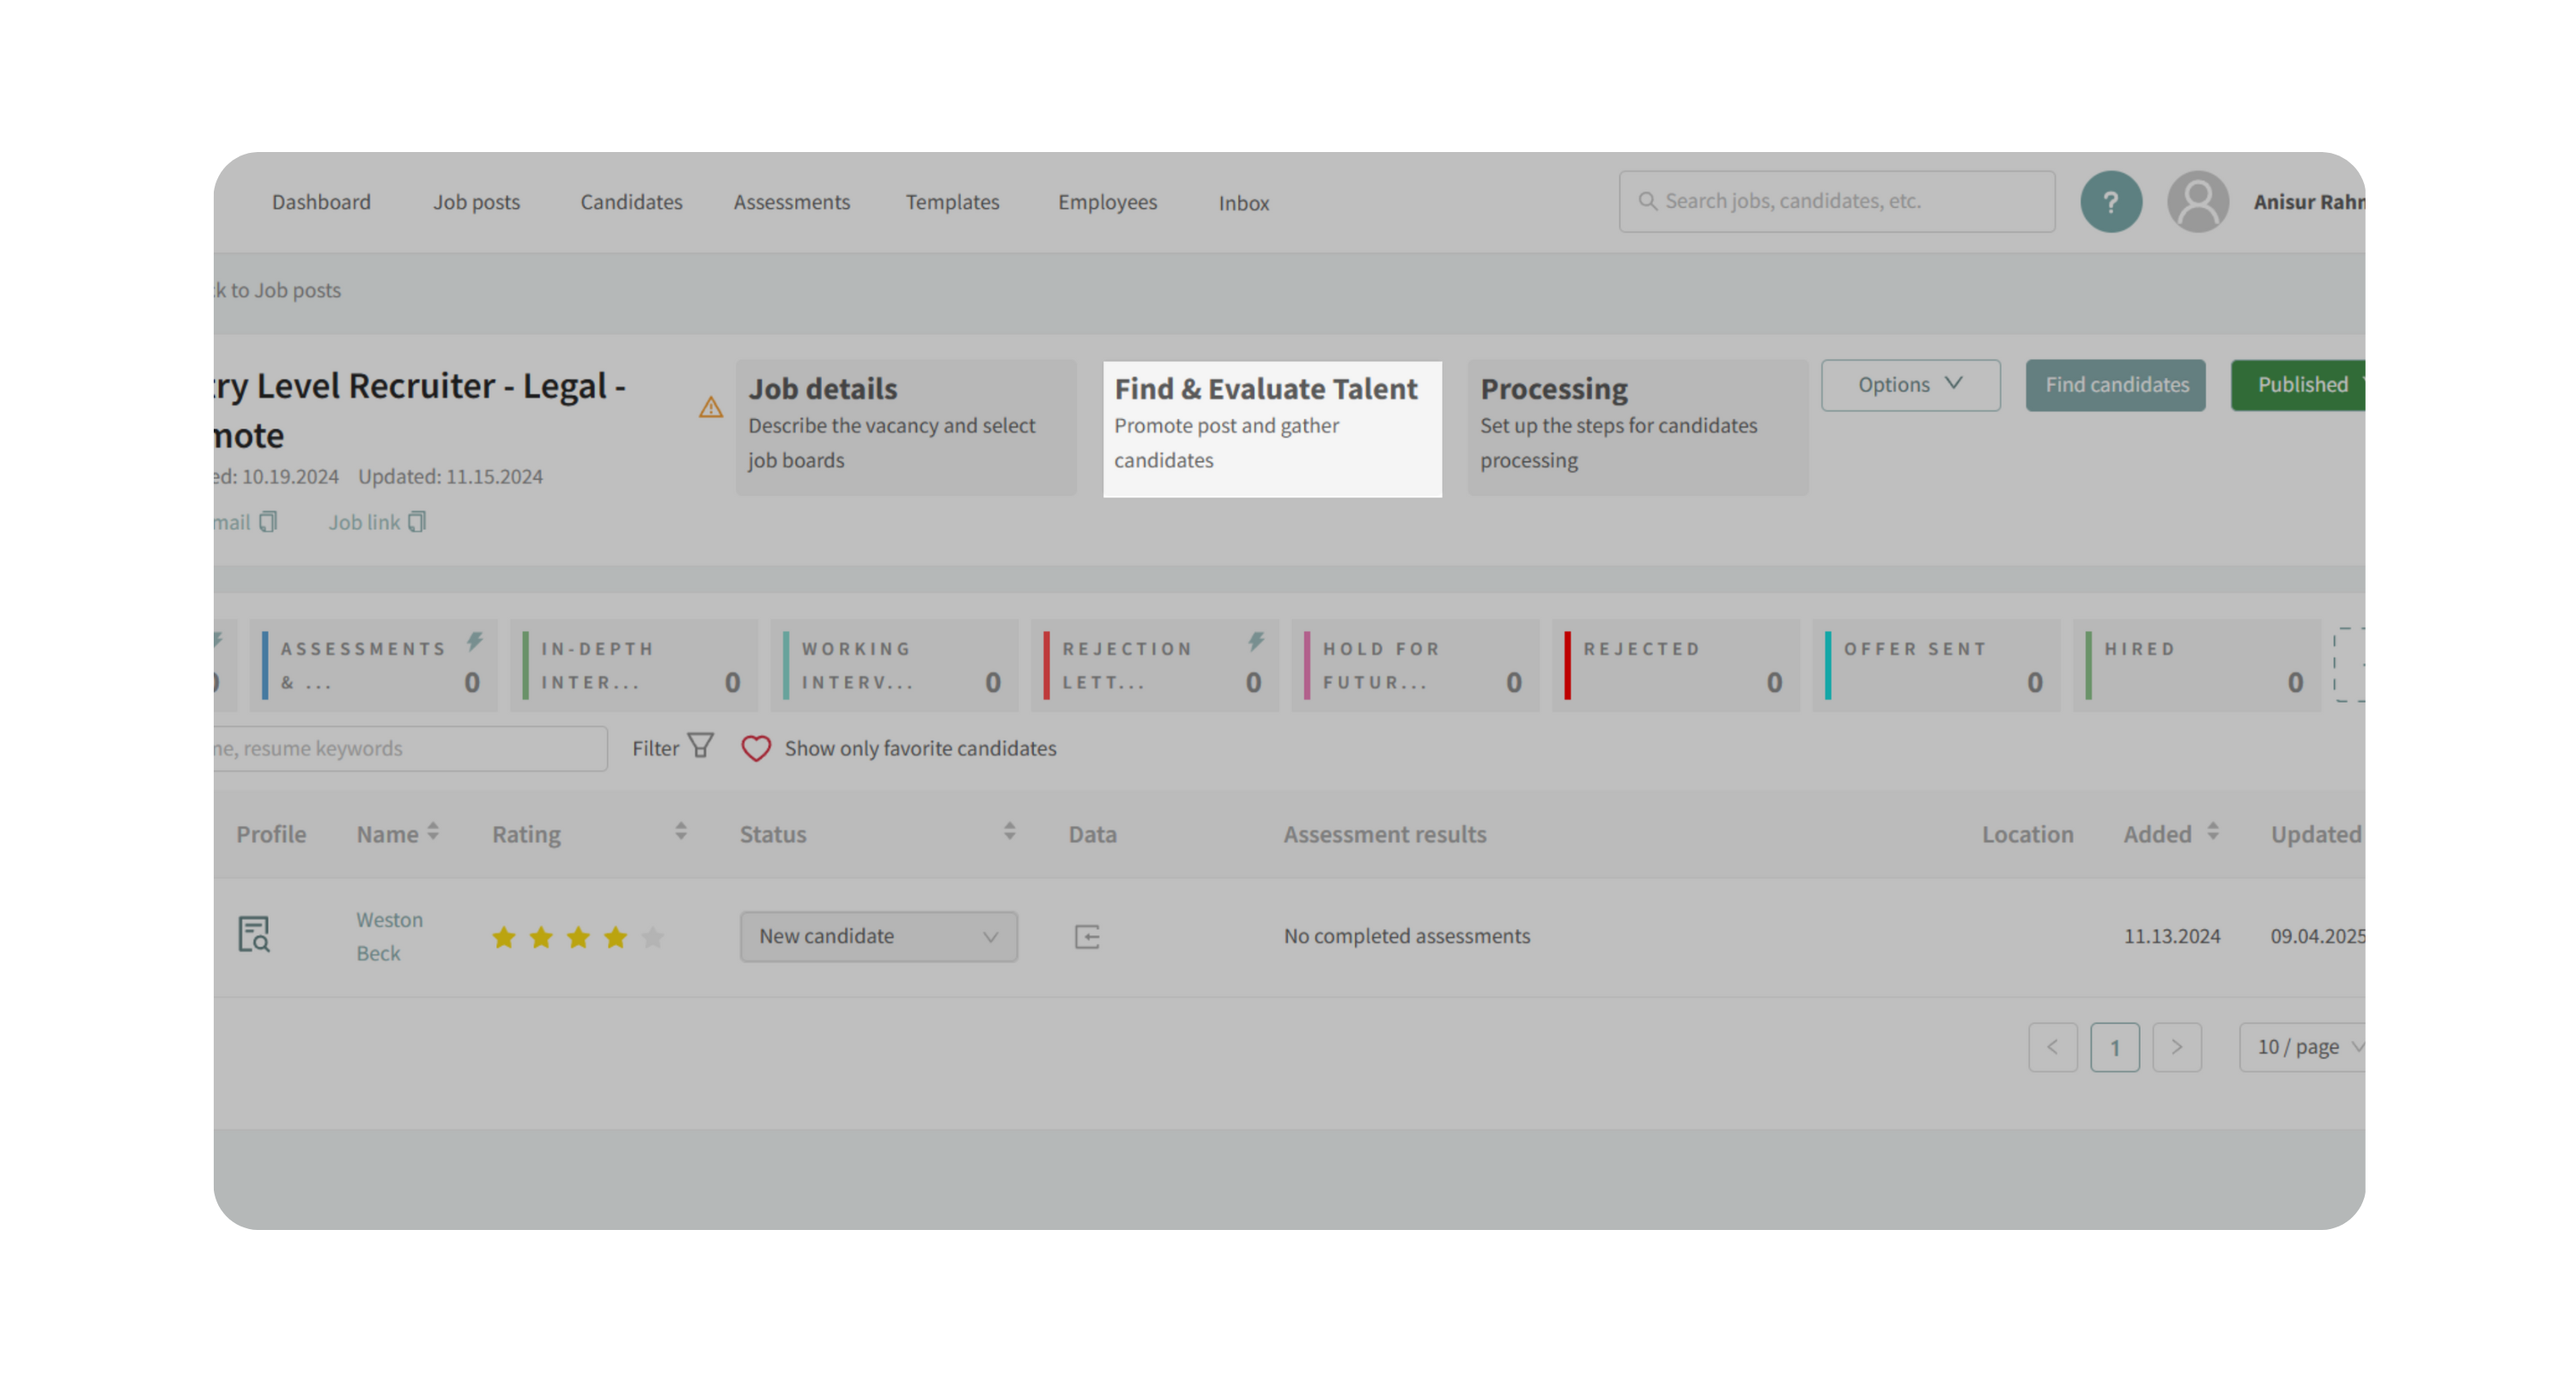
- Scroll to the Evaluate Candidates section and click Application Form.
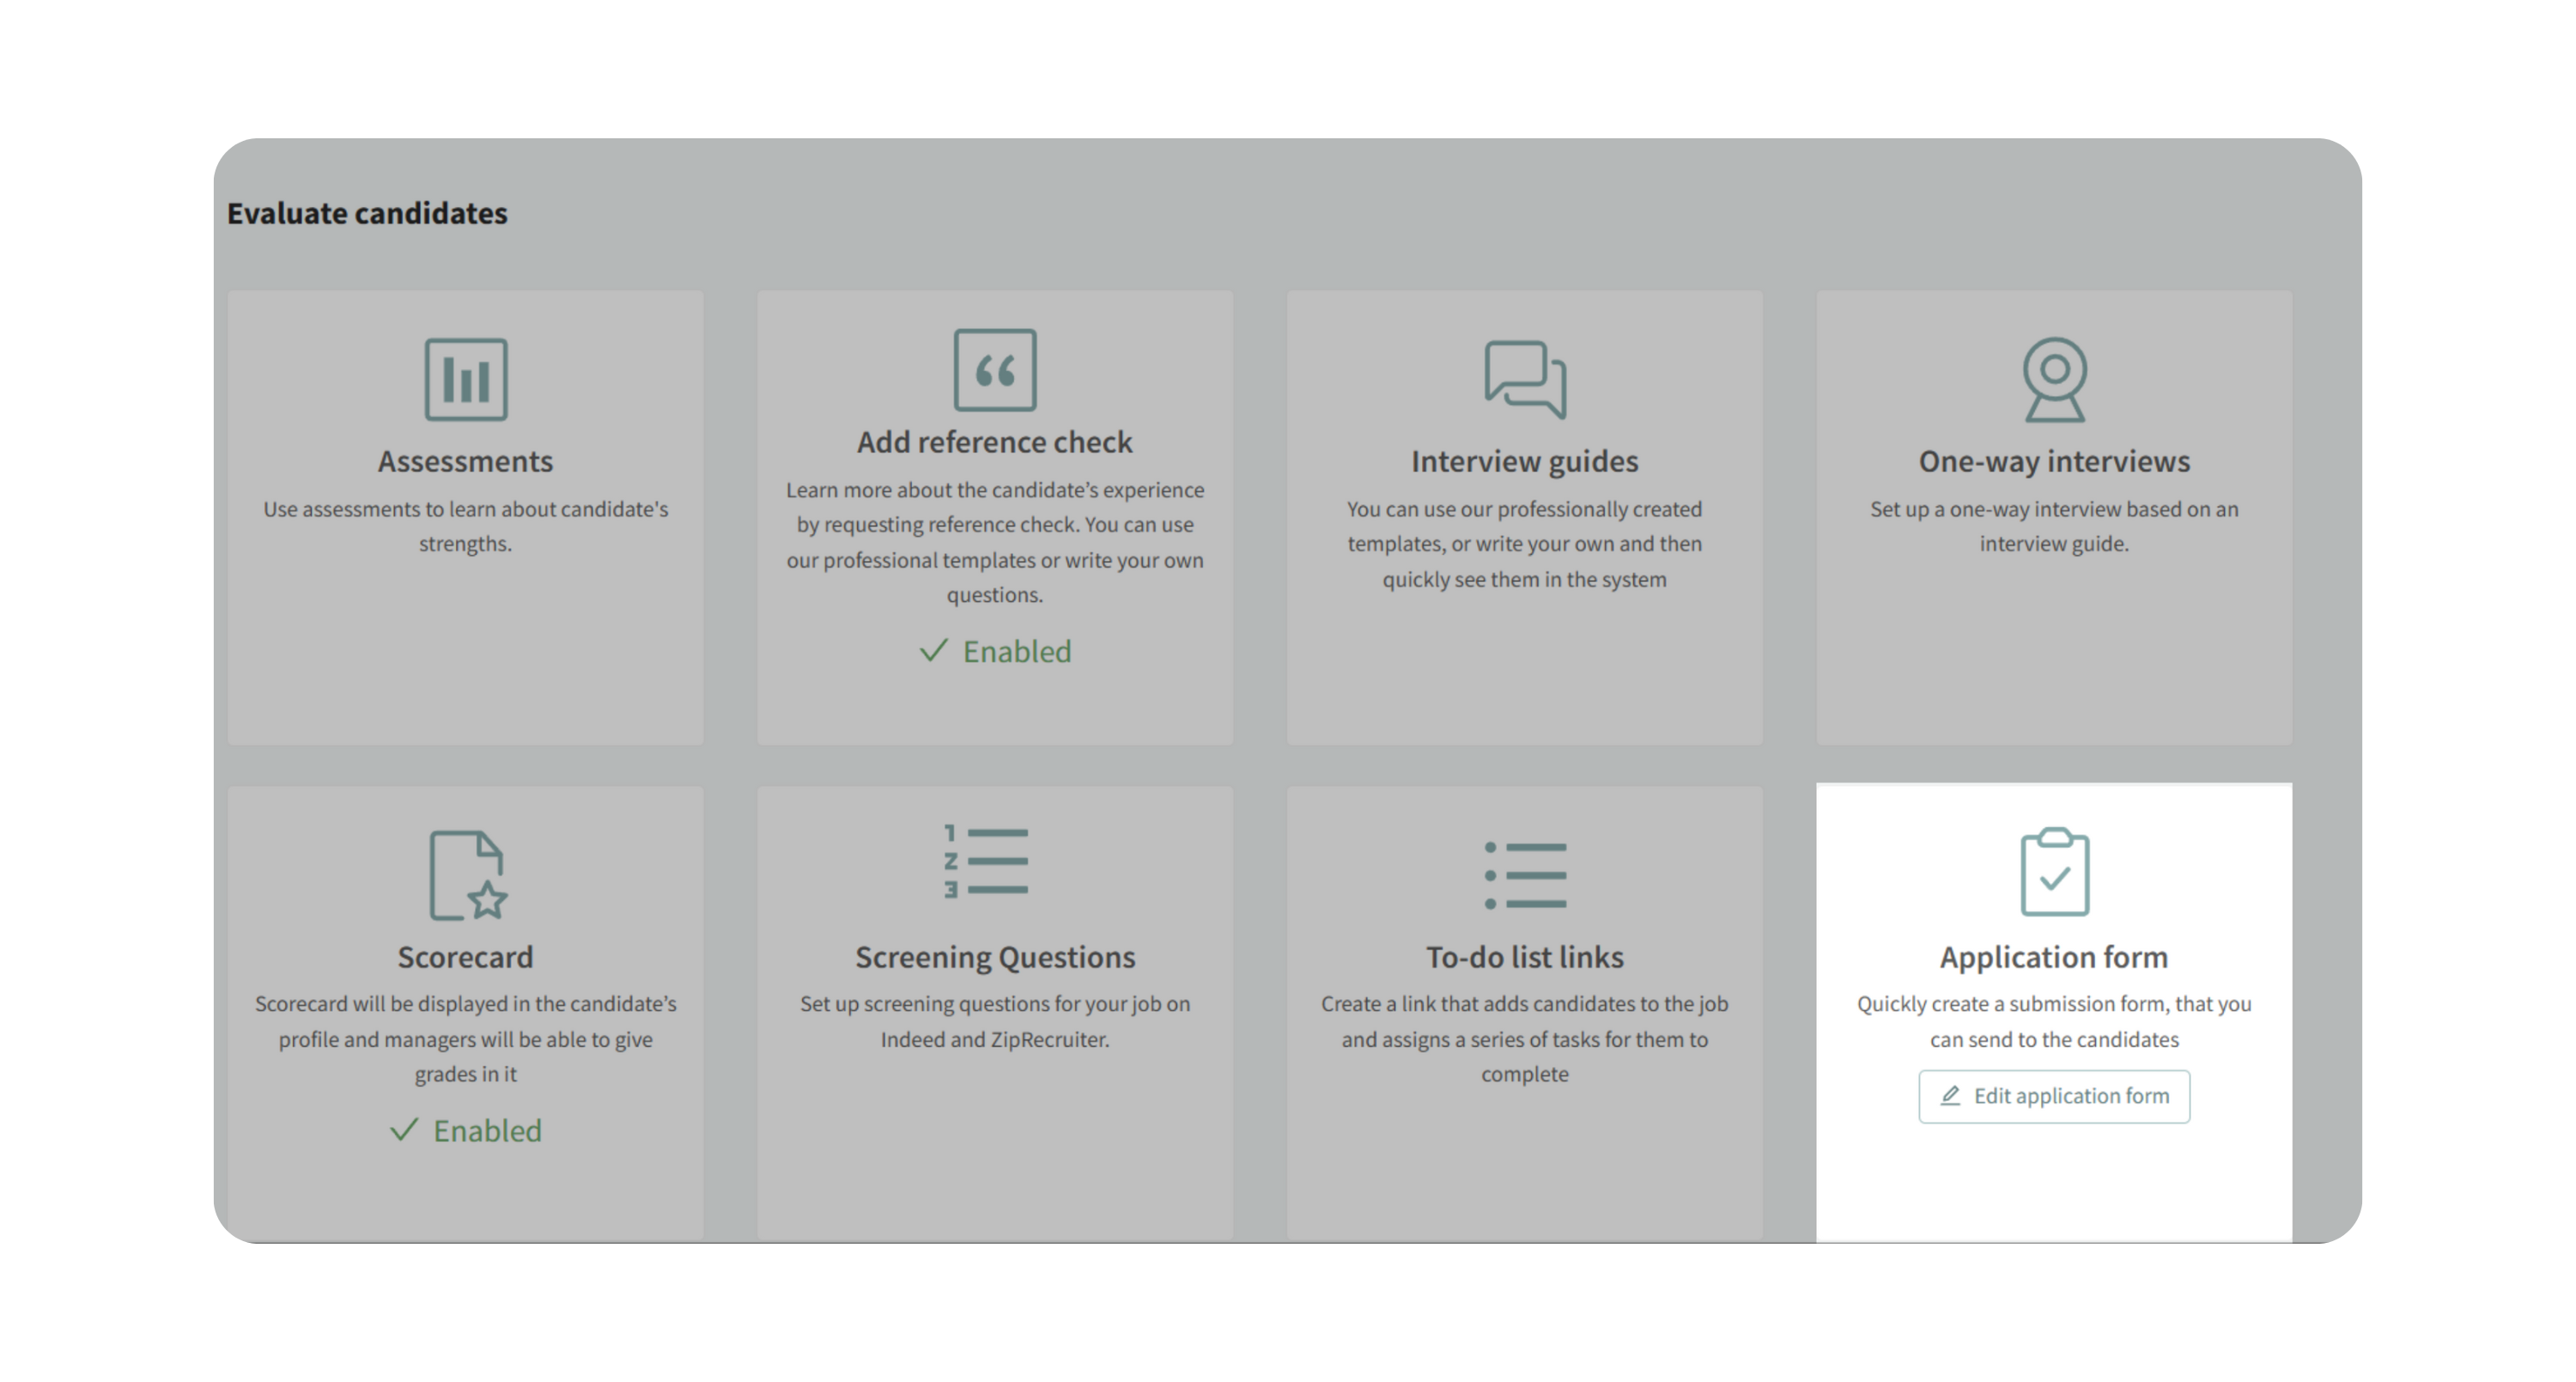
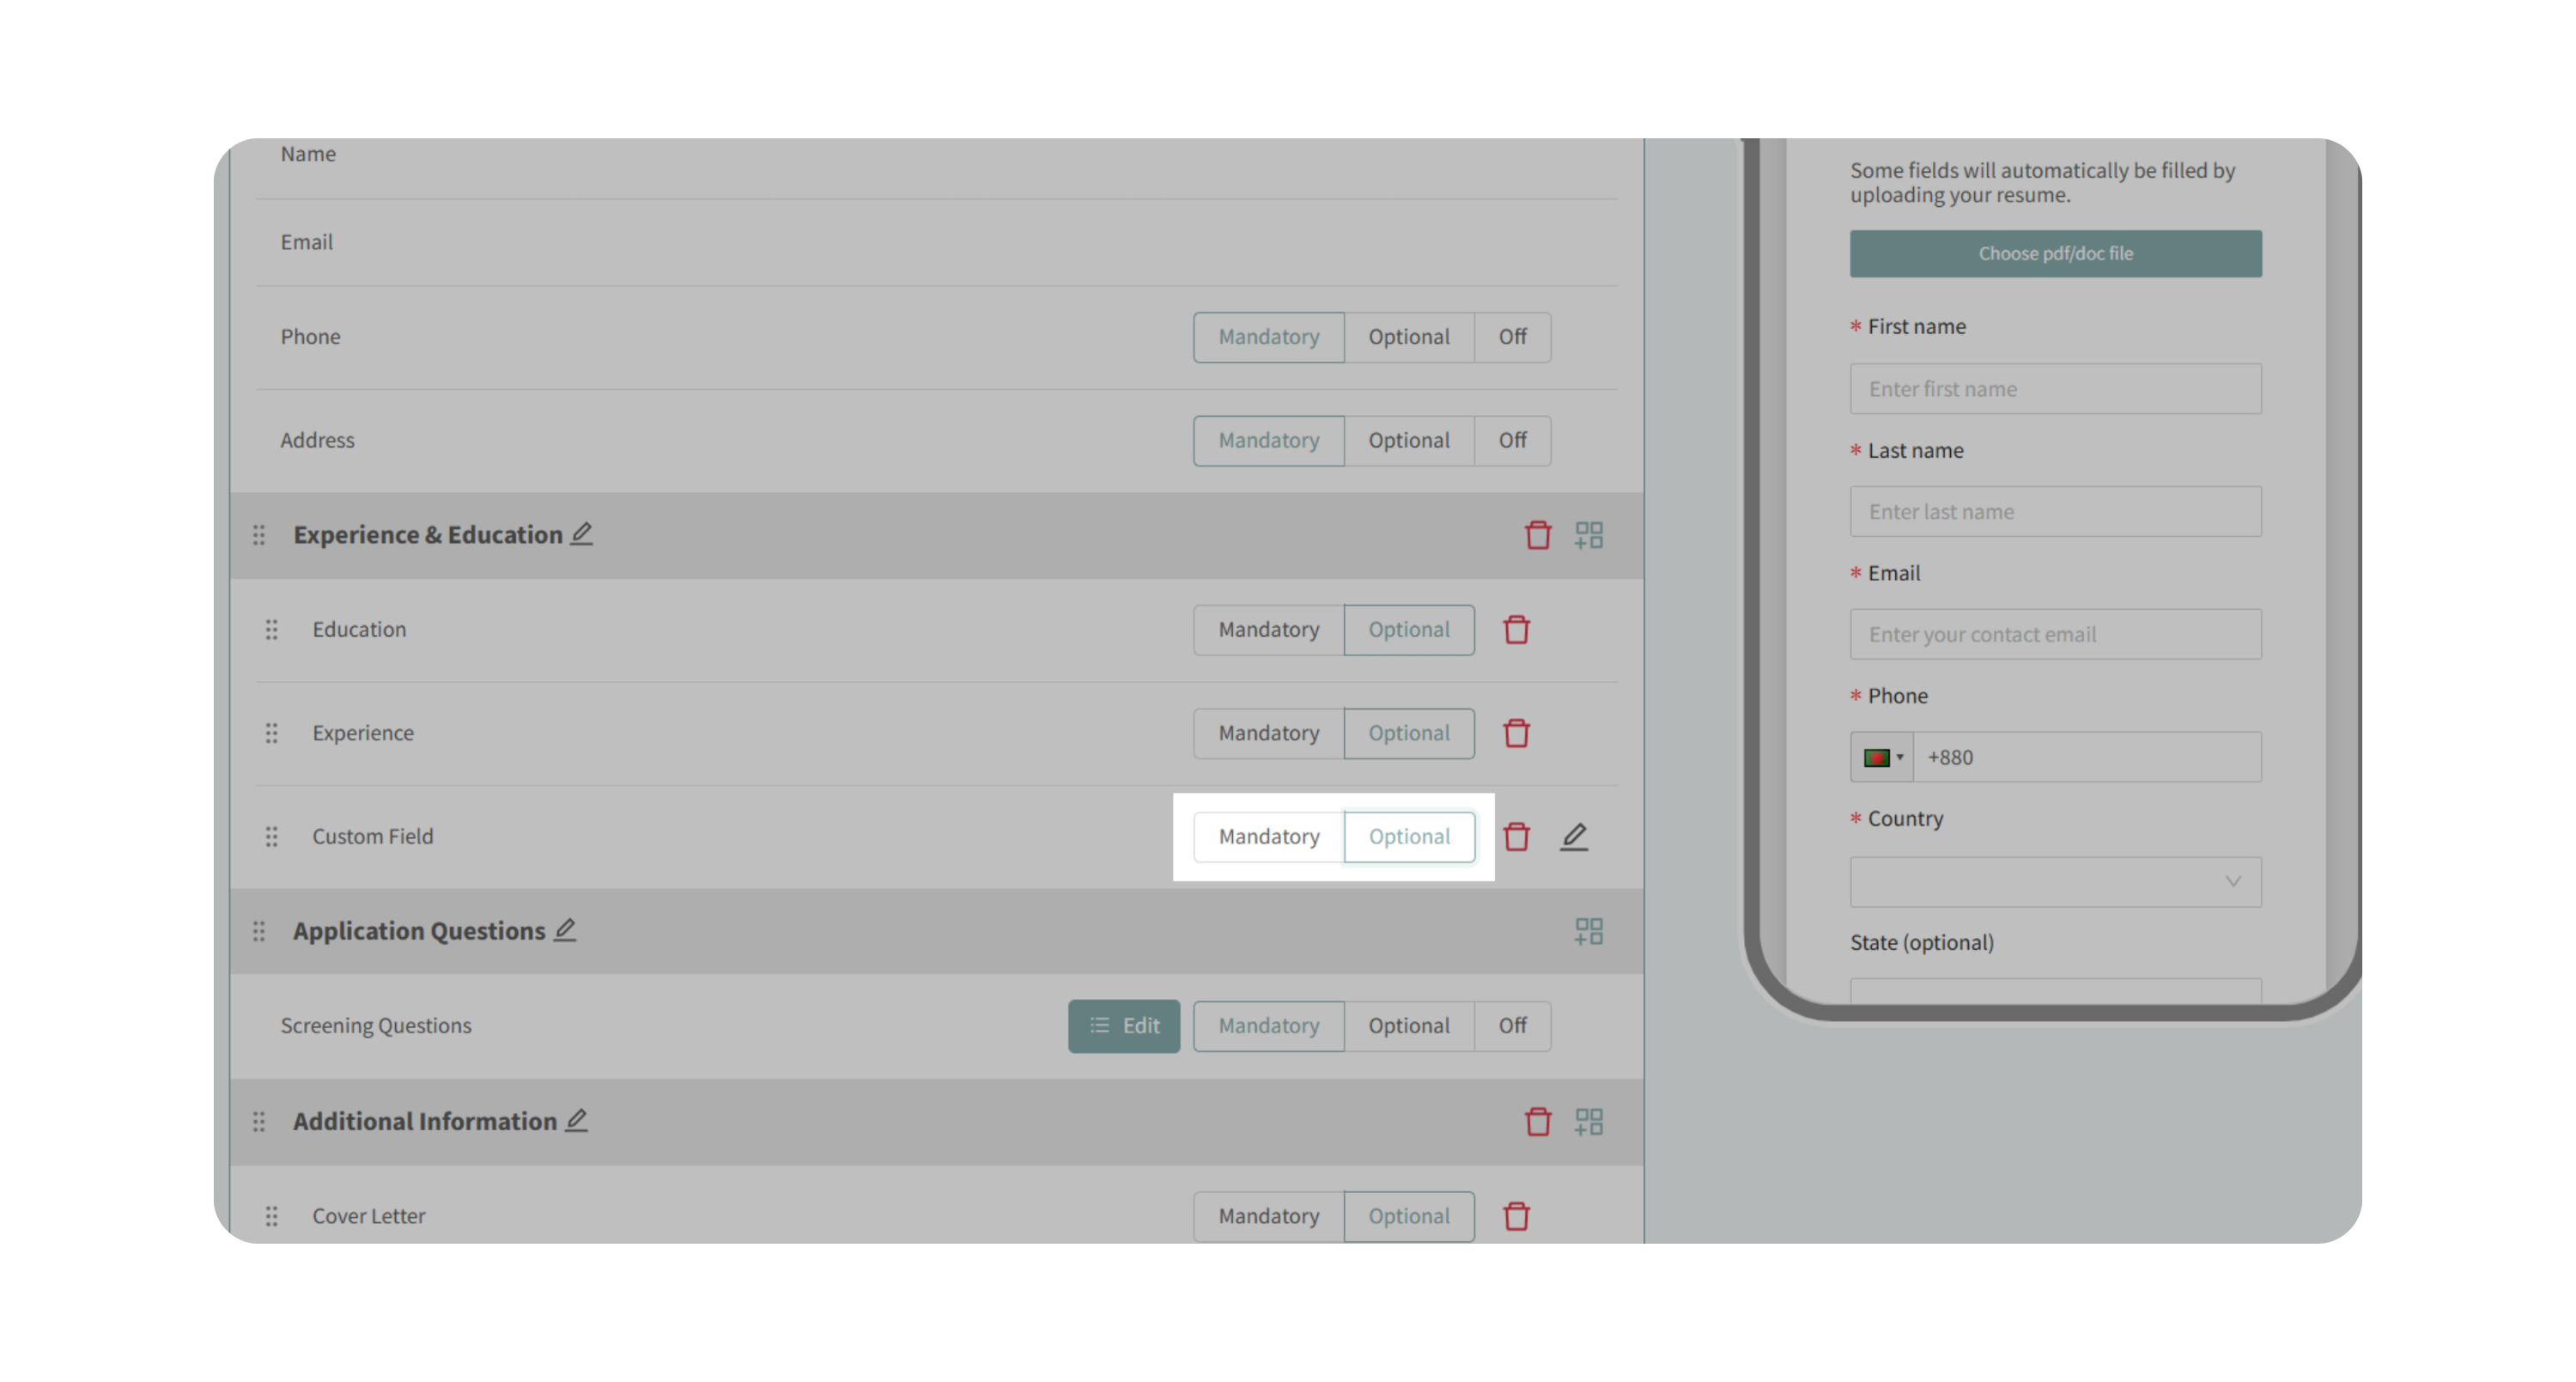
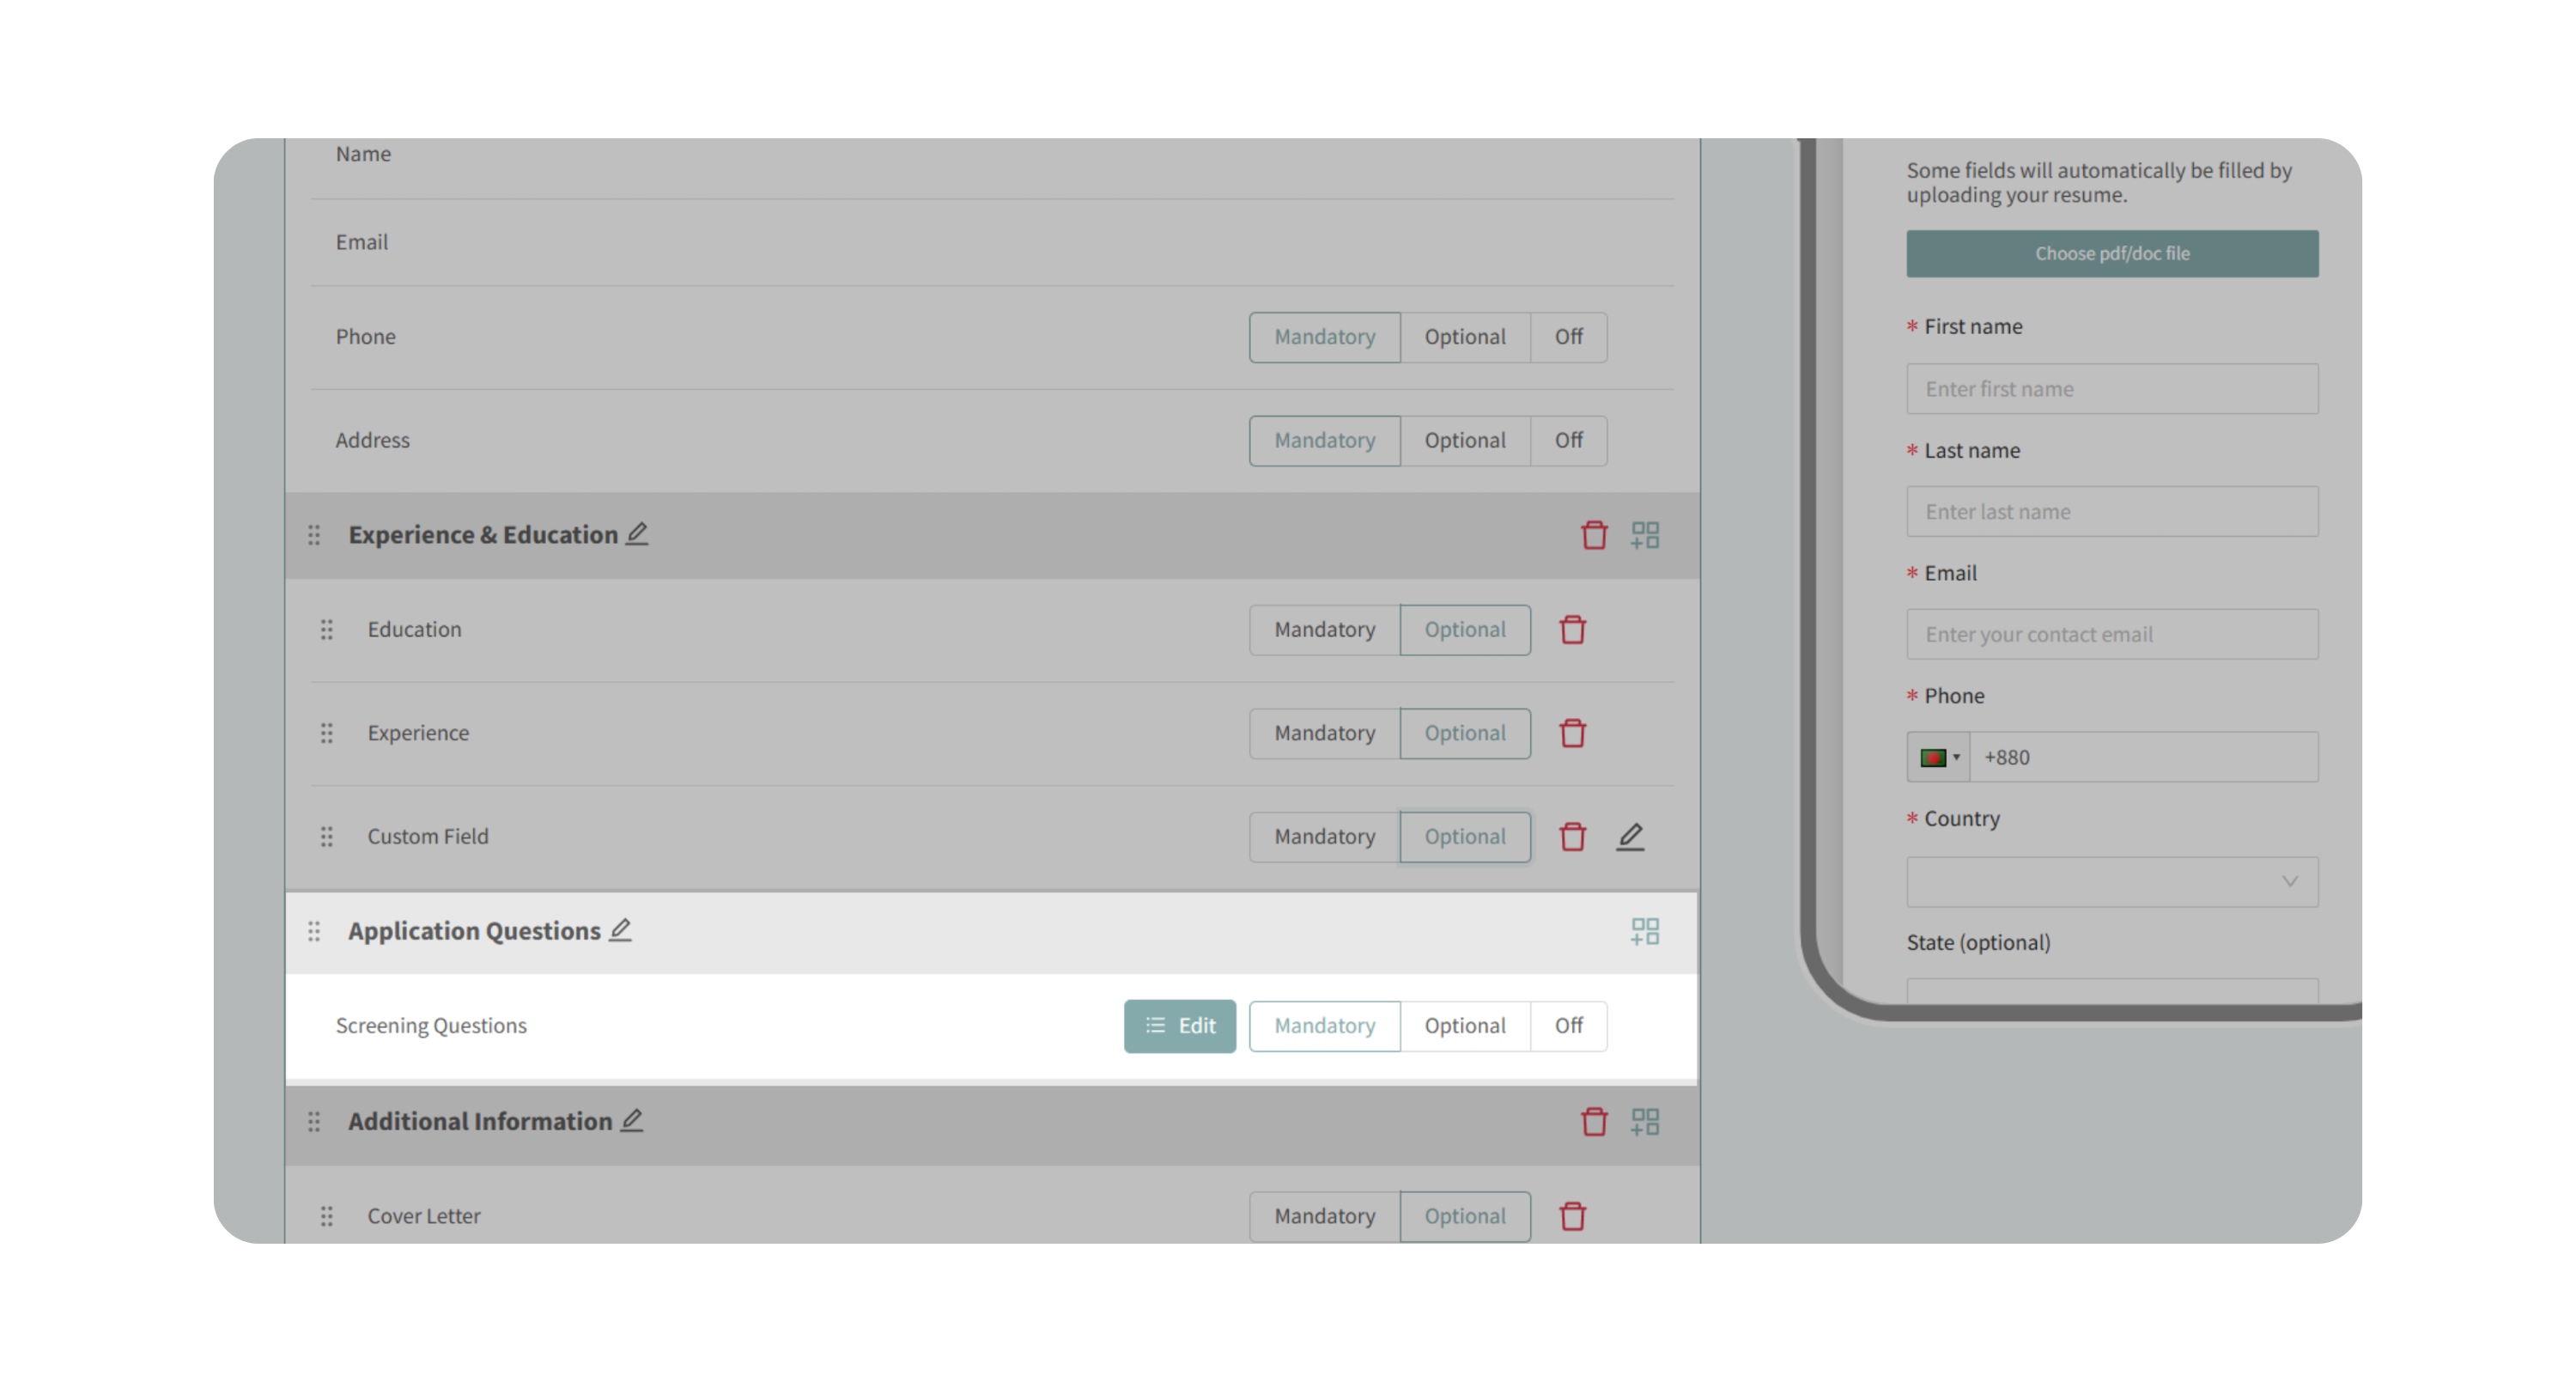
2. Review the Default Sections
Each new form includes:
- Promotional Content (optional)
- Basic Information
- Experience & Education
- Application Questions
- Additional Information
You can edit or remove sections as needed.
3. Split Forms into Multiple Steps (Optional)
- Toggle Split Sections into Multiple Steps for Applicants.
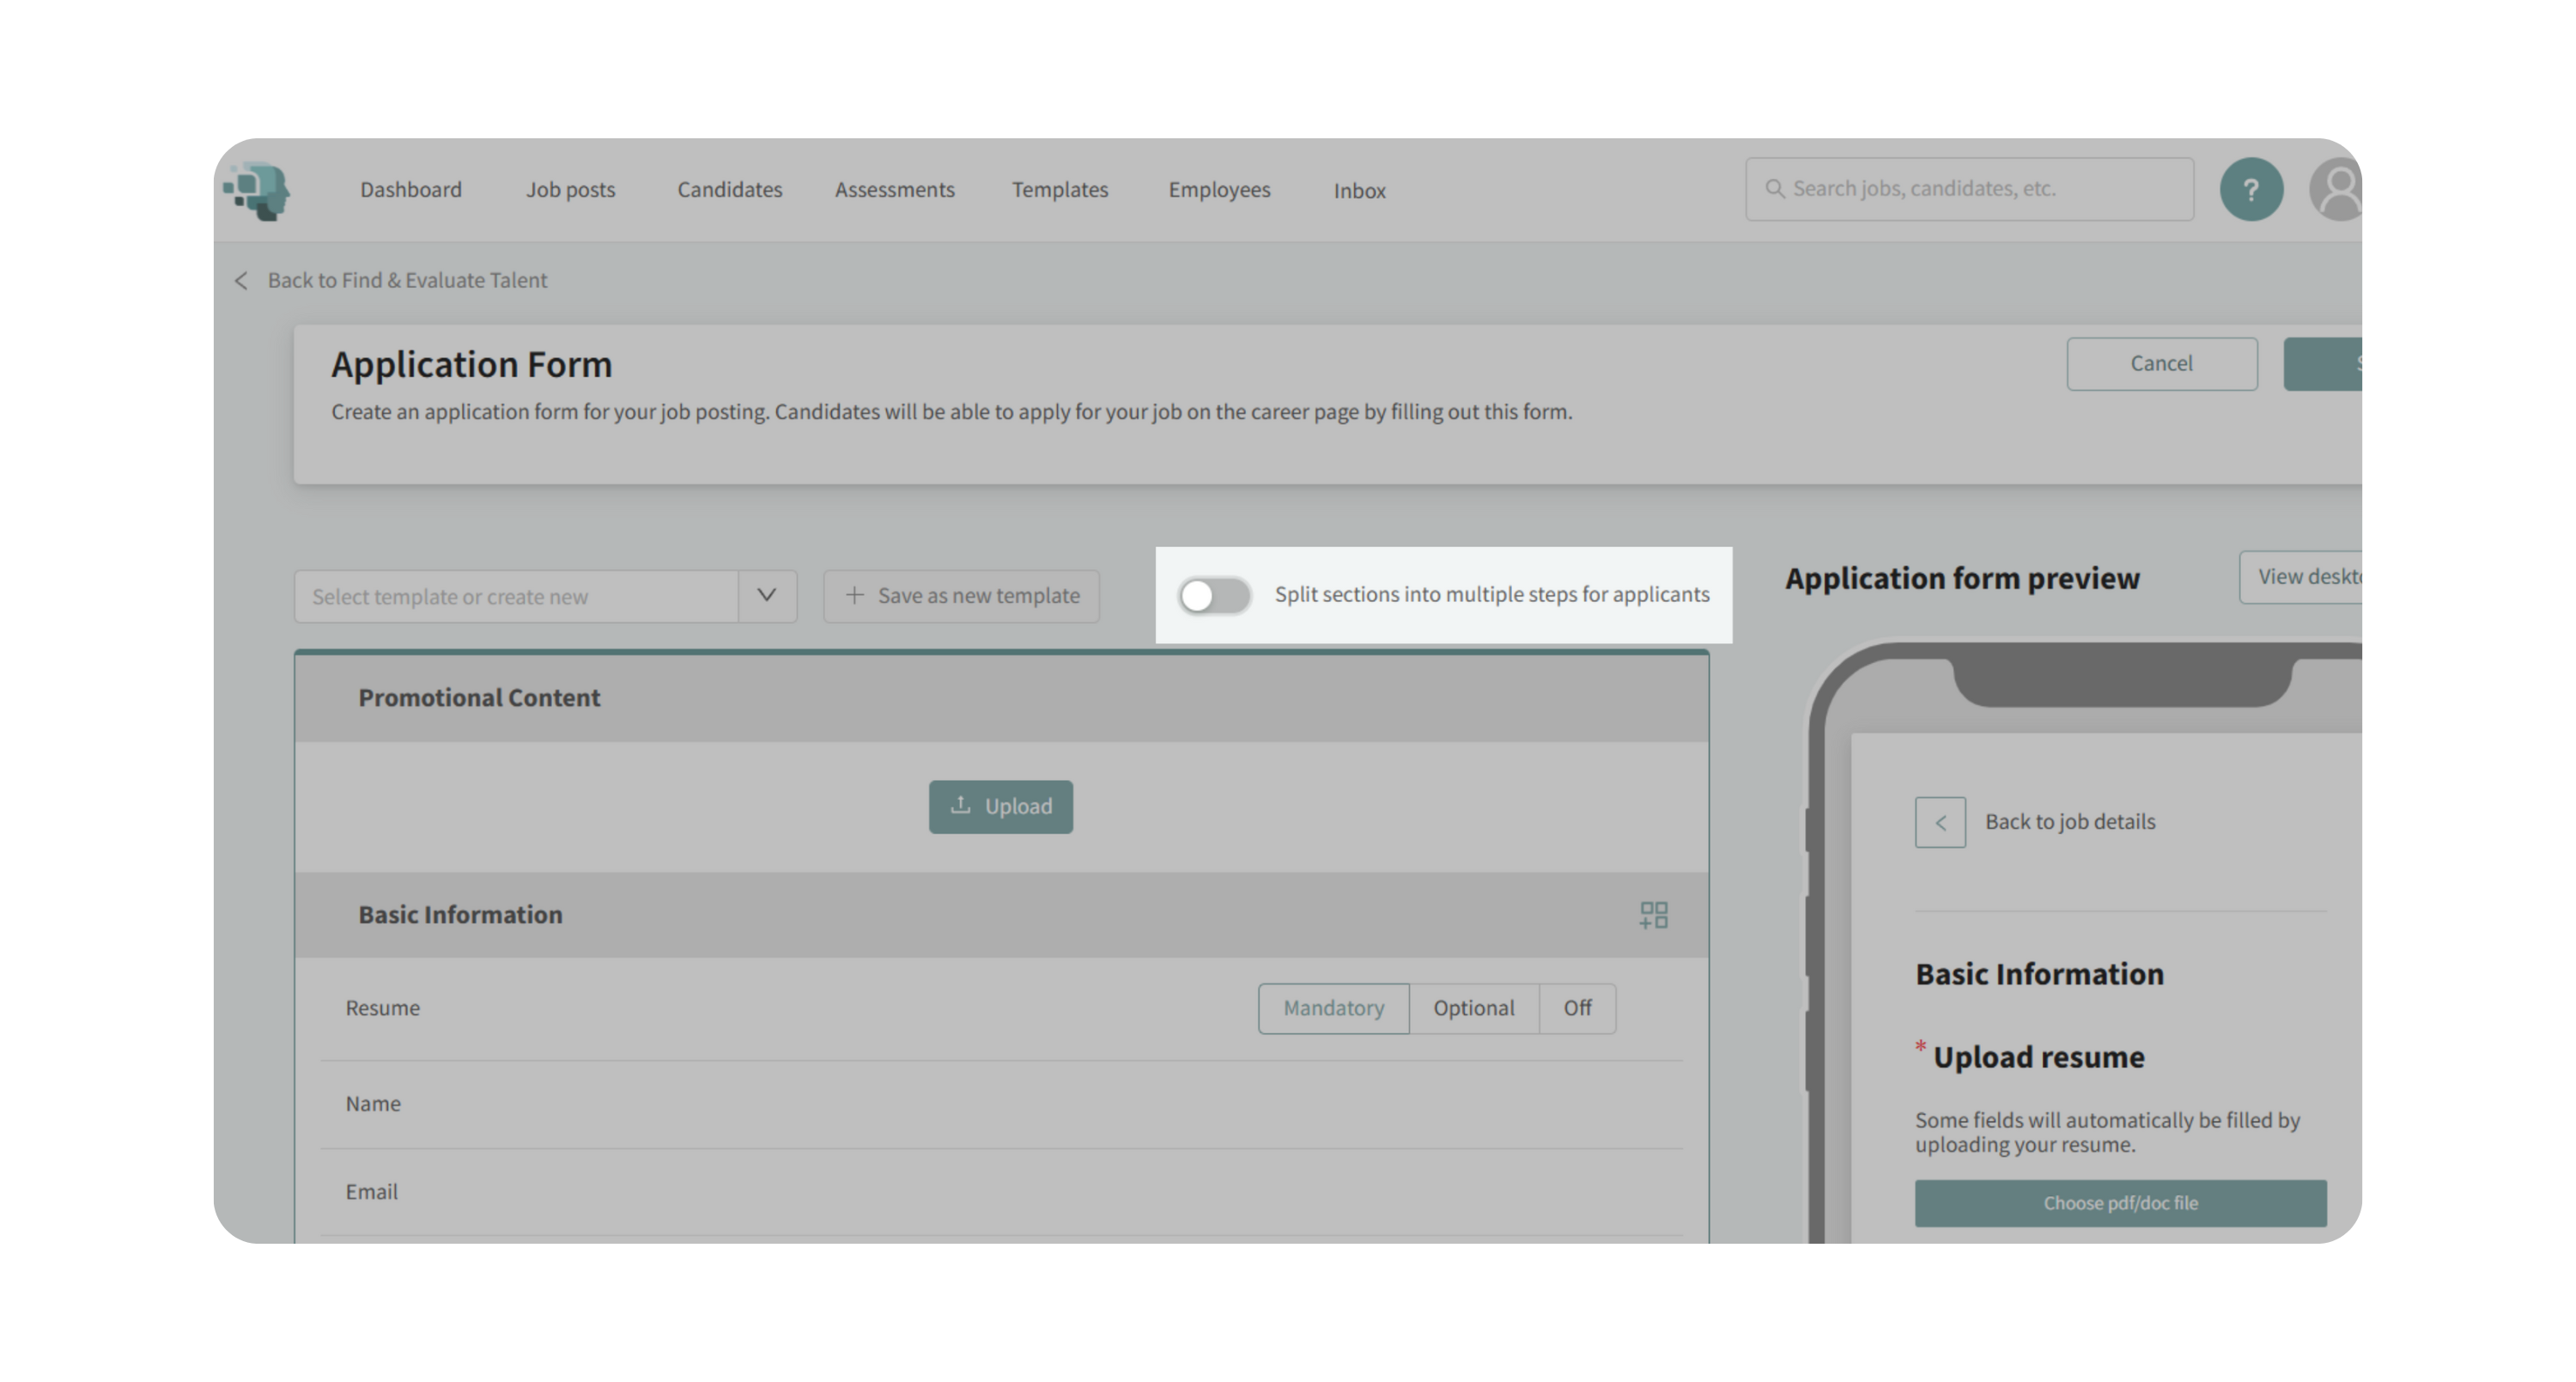
- Off: All fields appear on a single page.
- On: The form is broken into steps (e.g., Basic Information → Experience & Education → Additional Information), reducing candidate fatigue on long forms.
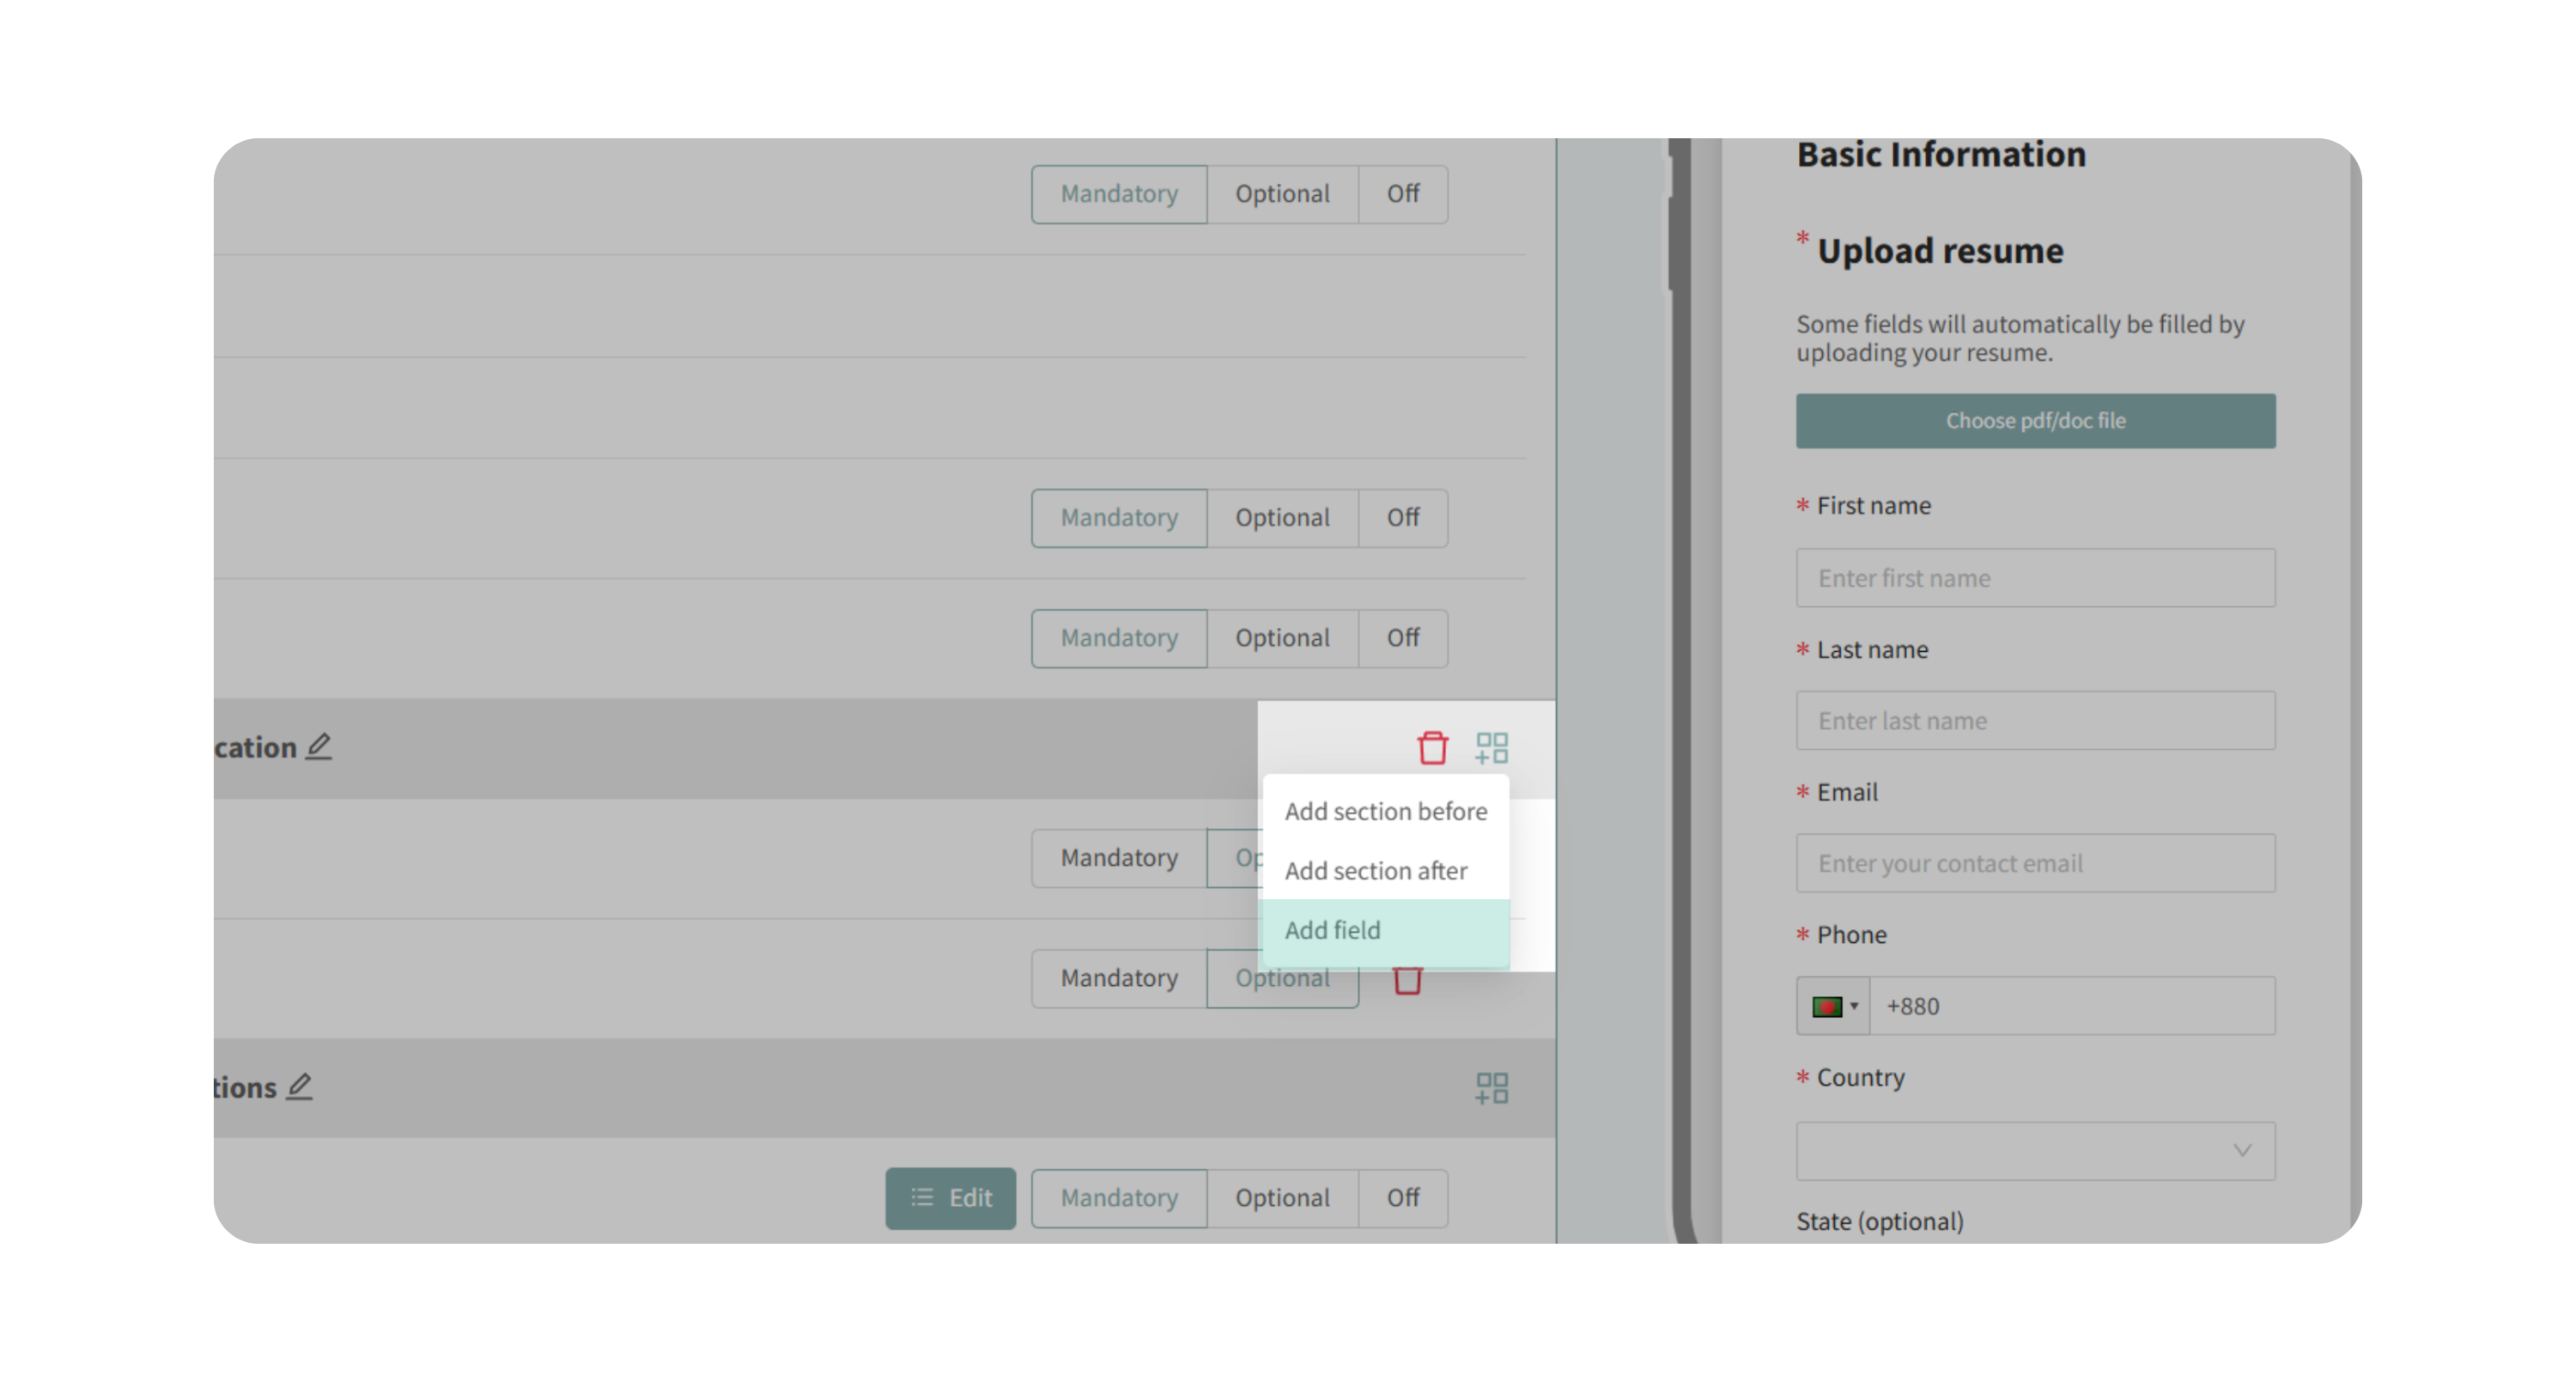
4. Add or Edit Fields
- Click Add Field within any section.
- Choose from boilerplate fields like Education, Experience, Cover Letter, Portfolio Link, or Demographic Information.
- For custom needs, add fields using:
- Short Text
- Long Text
- Pick One Option (exclusive choice)
- Pick Multiple Options
- Date
- Upload File (e.g., certifications, writing samples)
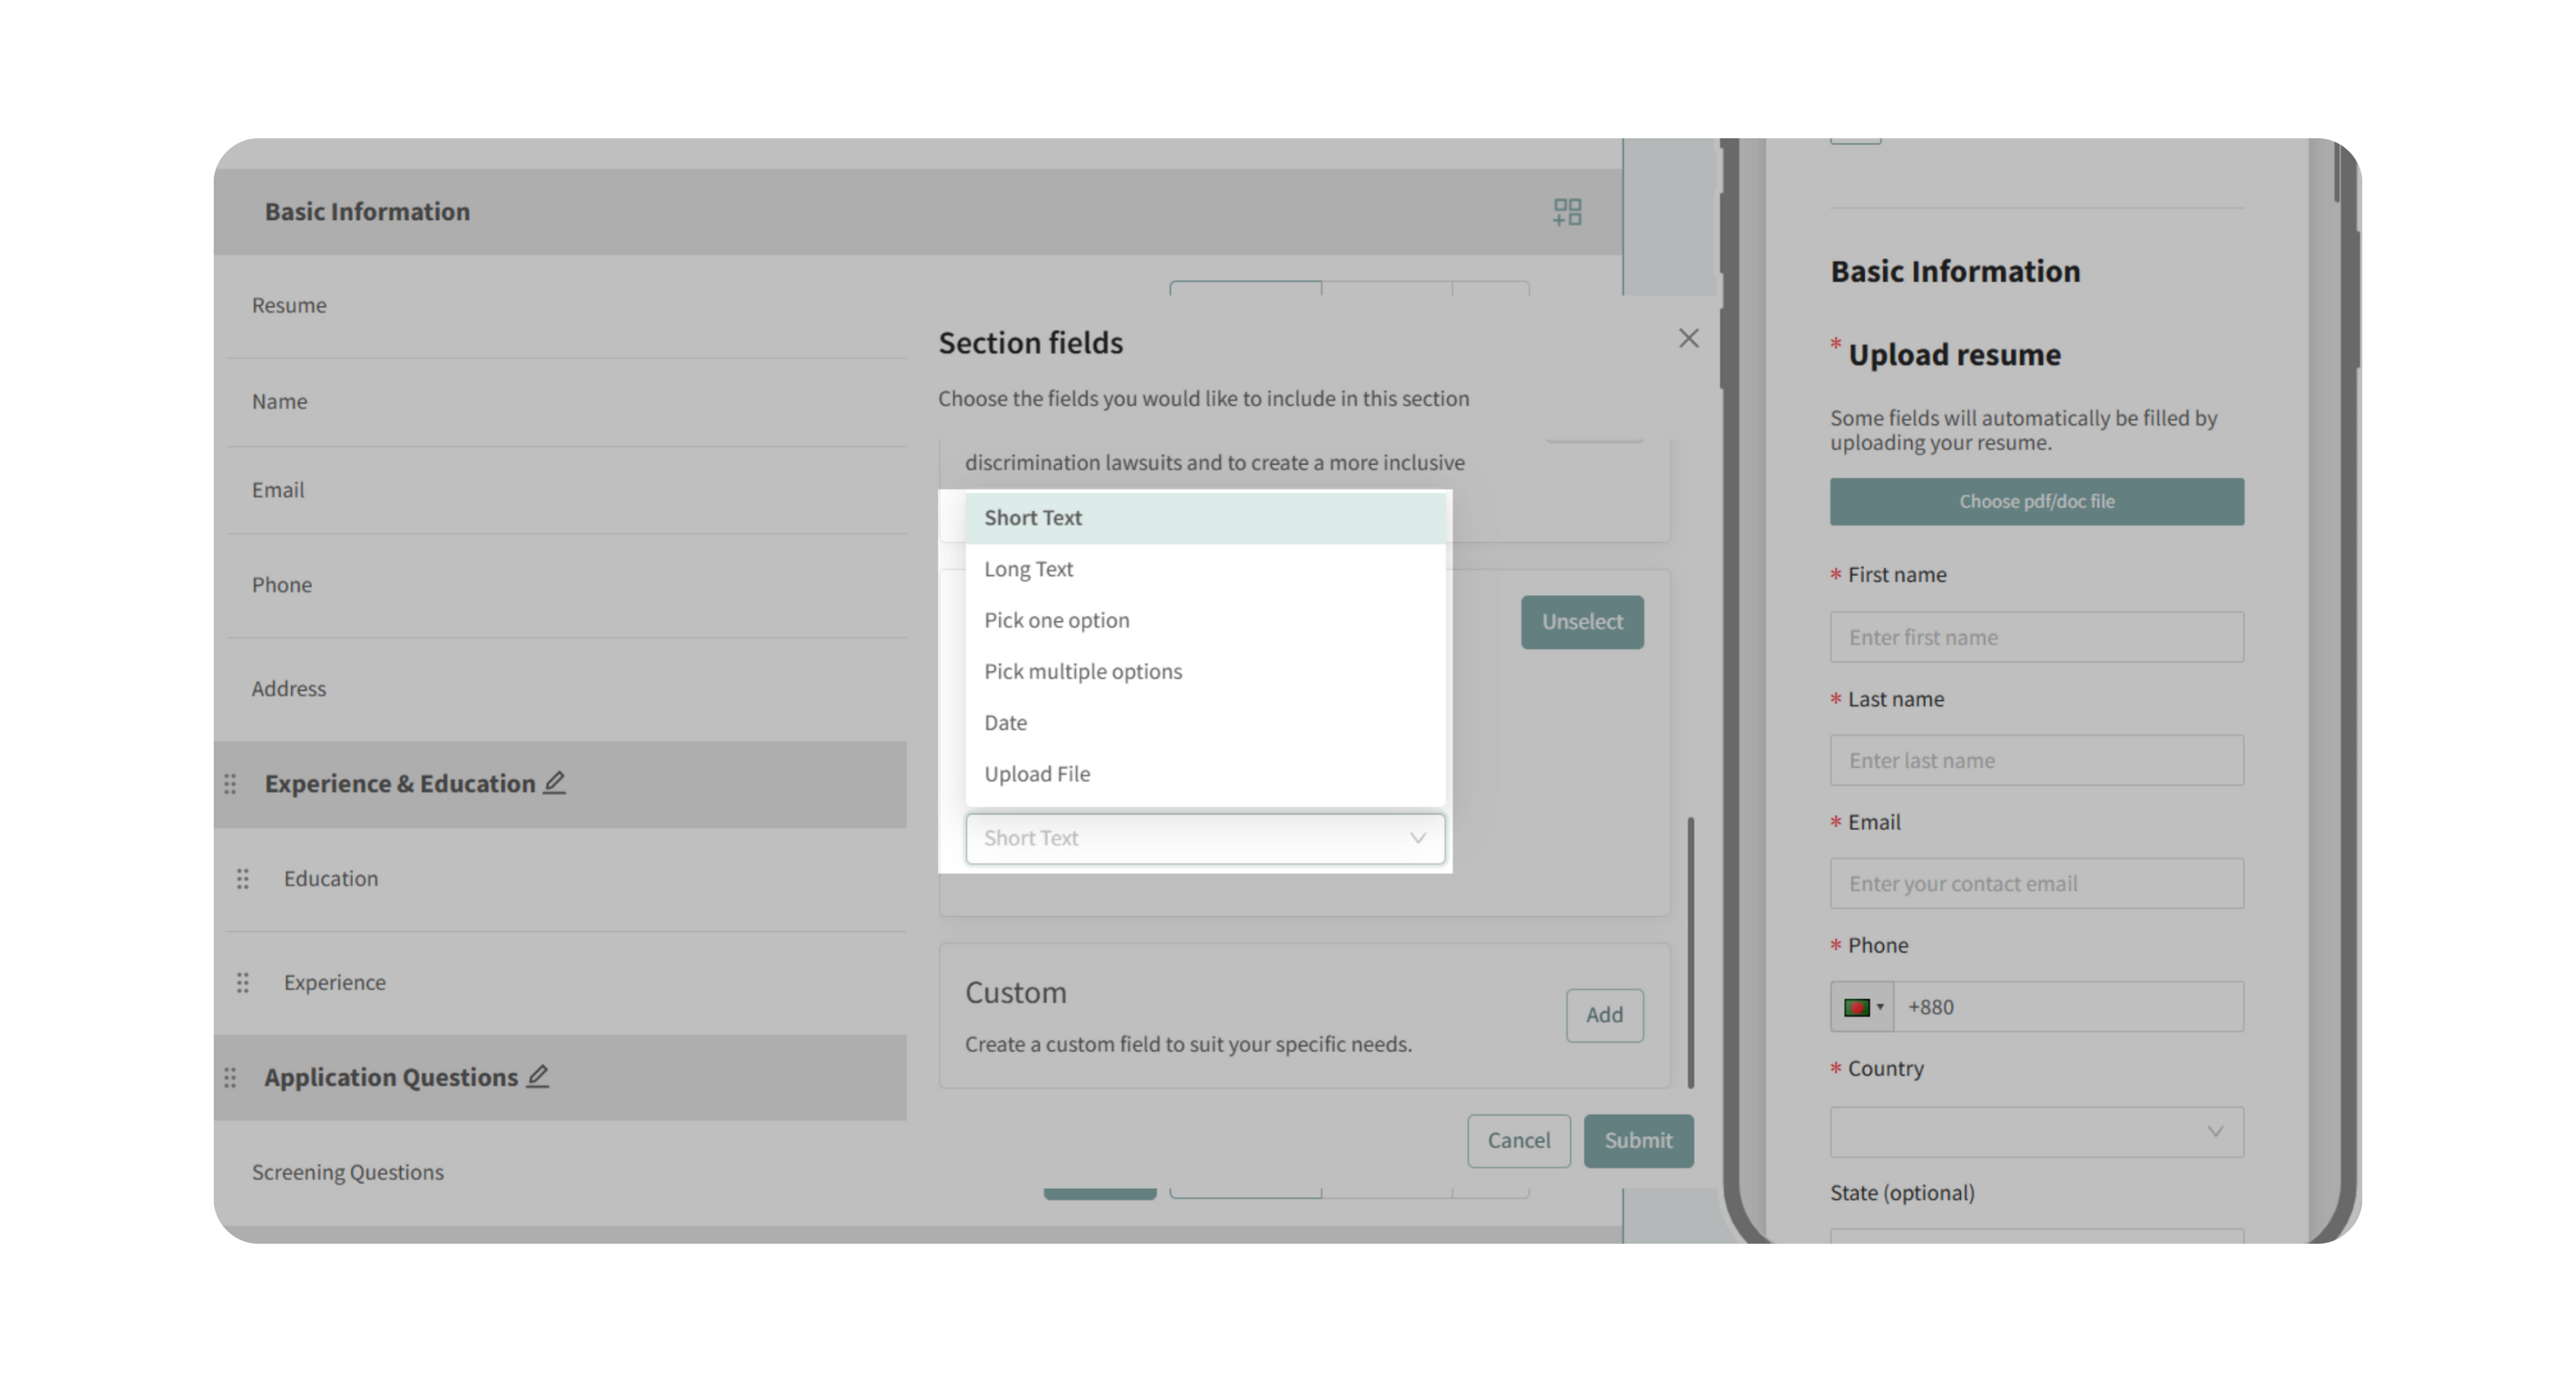
- Drag and drop fields to reorder.
- Set each field as Optional or Mandatory (except Name and Email, which are always required).
5. Add New Sections
- Hover over an existing section and click Add Section After.
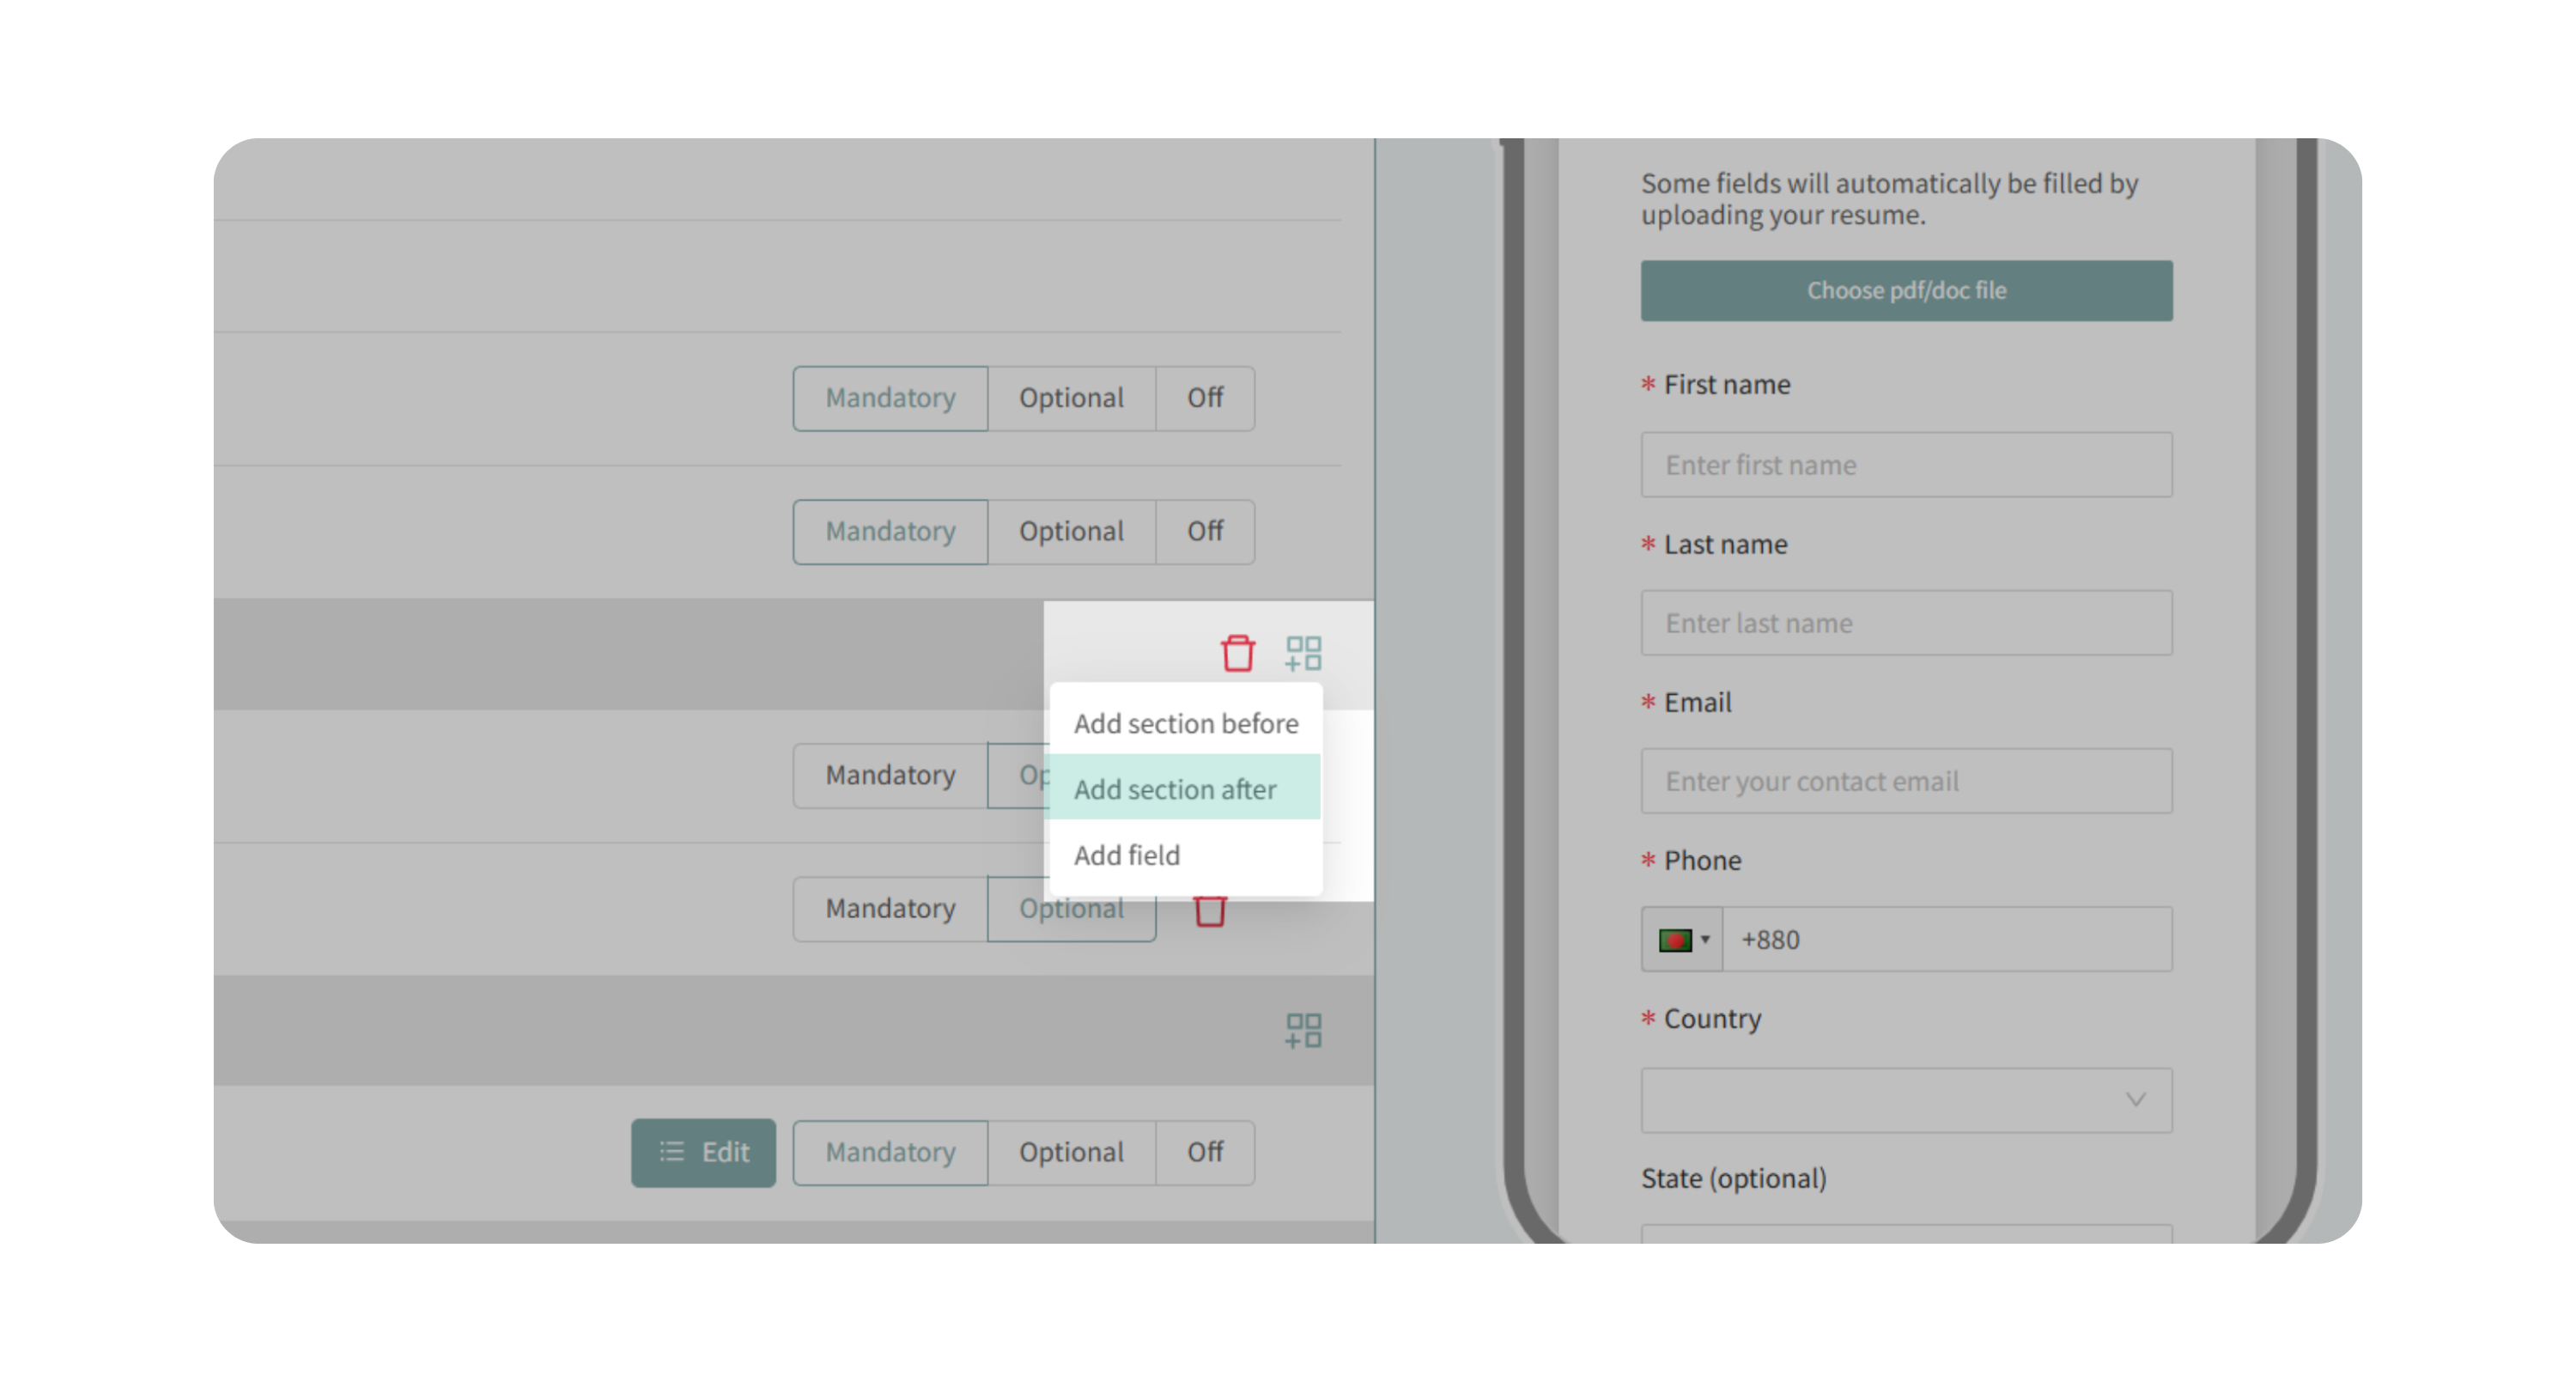
- Name the new section and add fields later or immediately.
6. Include Screening Questions (Optional)
- If screening questions exist on the job, you can include them directly in the application form.
- Choose whether they’re Mandatory, Optional, or excluded entirely.
7. Save as a Template
- Enter a template name and click Save as New Template.
- Click on Templates in the navigation bar to manage templates.
- Click on Application Forms.
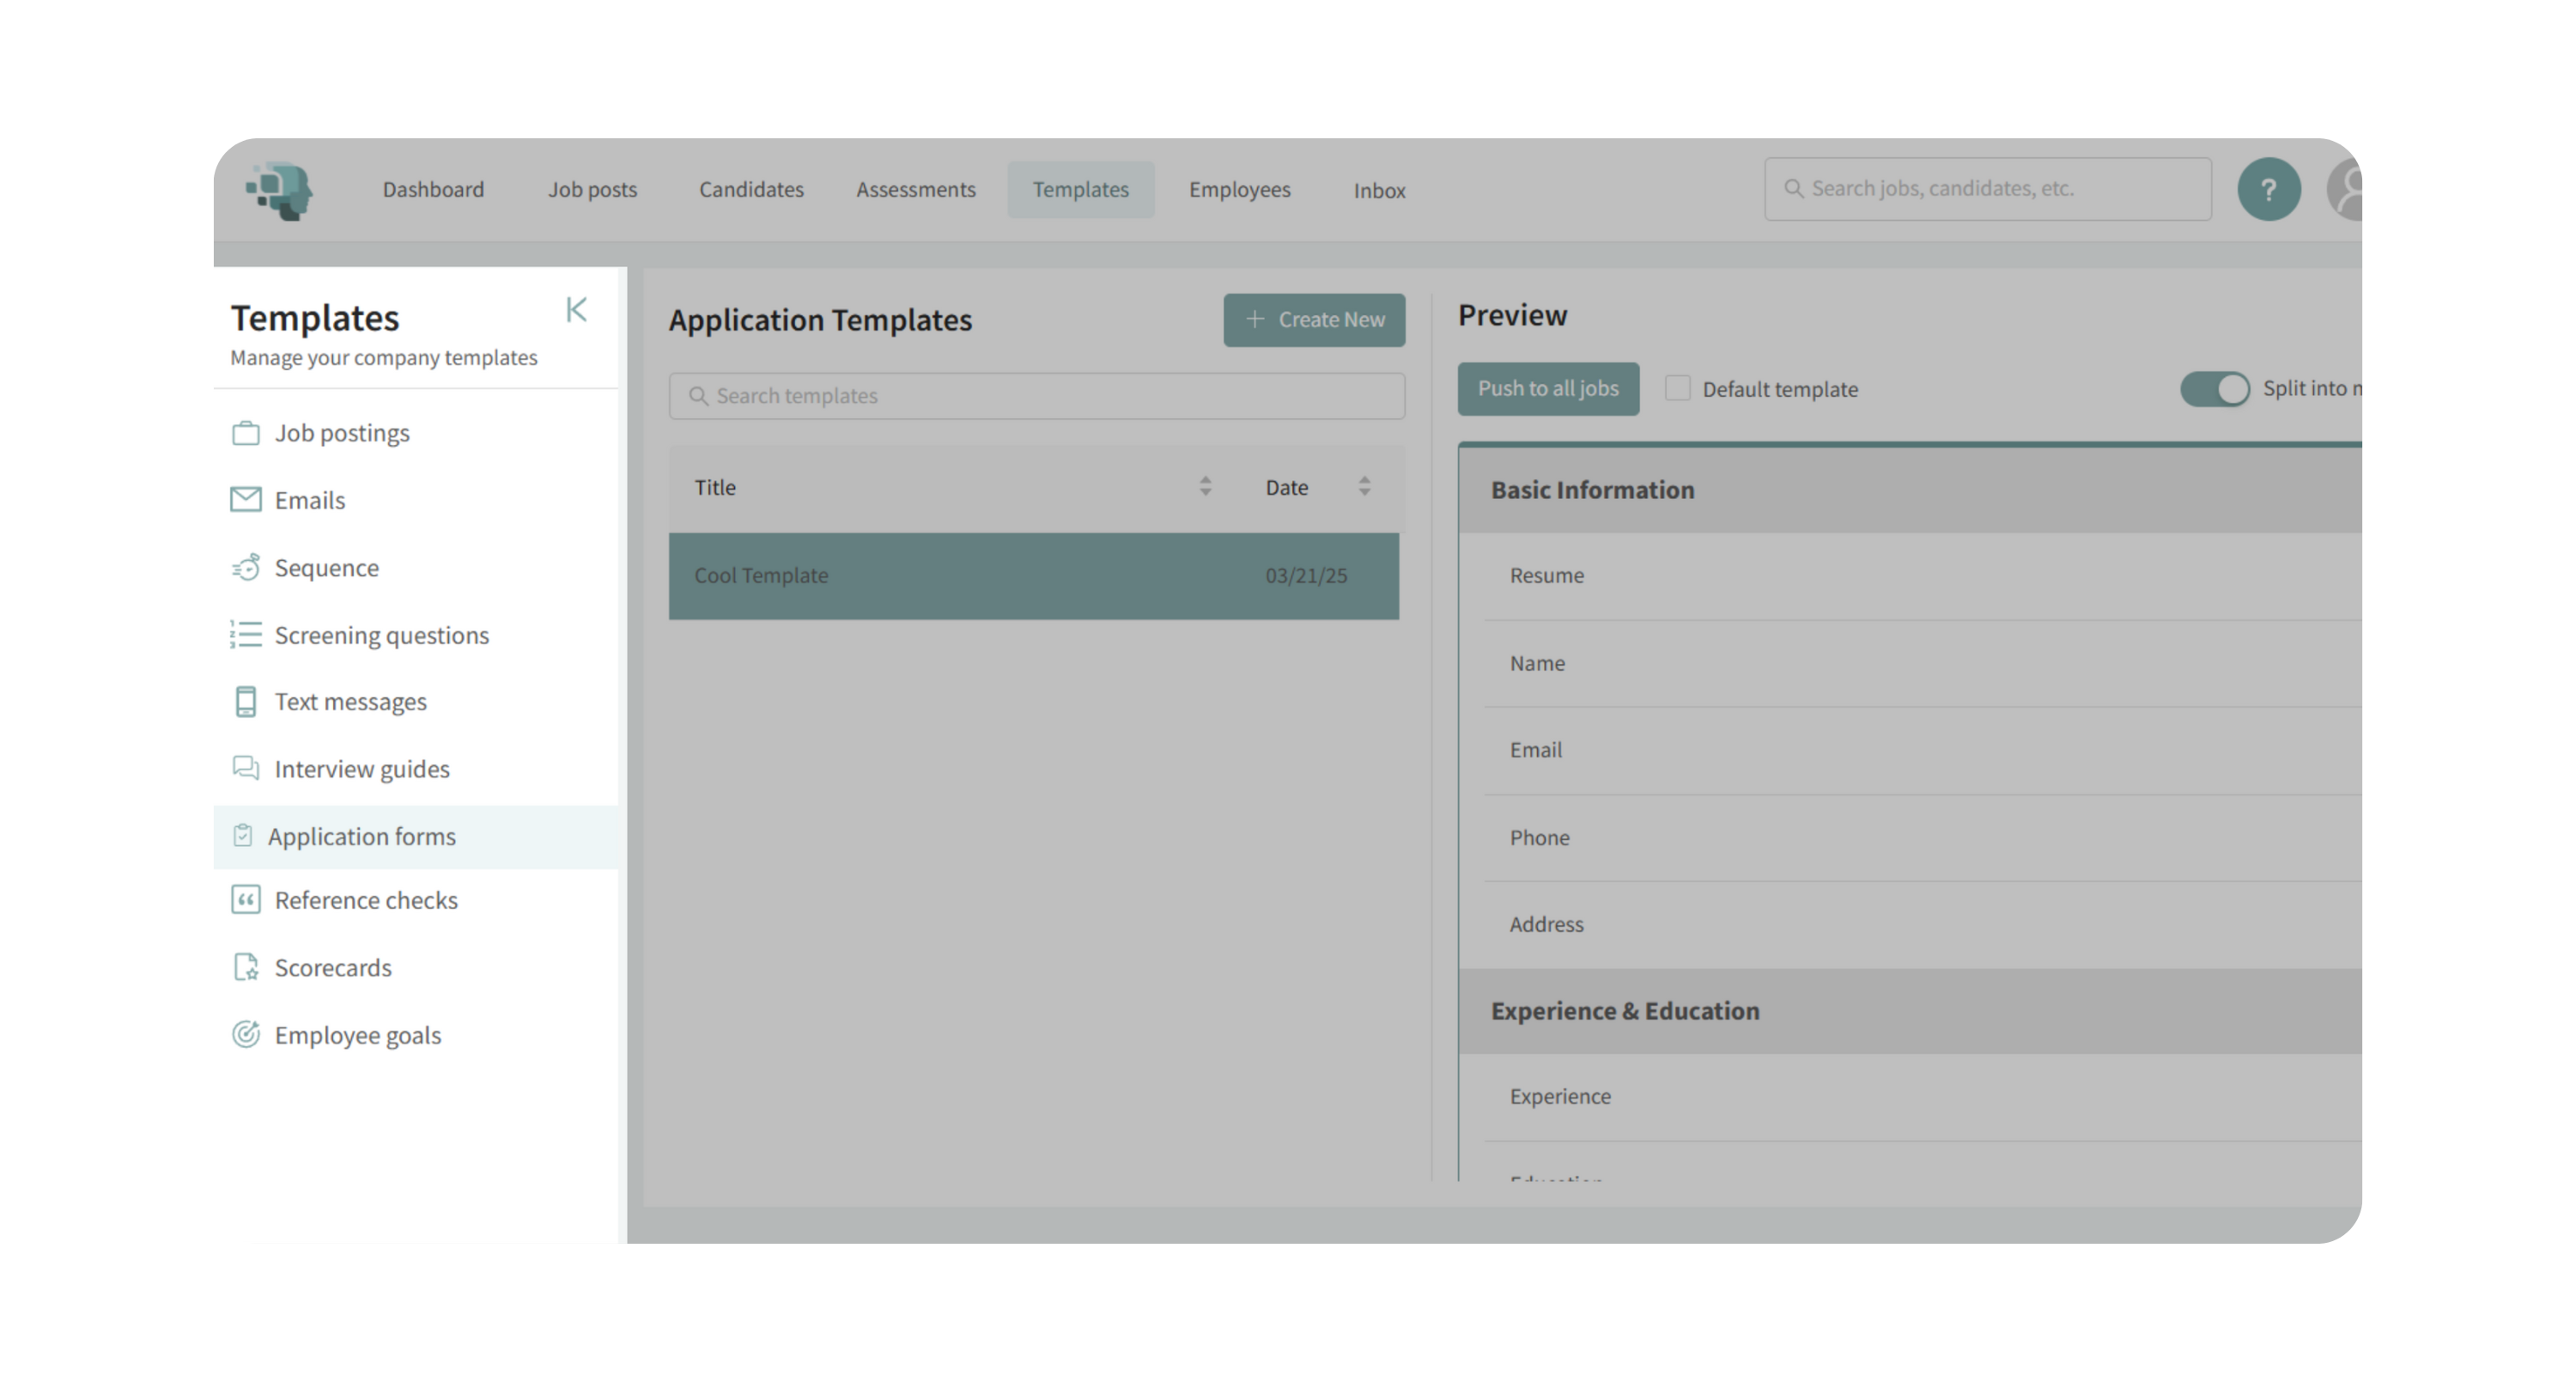
- Click on your application templates.
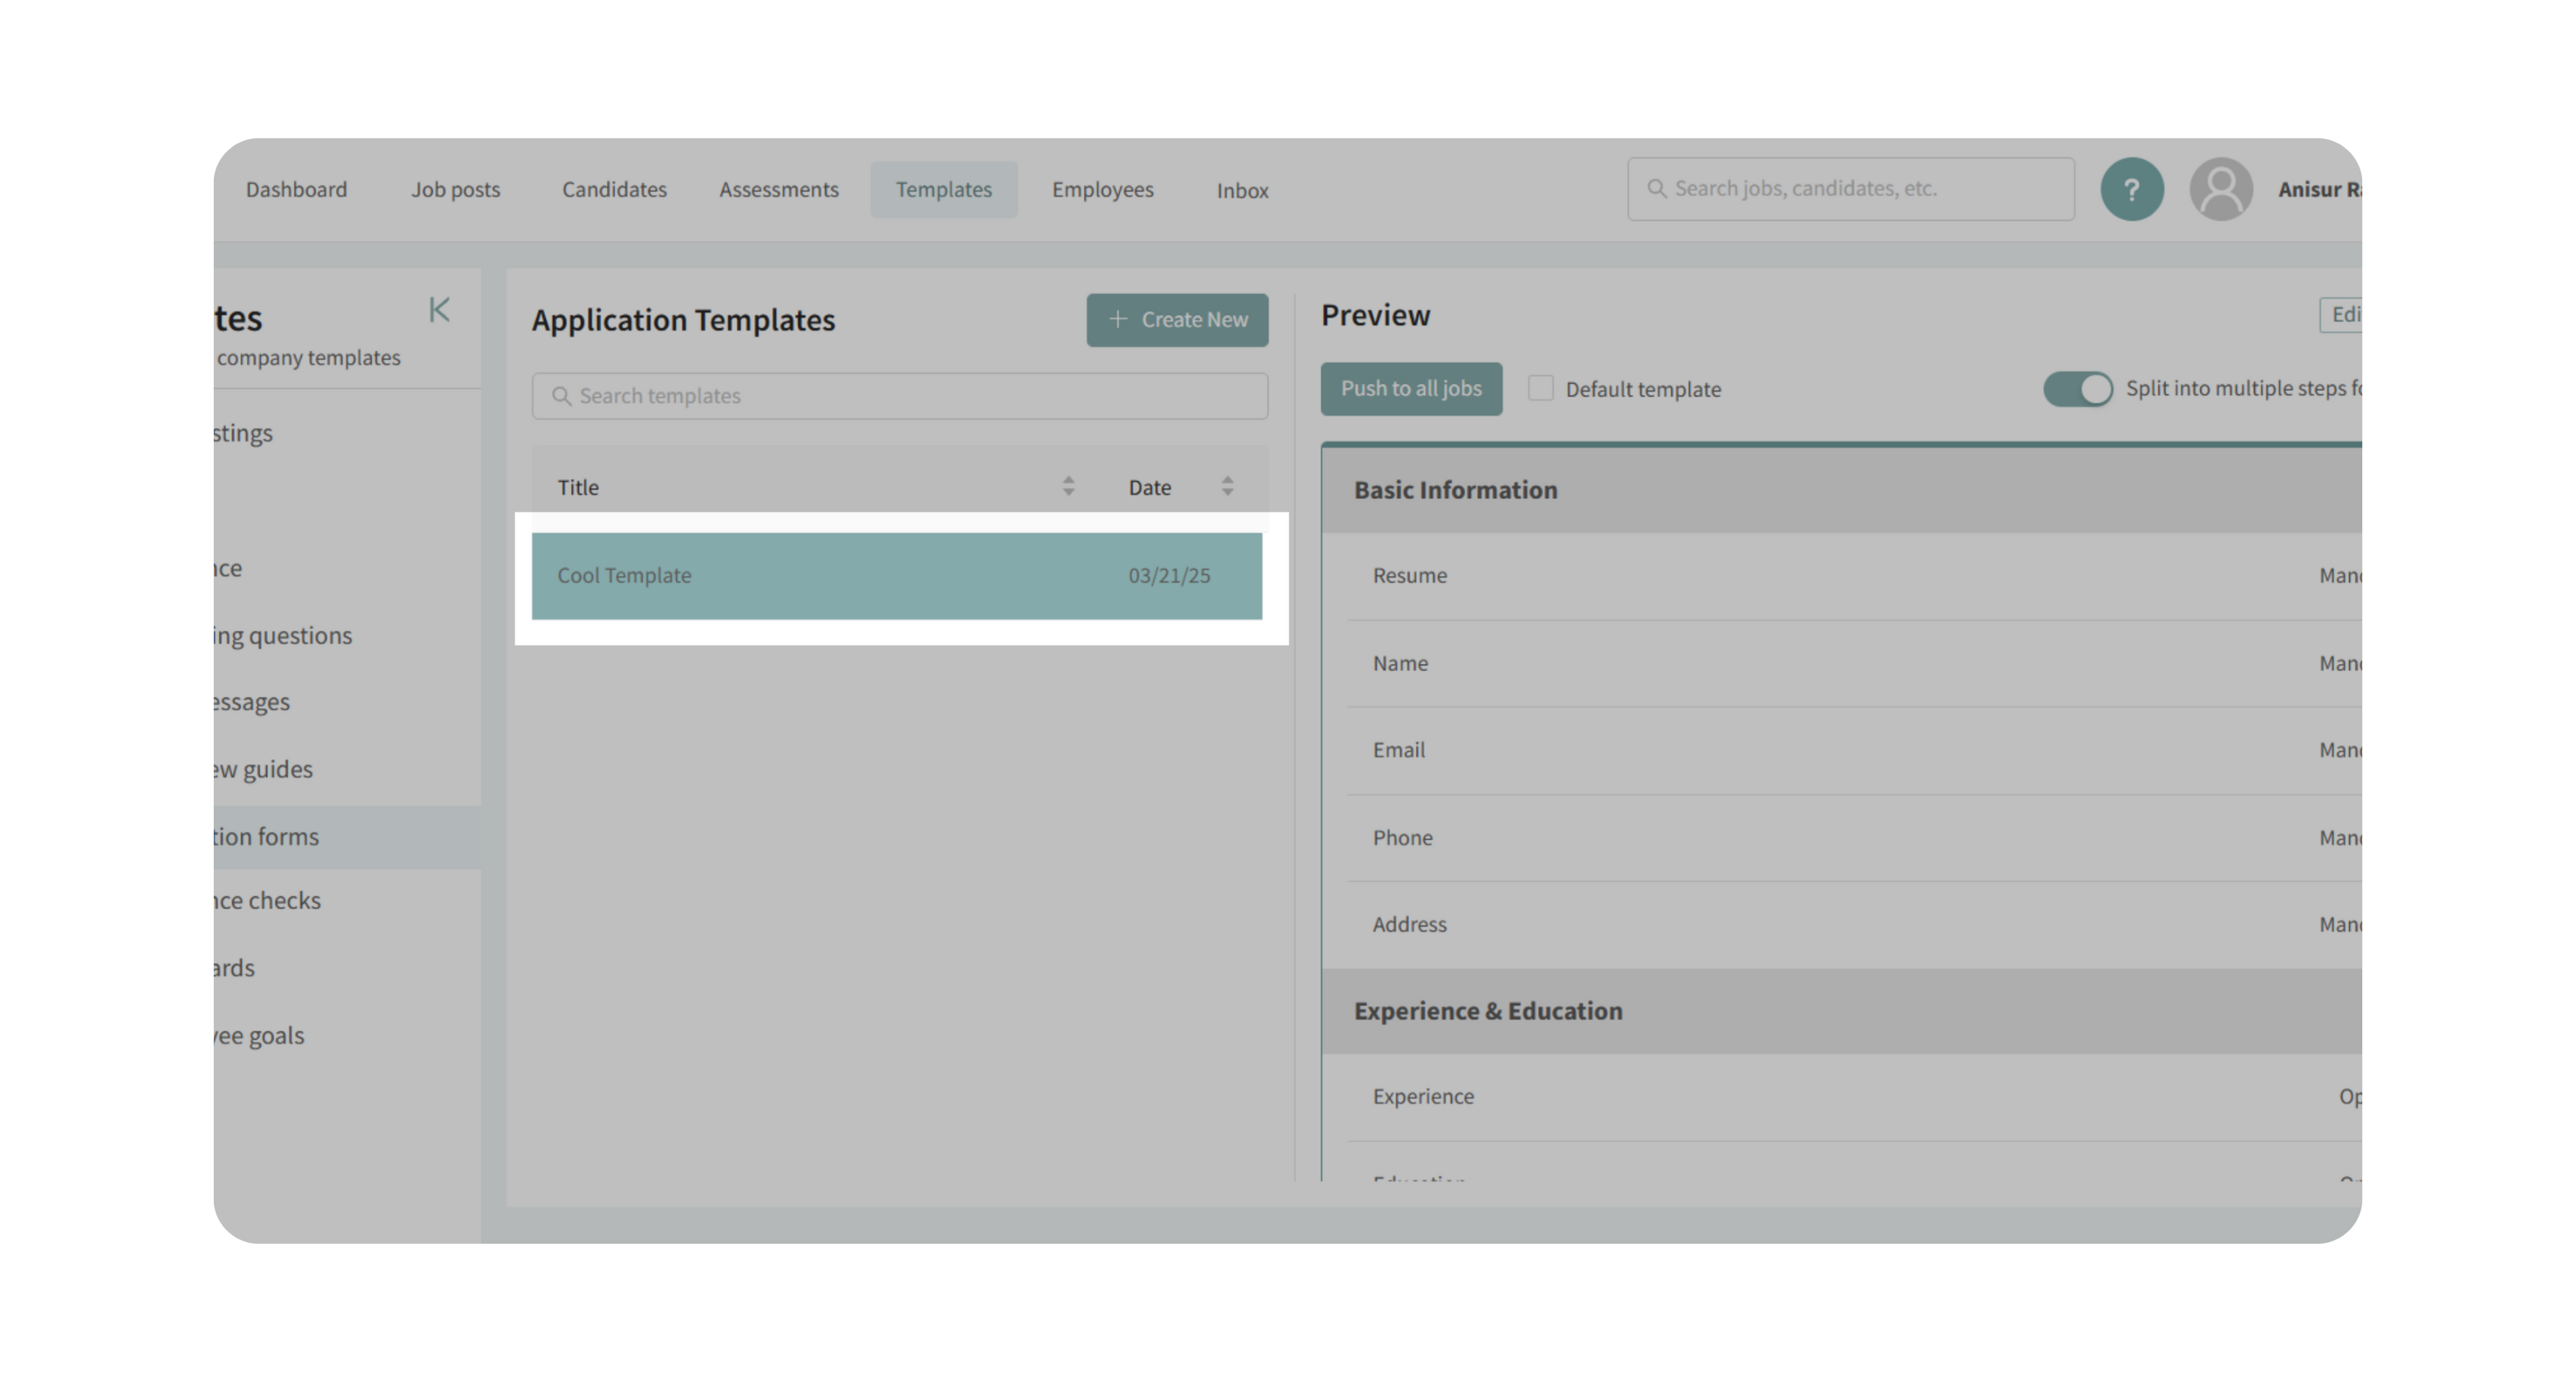
- Options include:
- Default template: Applies this form automatically to all new jobs.
- Push to All Jobs: Updates all existing jobs with this template.

Why This Matters
- Collect only the information relevant to your hiring needs.
- Provide a smoother candidate experience with multi-step forms.
- Standardize data collection across teams and jobs.
- Save time with reusable templates that can be updated globally.
Use Cases
- A tech company wants coding sample uploads as part of its application.
- A sales role requires mandatory screening questions to ensure candidate fit.
- HR wants all new job postings to use the same standardized form template.
Best Practices
- Keep forms as short as possible—long, complex forms can drive candidate drop-off.
- Use multi-step layout for lengthy applications to improve completion rates.
- Save strong forms as templates for reuse across similar roles.
- Periodically review forms to remove outdated or unnecessary questions.
What Happens Next
- Once saved, the Application Form is tied to the job posting.
- Candidates see the form when applying and must complete rthe equired fields.
- Data flows directly into their profile in Discovered, where recruiters can review it.
- Templates can be reused, edited, or pushed across jobs for consistency.