
Configure Email Settings
Overview
The Email Settings section in your Discovered profile allows you to:
- Configure two-factor authentication (2FA) for account security.
- Connect your Google or Microsoft email for improved candidate communication.
- Automatically link your calendar for scheduling.
- Add a custom email signature to personalize messages.
How To Configure Email Settings:
1. Access Your Email Settings
- Log in to Discovered.
- Click your name in the top-right corner.
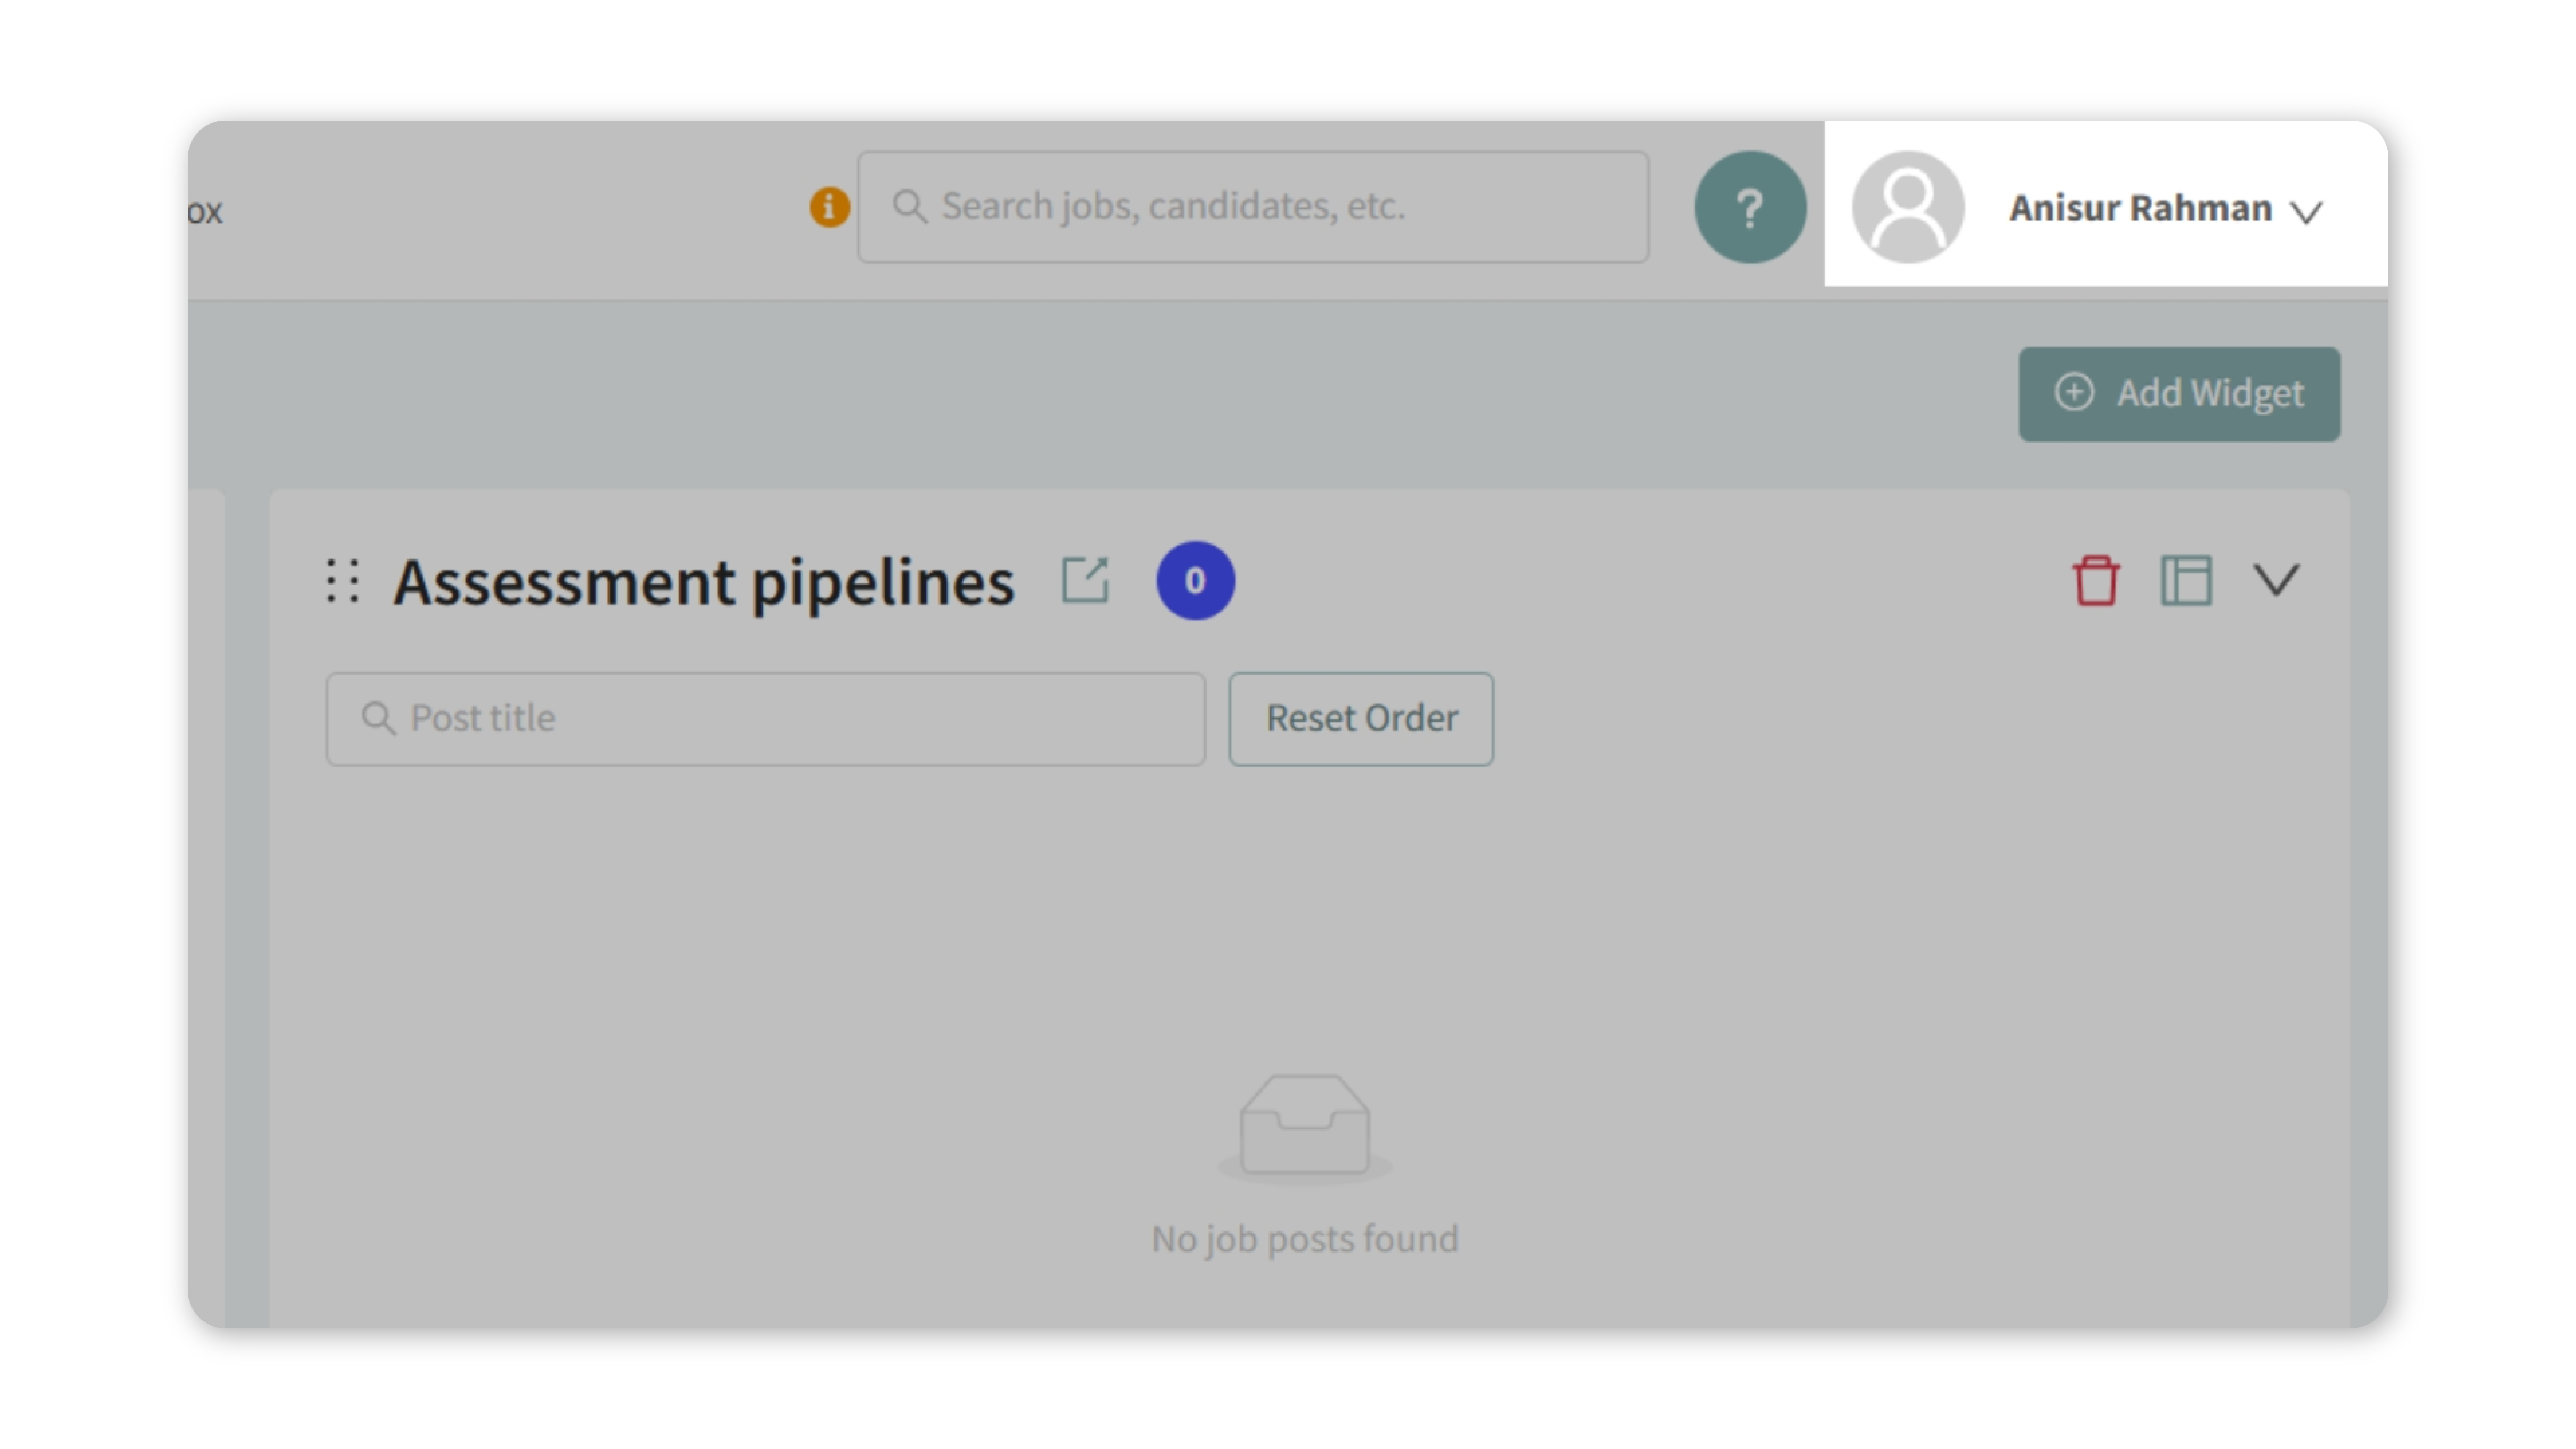
- Select My Profile.
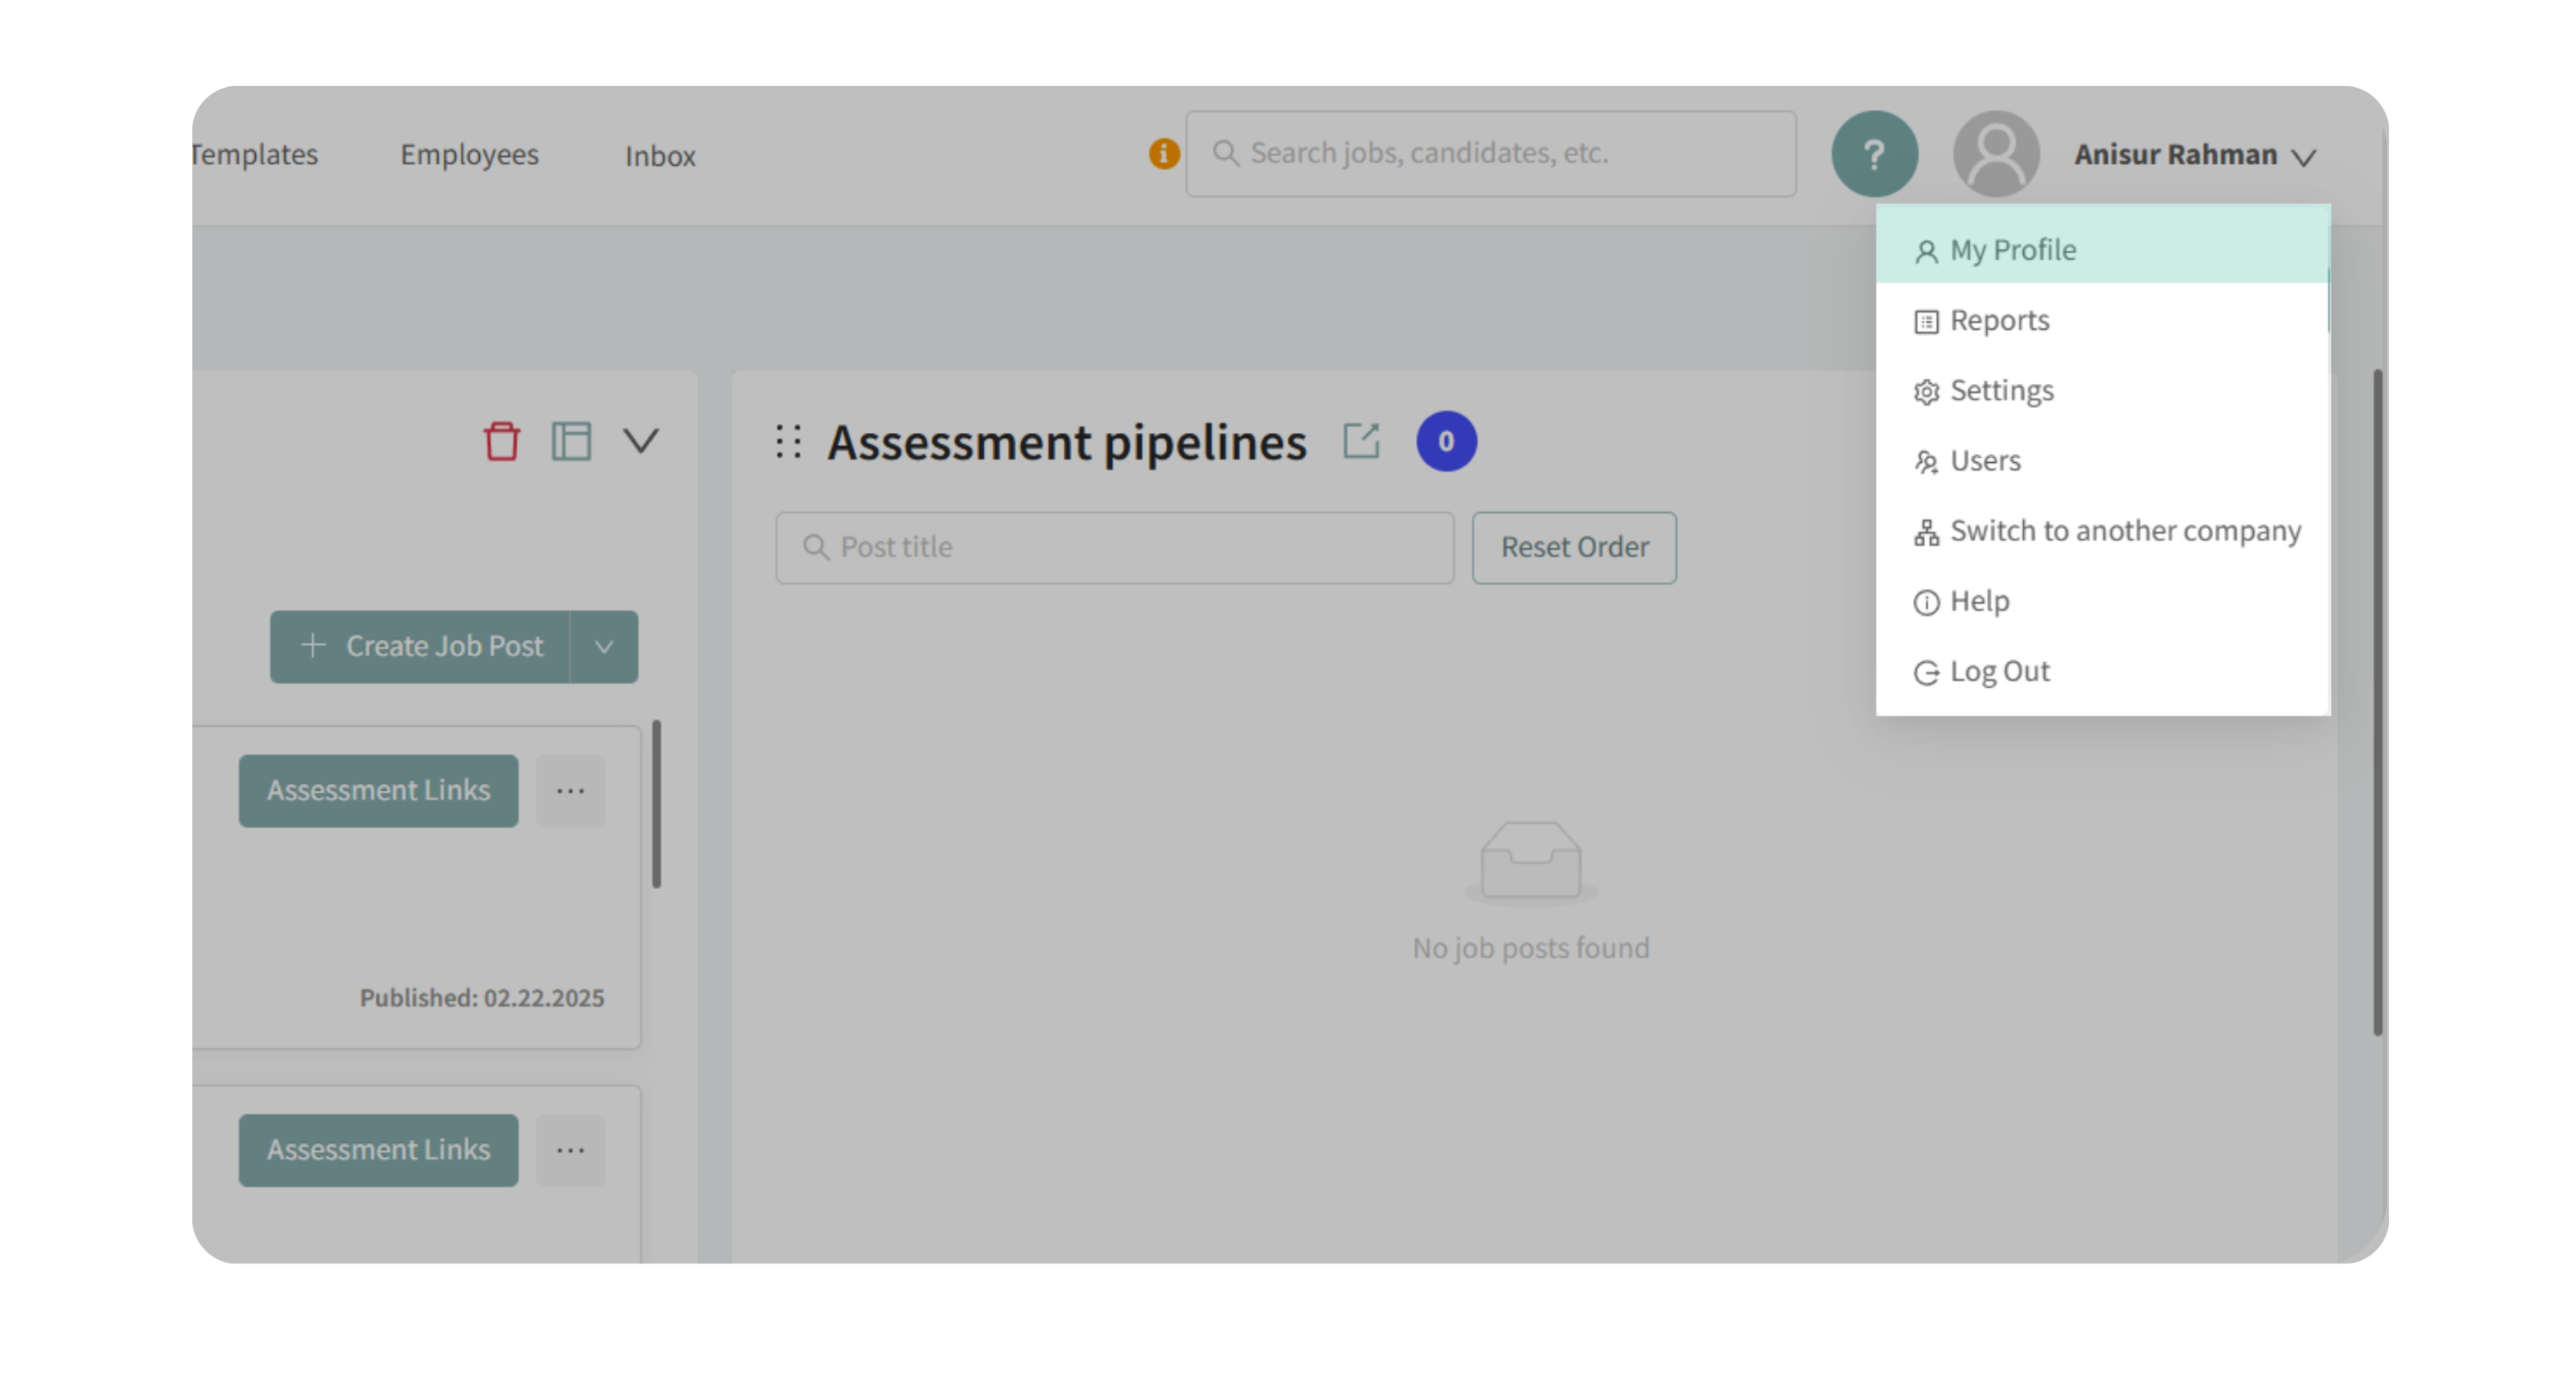
- On the profile settings page, click Email Settings.
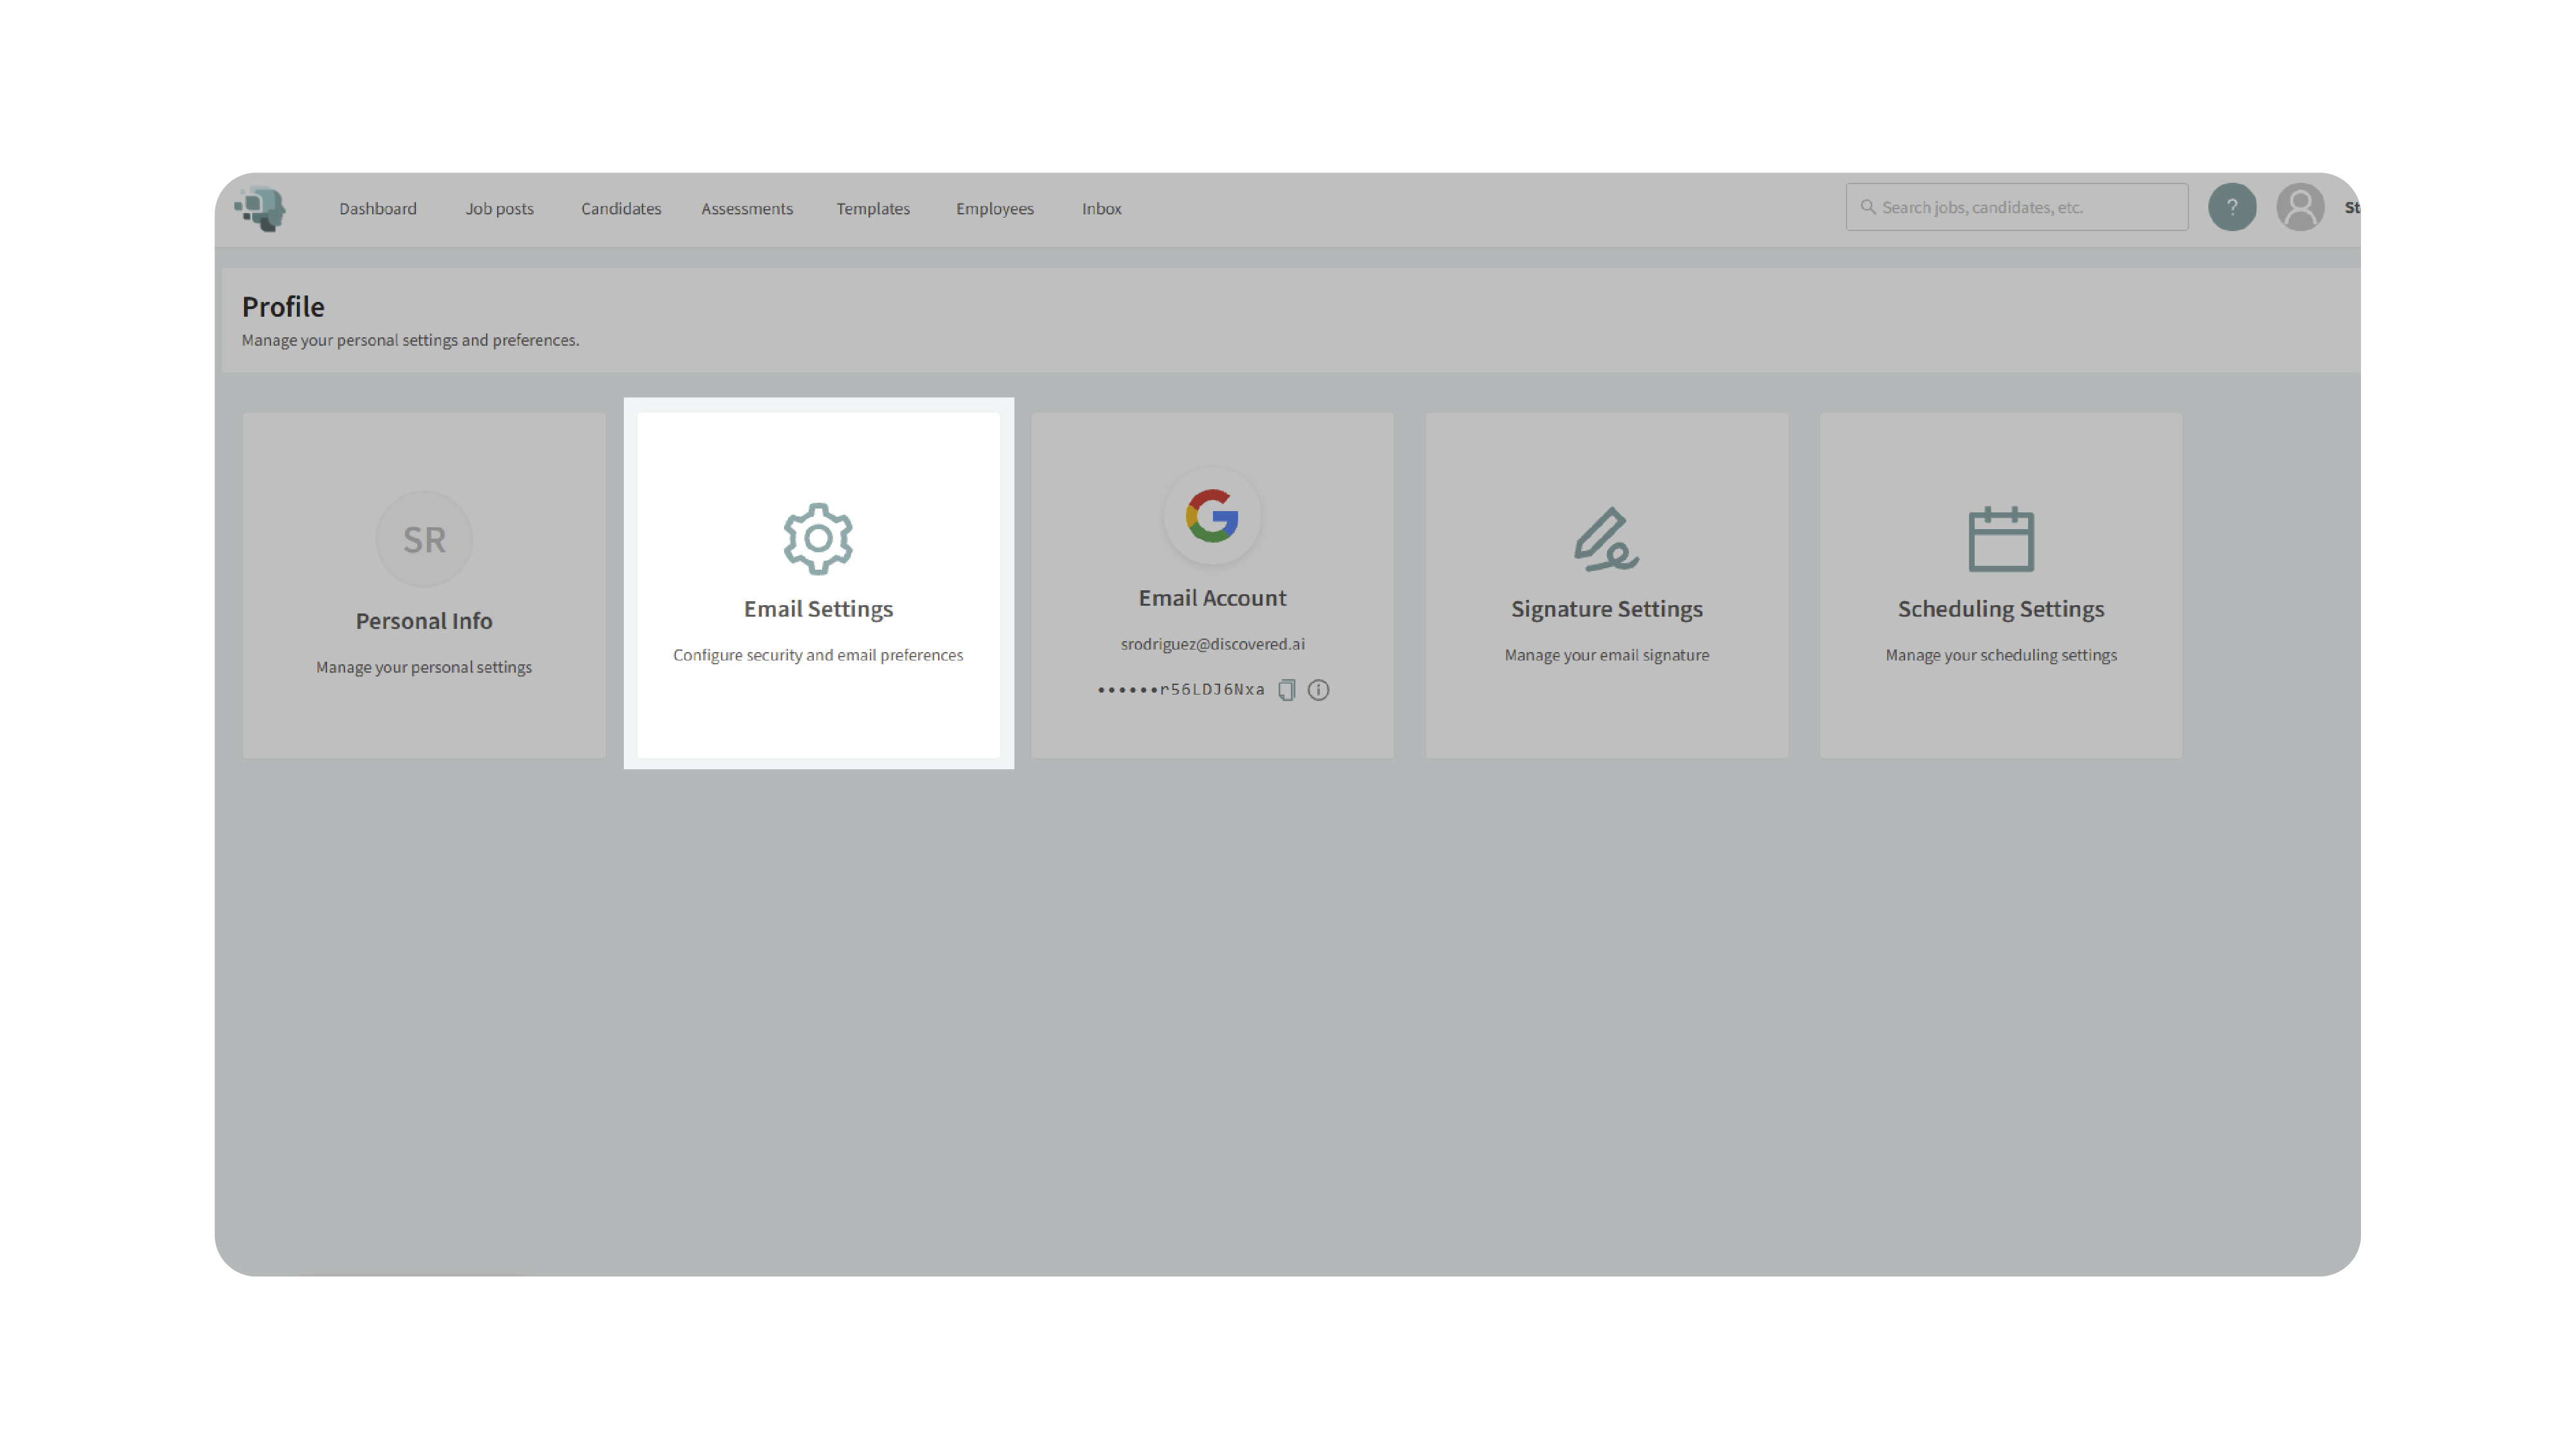
2. Configure Two-Factor Authentication (2FA)
Choose how often you want verification:
- Always – Requires 2FA for every login.
- On new devices – Prompts only when logging in from an unrecognized device.
- Don’t use 2-step verification – Not recommended.
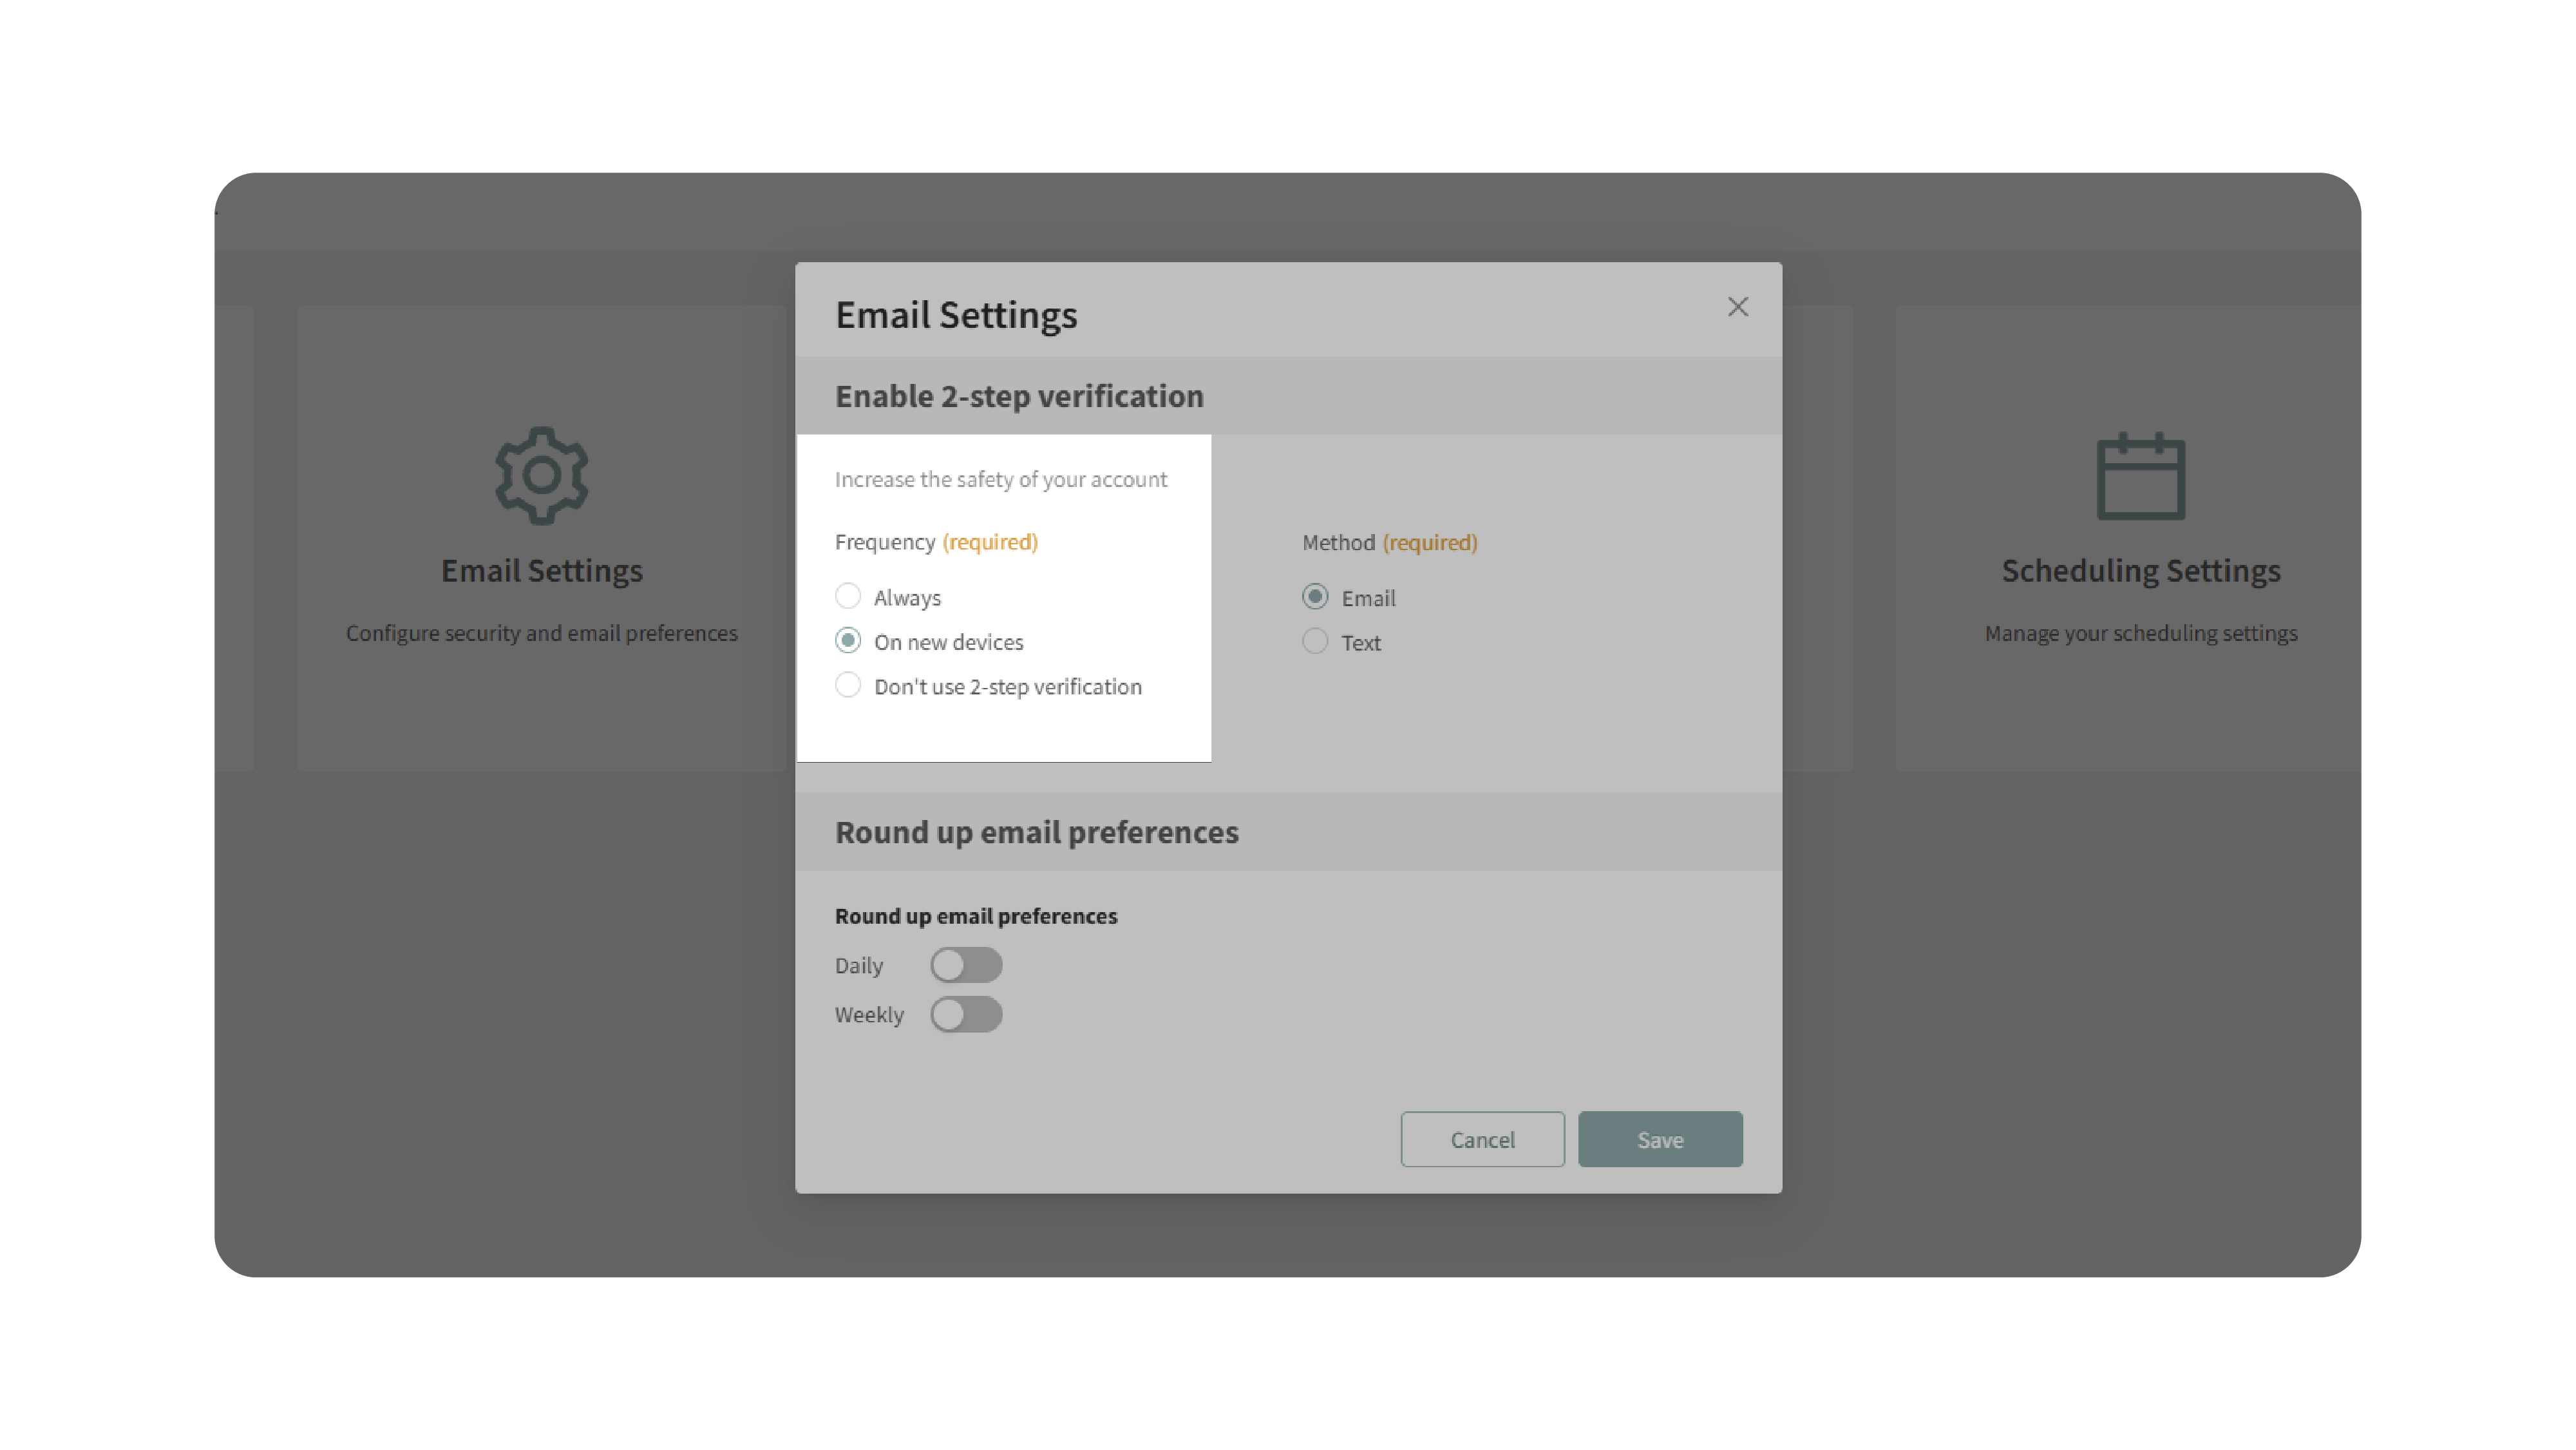
Choose your verification method:
- Email – Get a secure login link sent to your registered email.
- Text Message – Provide a phone number to receive verification codes via SMS.
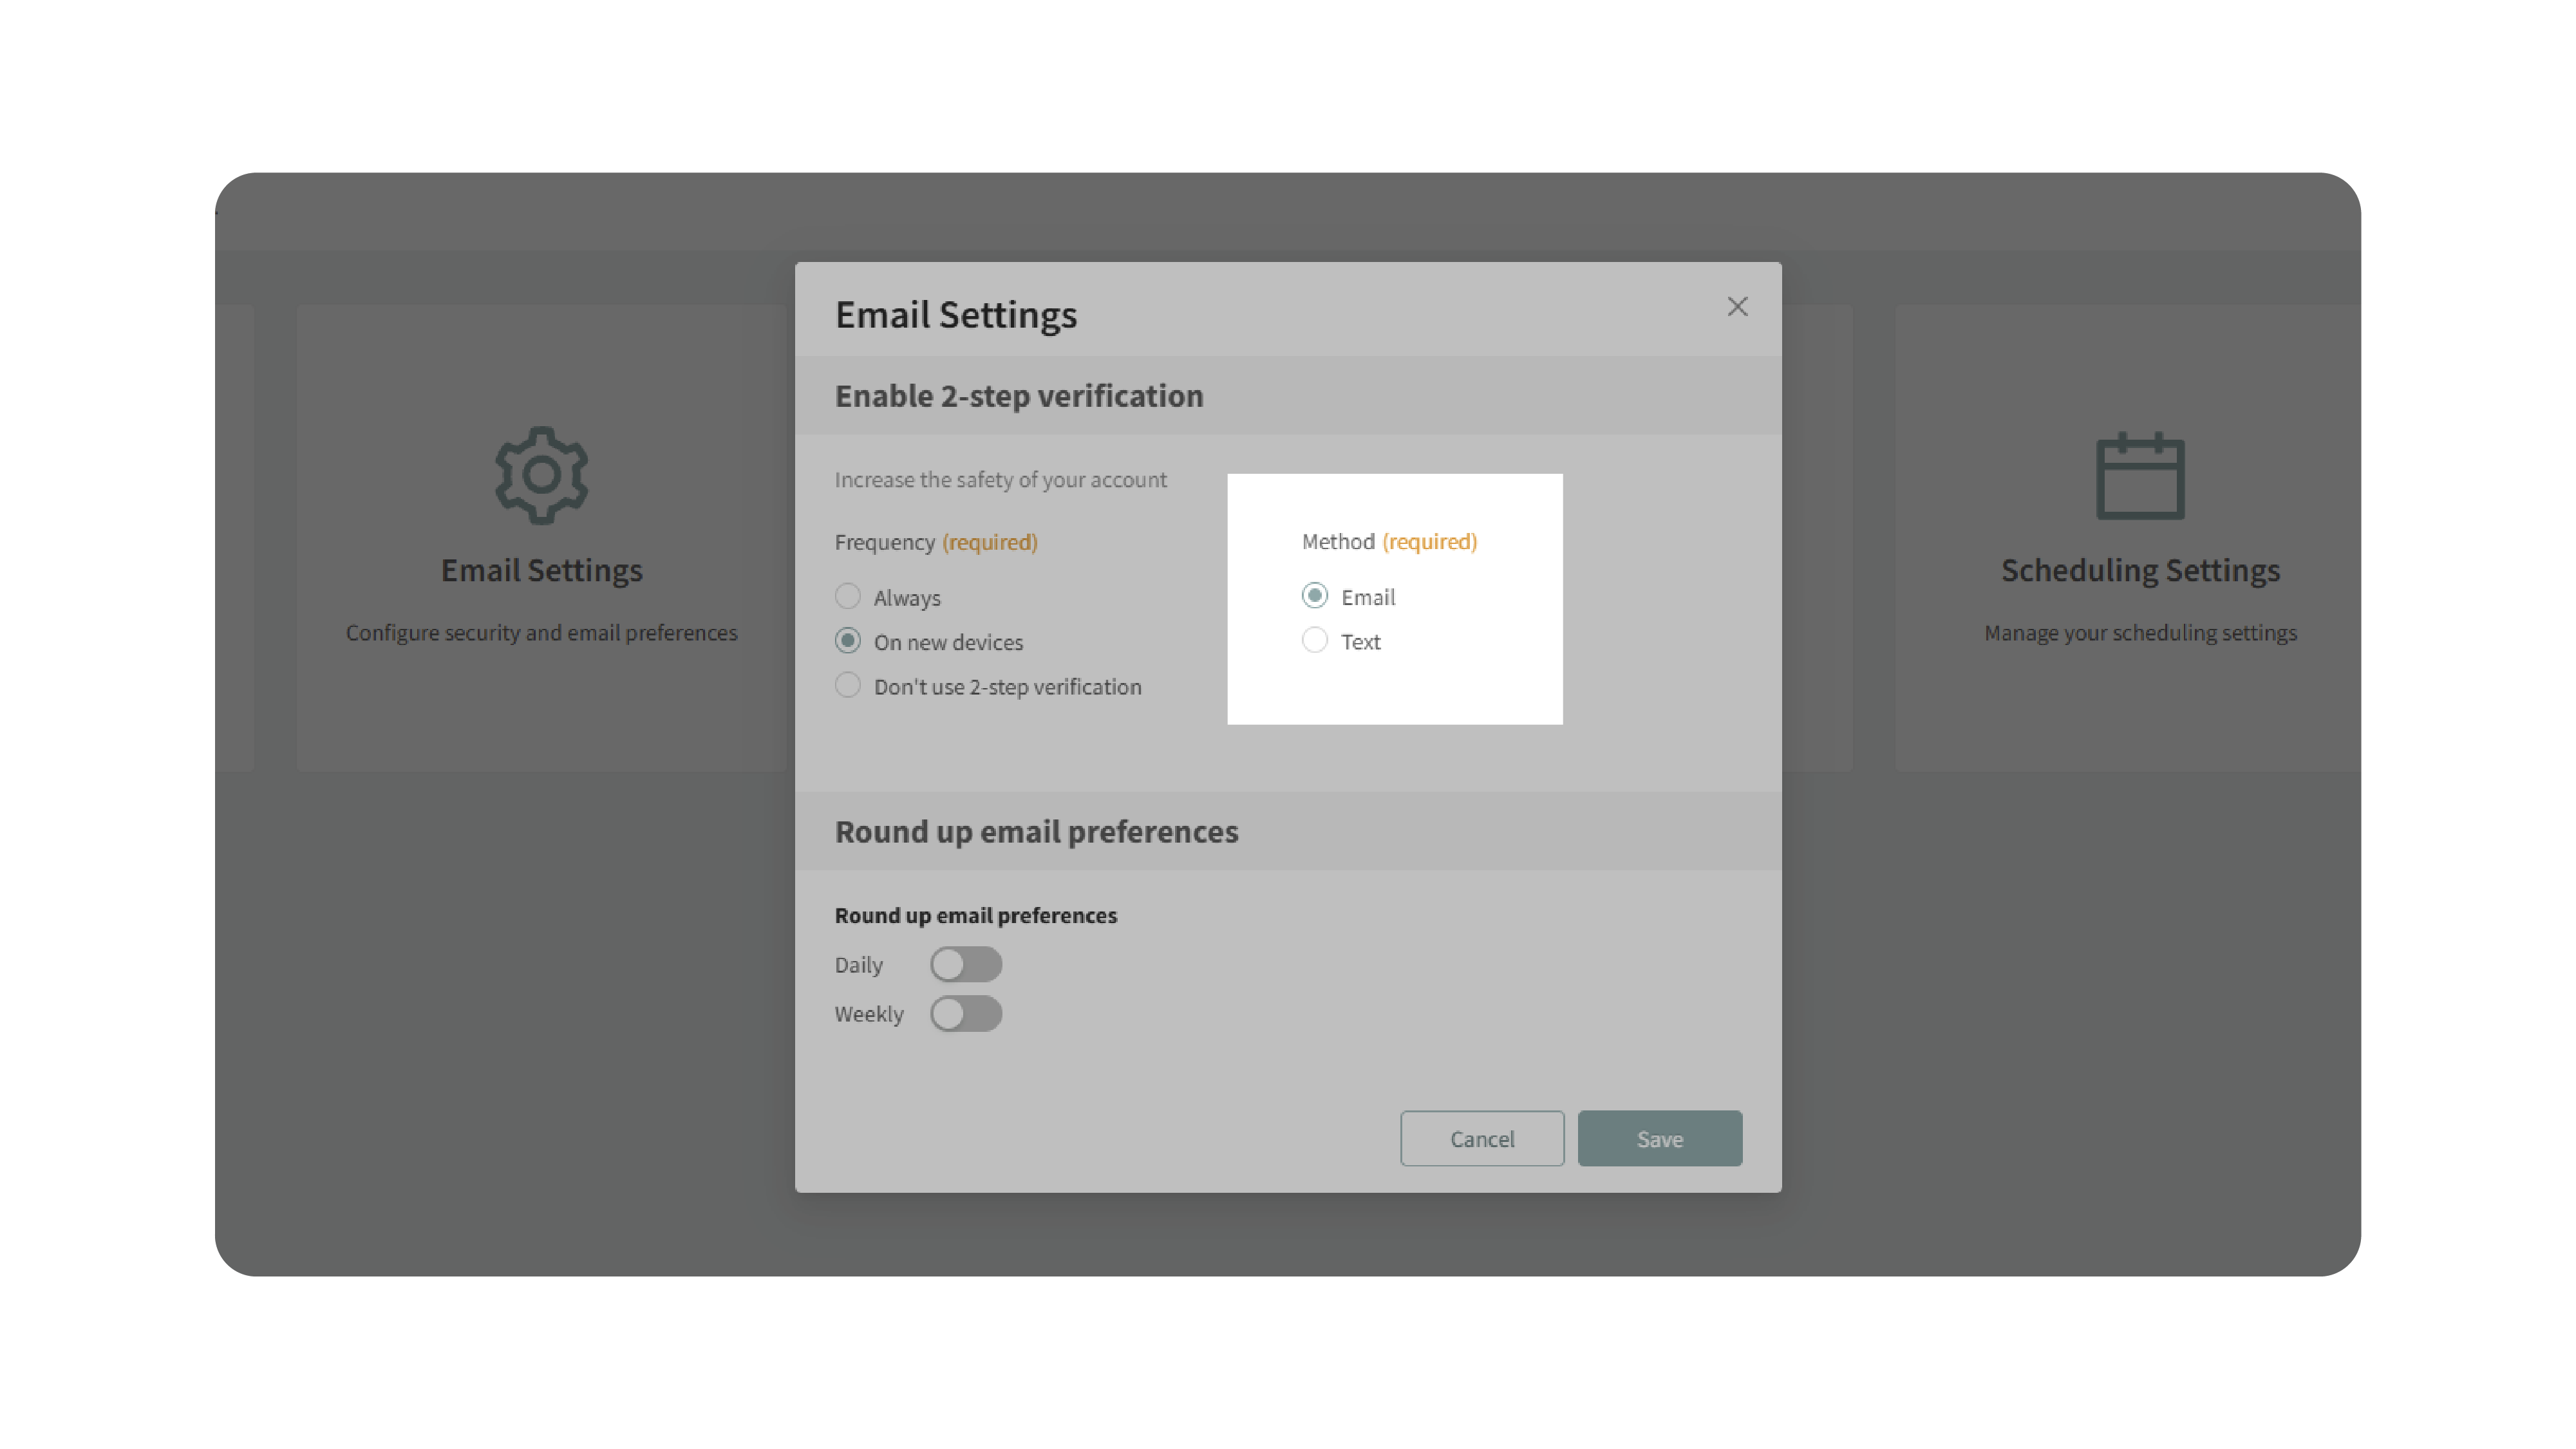
Tip: Use “New Devices” for balanced security and convenience.
3. Connect Your Email Account
Integrating your email ensures candidate communications come directly from your address.
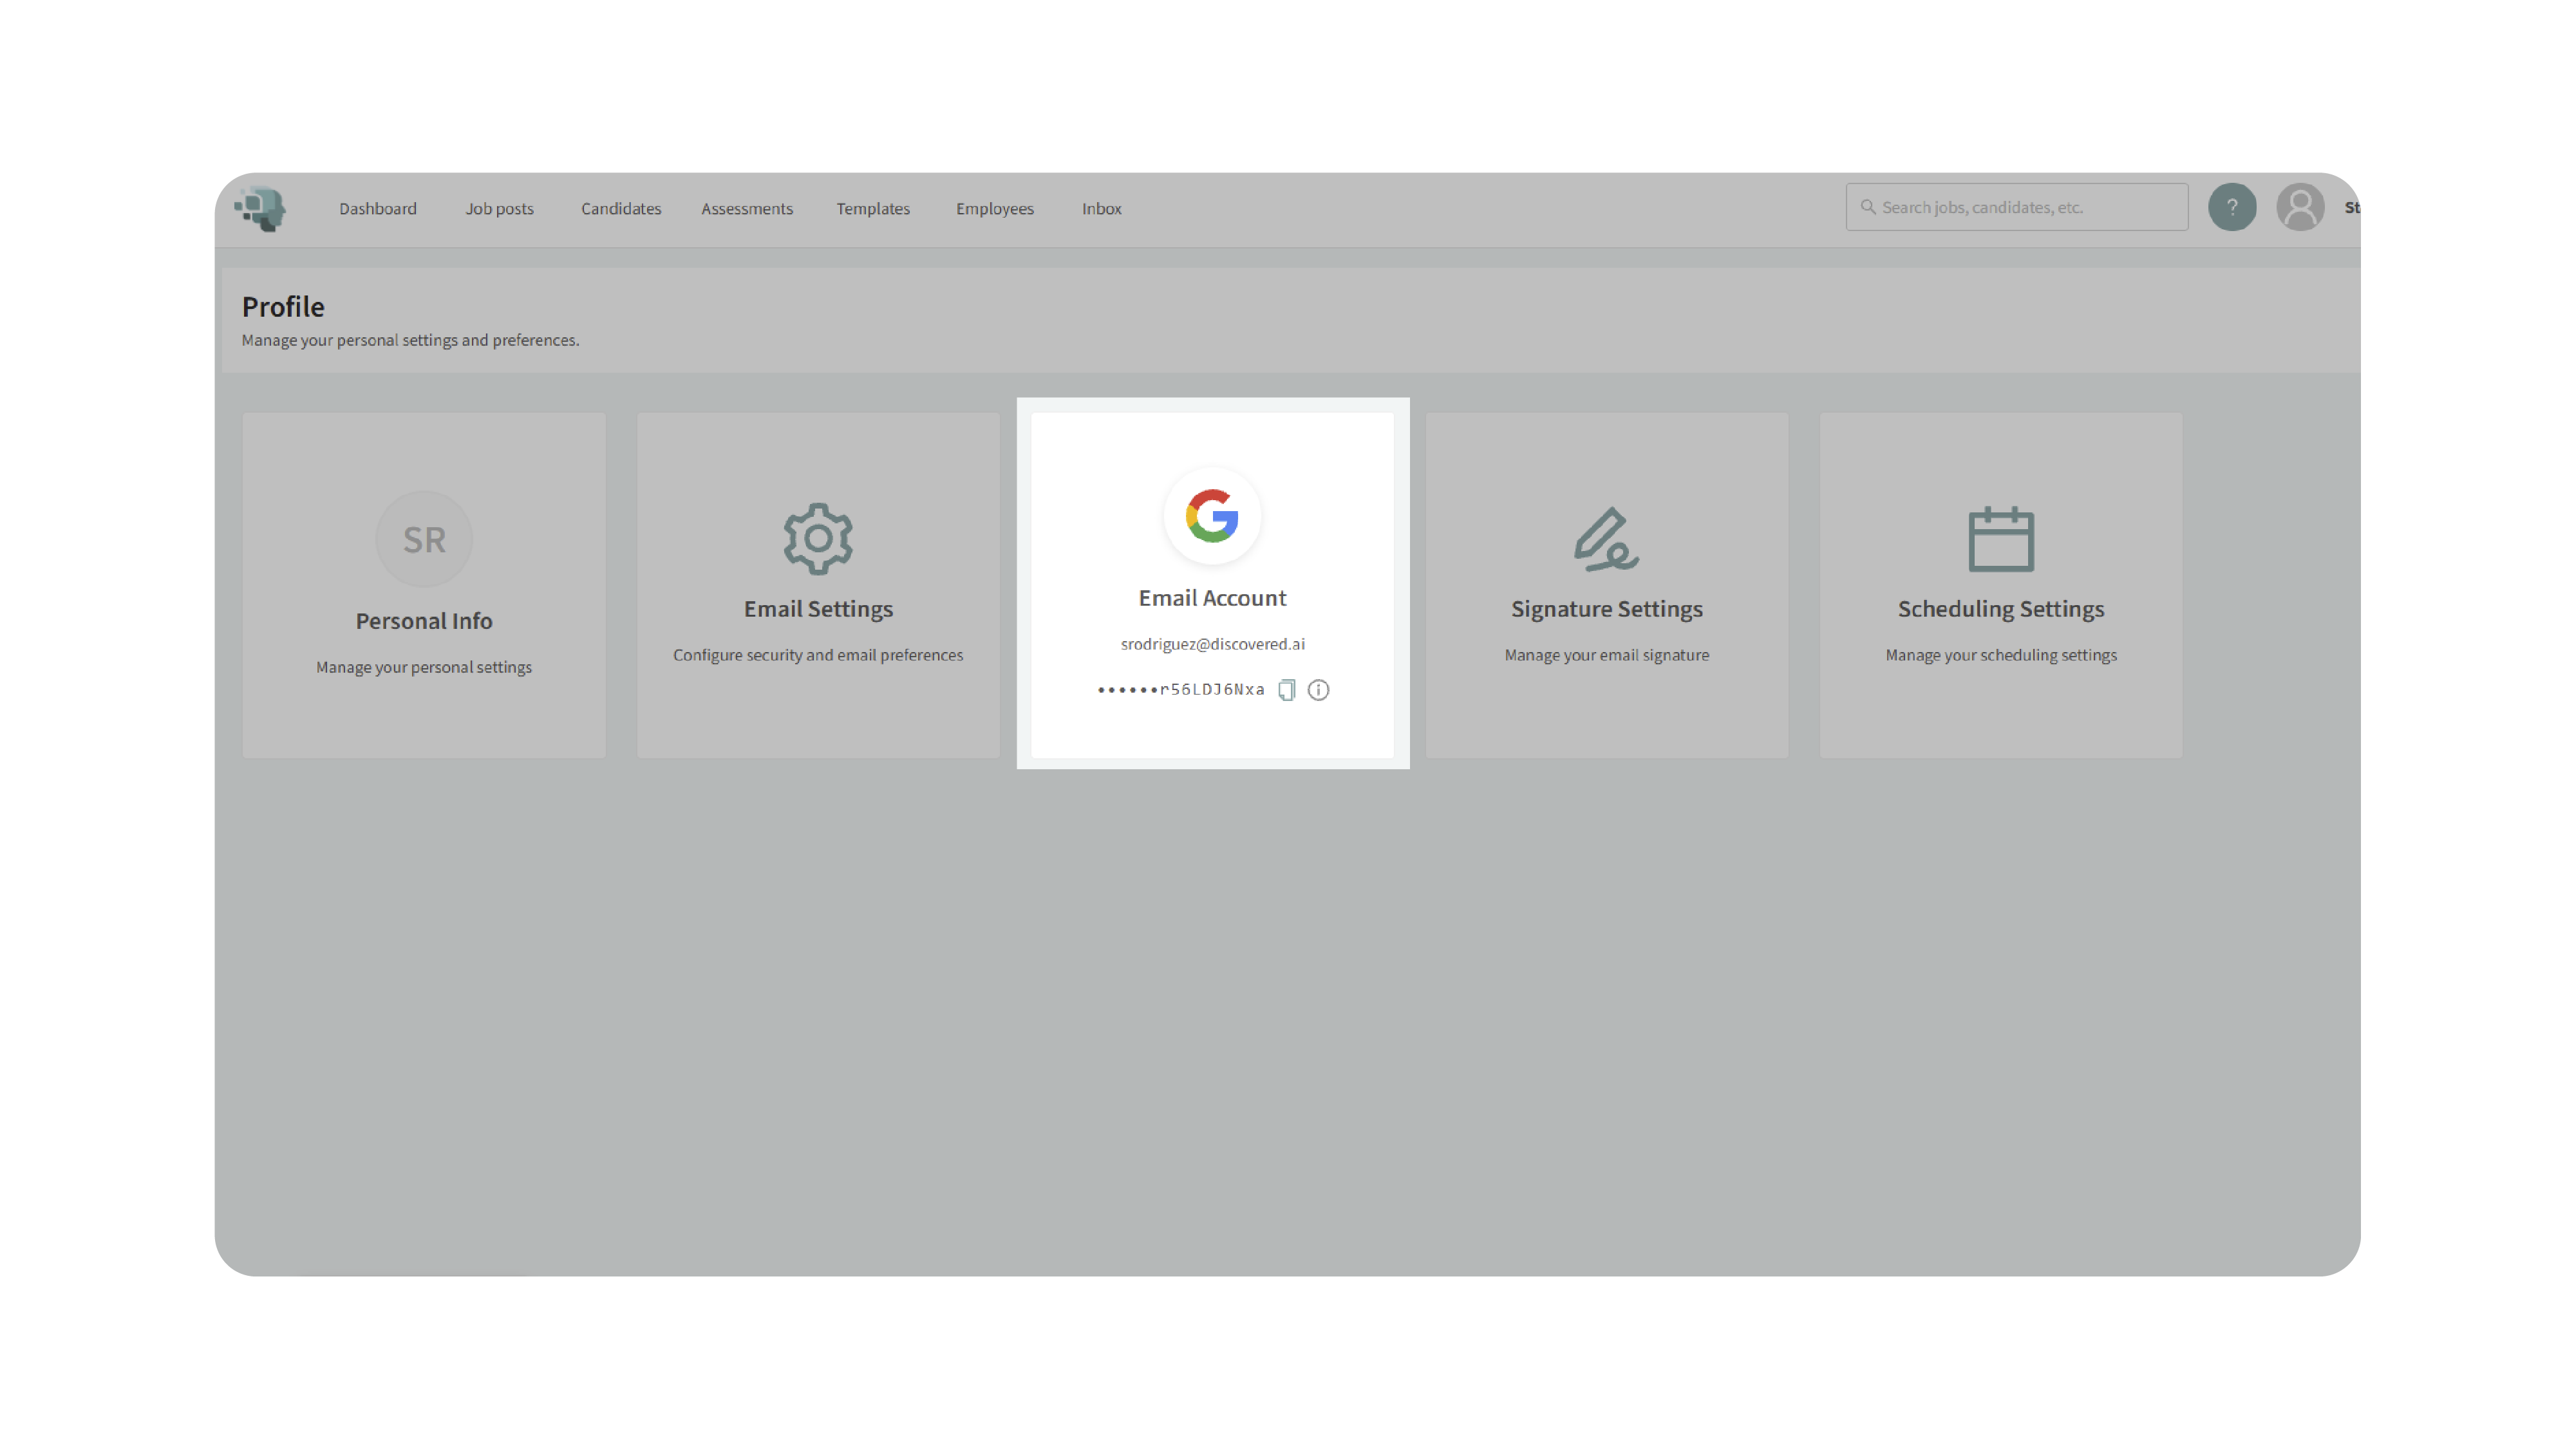
- Choose Sign in with Google or Sign in with Microsoft.
- Select your account and grant permissions.
- Click Save to finalize the connection.
Note: Email integration also links your calendar, allowing candidates to schedule meetings with you.
4. Set Up Your Email Signature
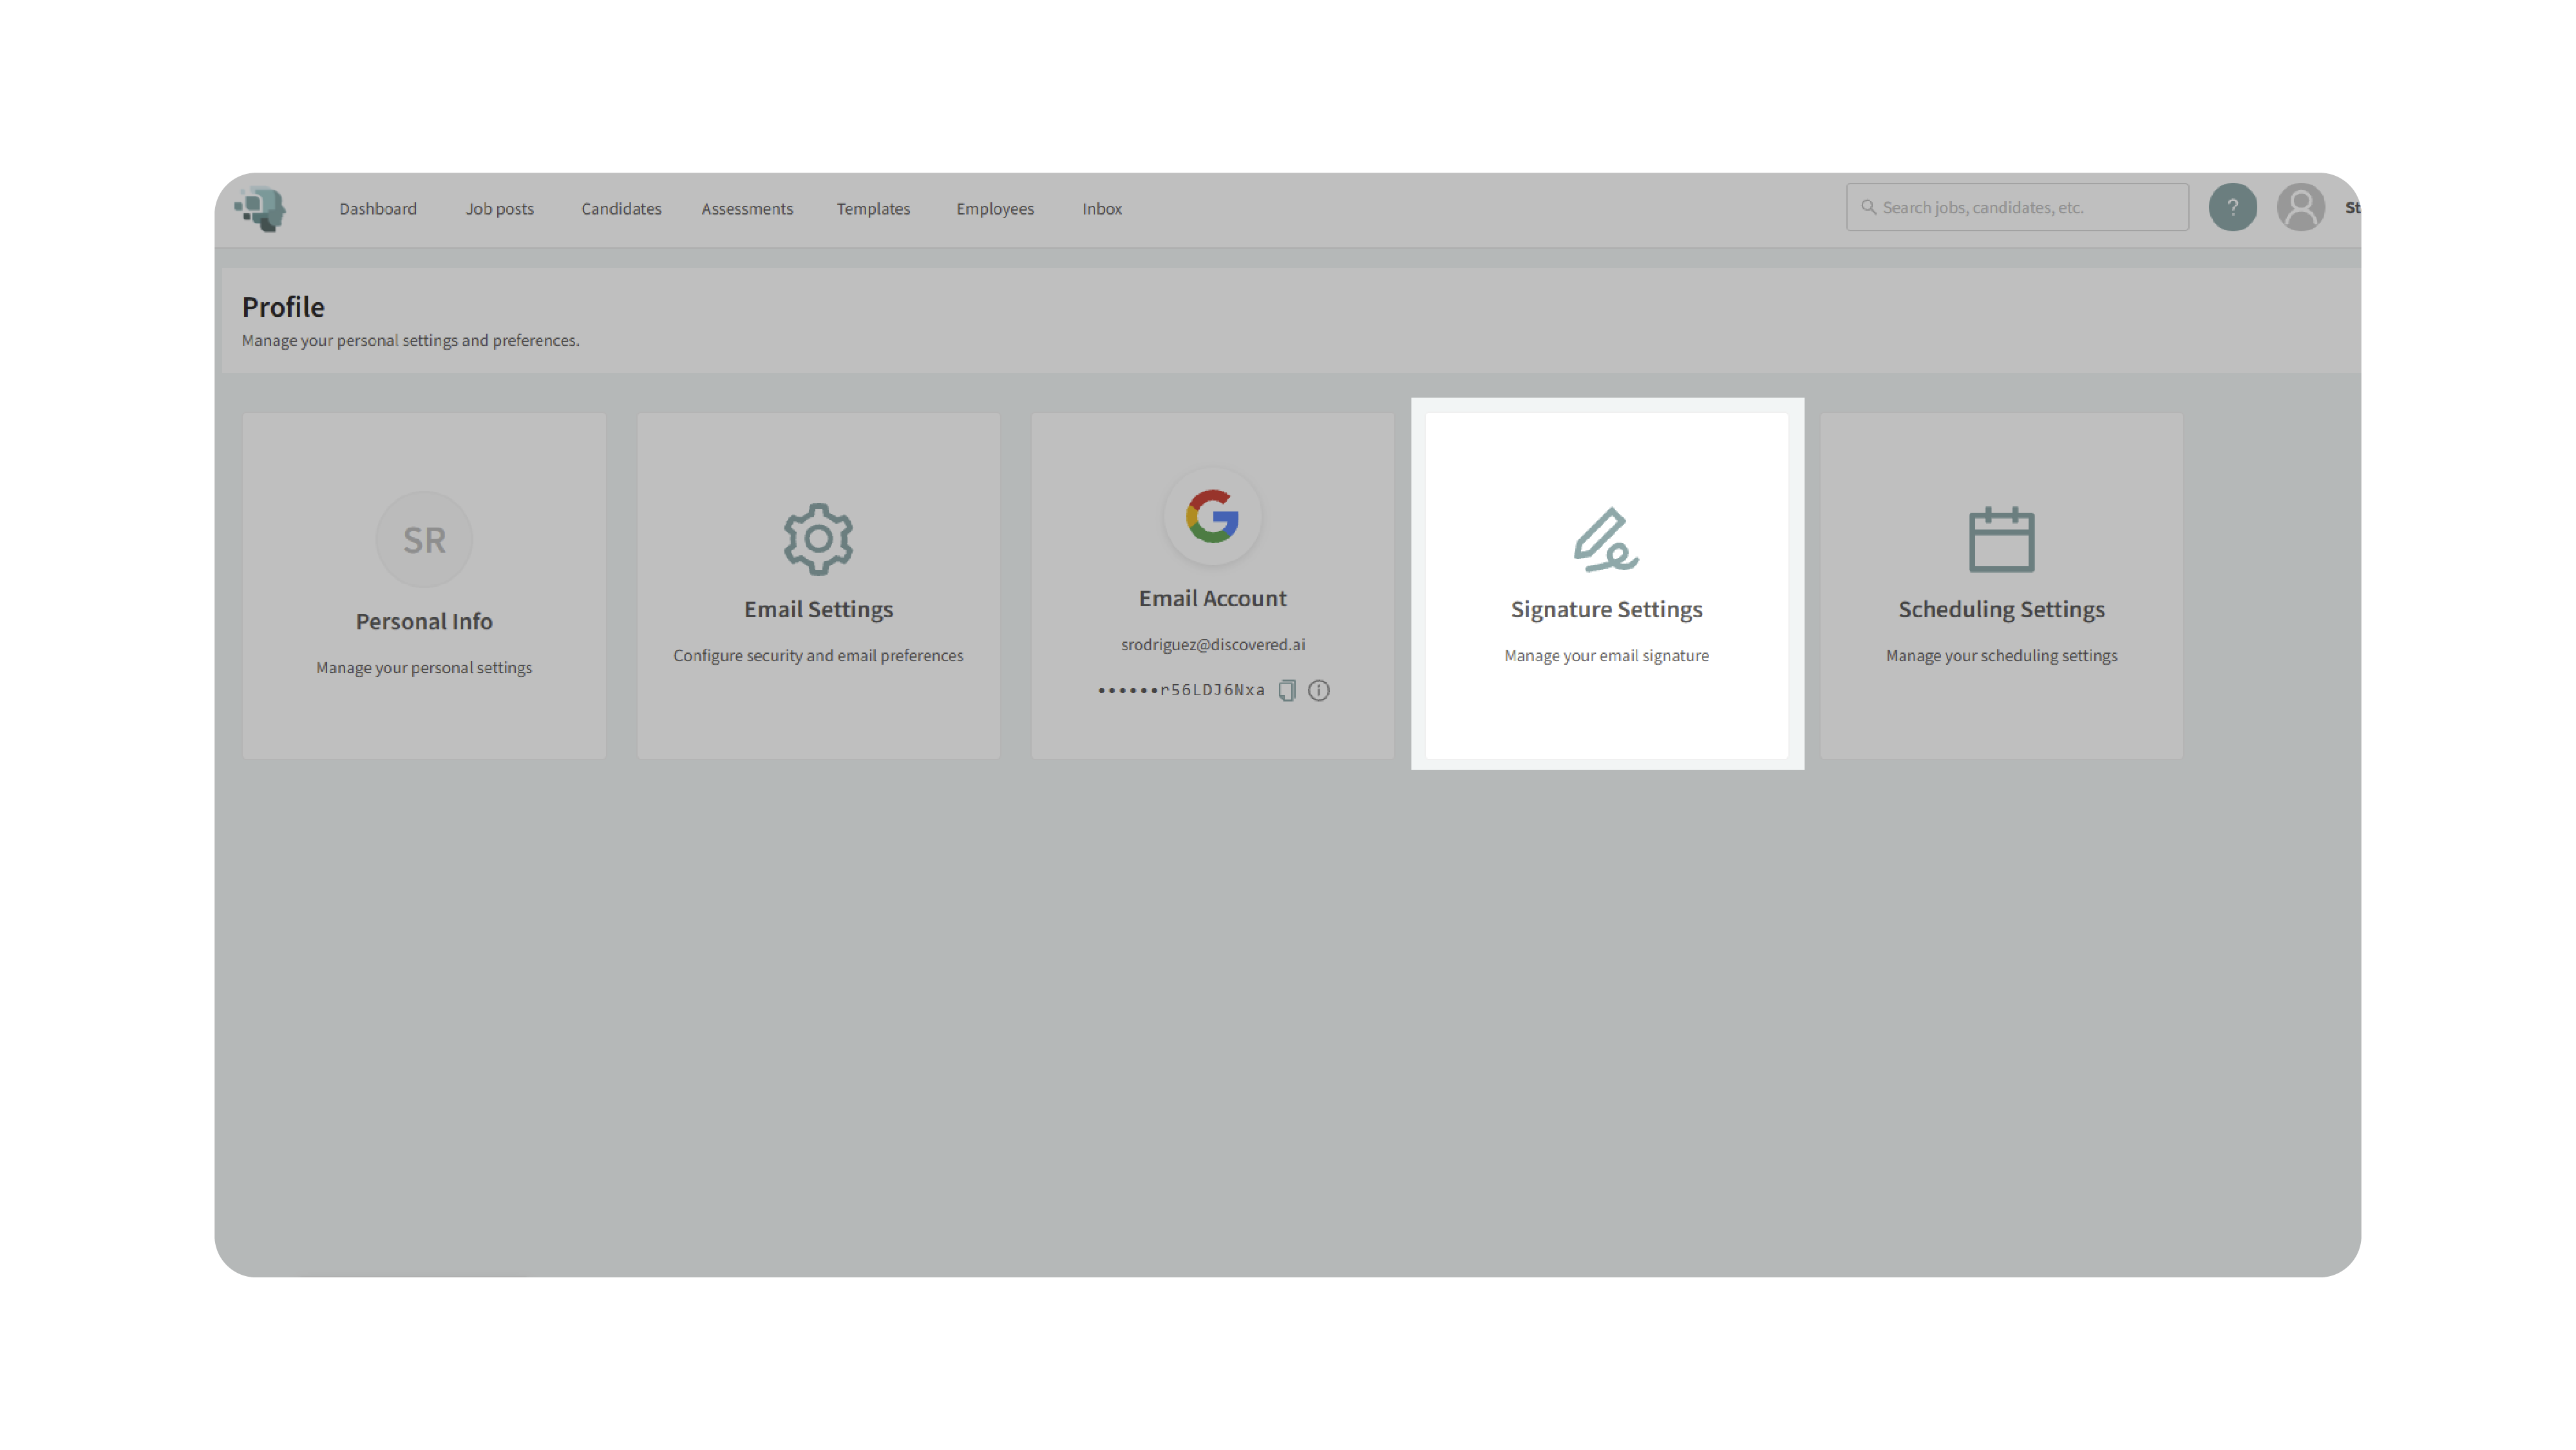
- In the Email Settings section, type your desired signature text (e.g., “Best regards, John”).
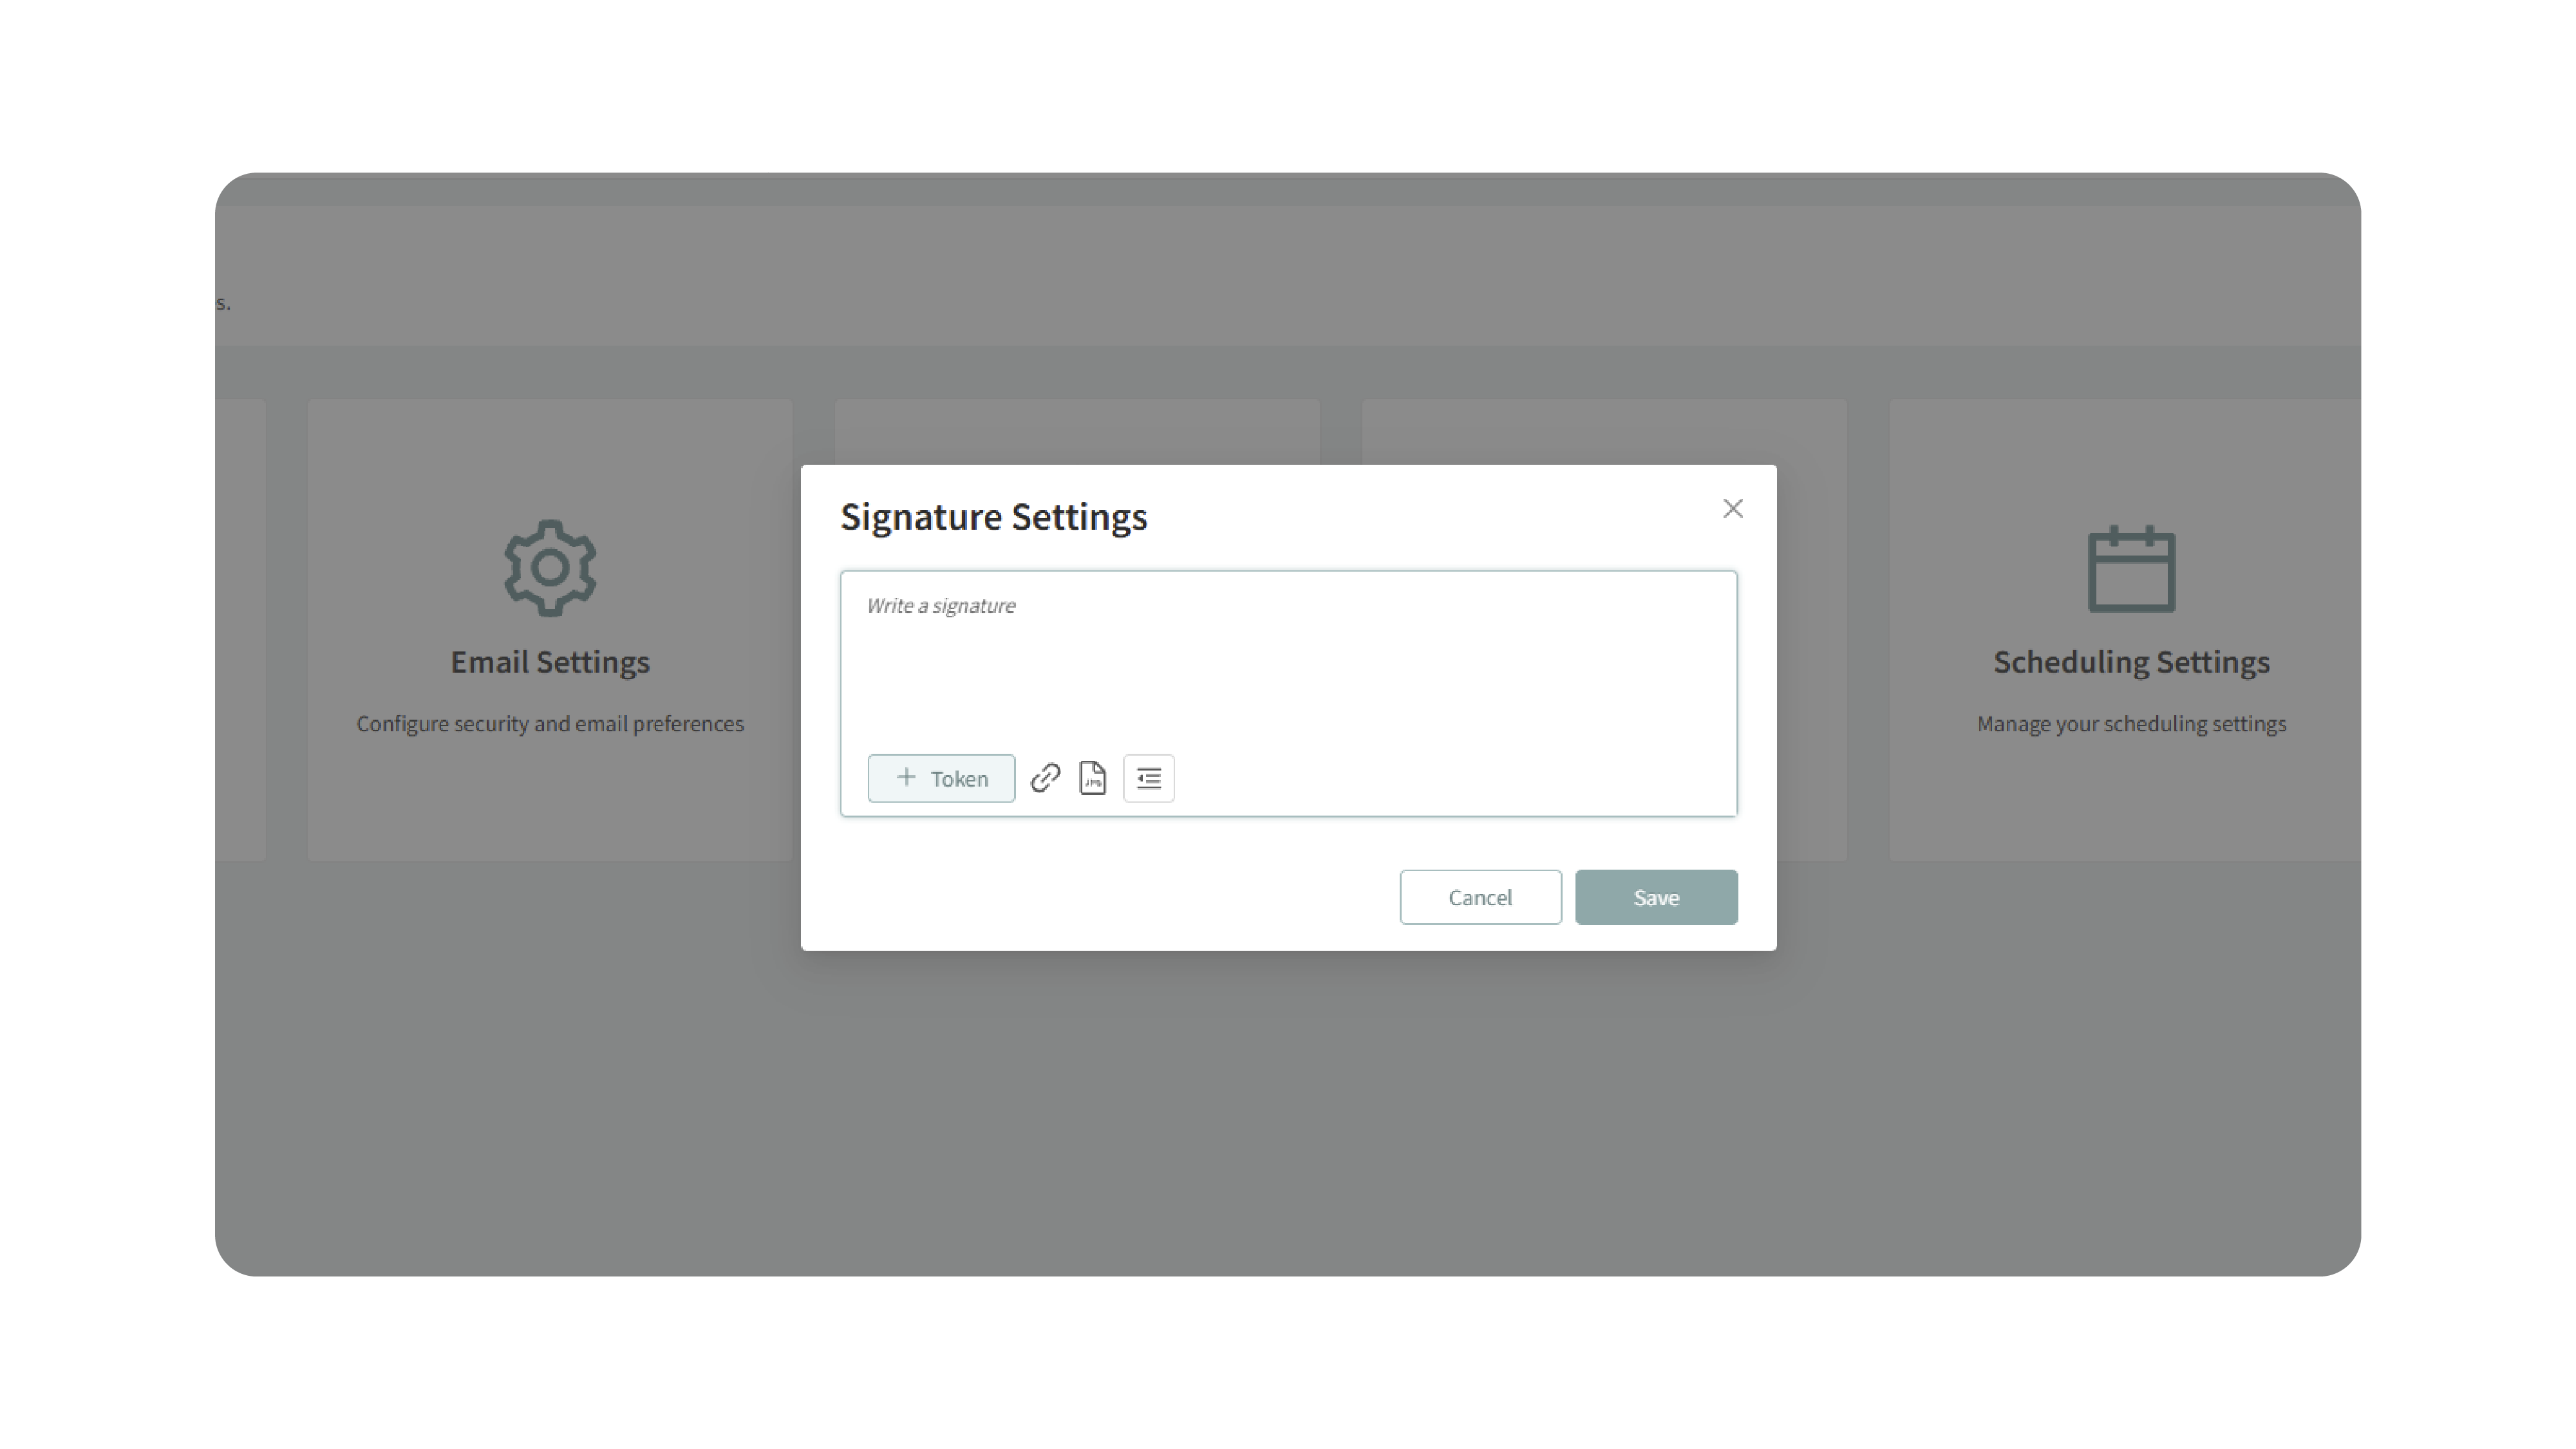
- When composing a candidate email, insert the Signature placeholder token.
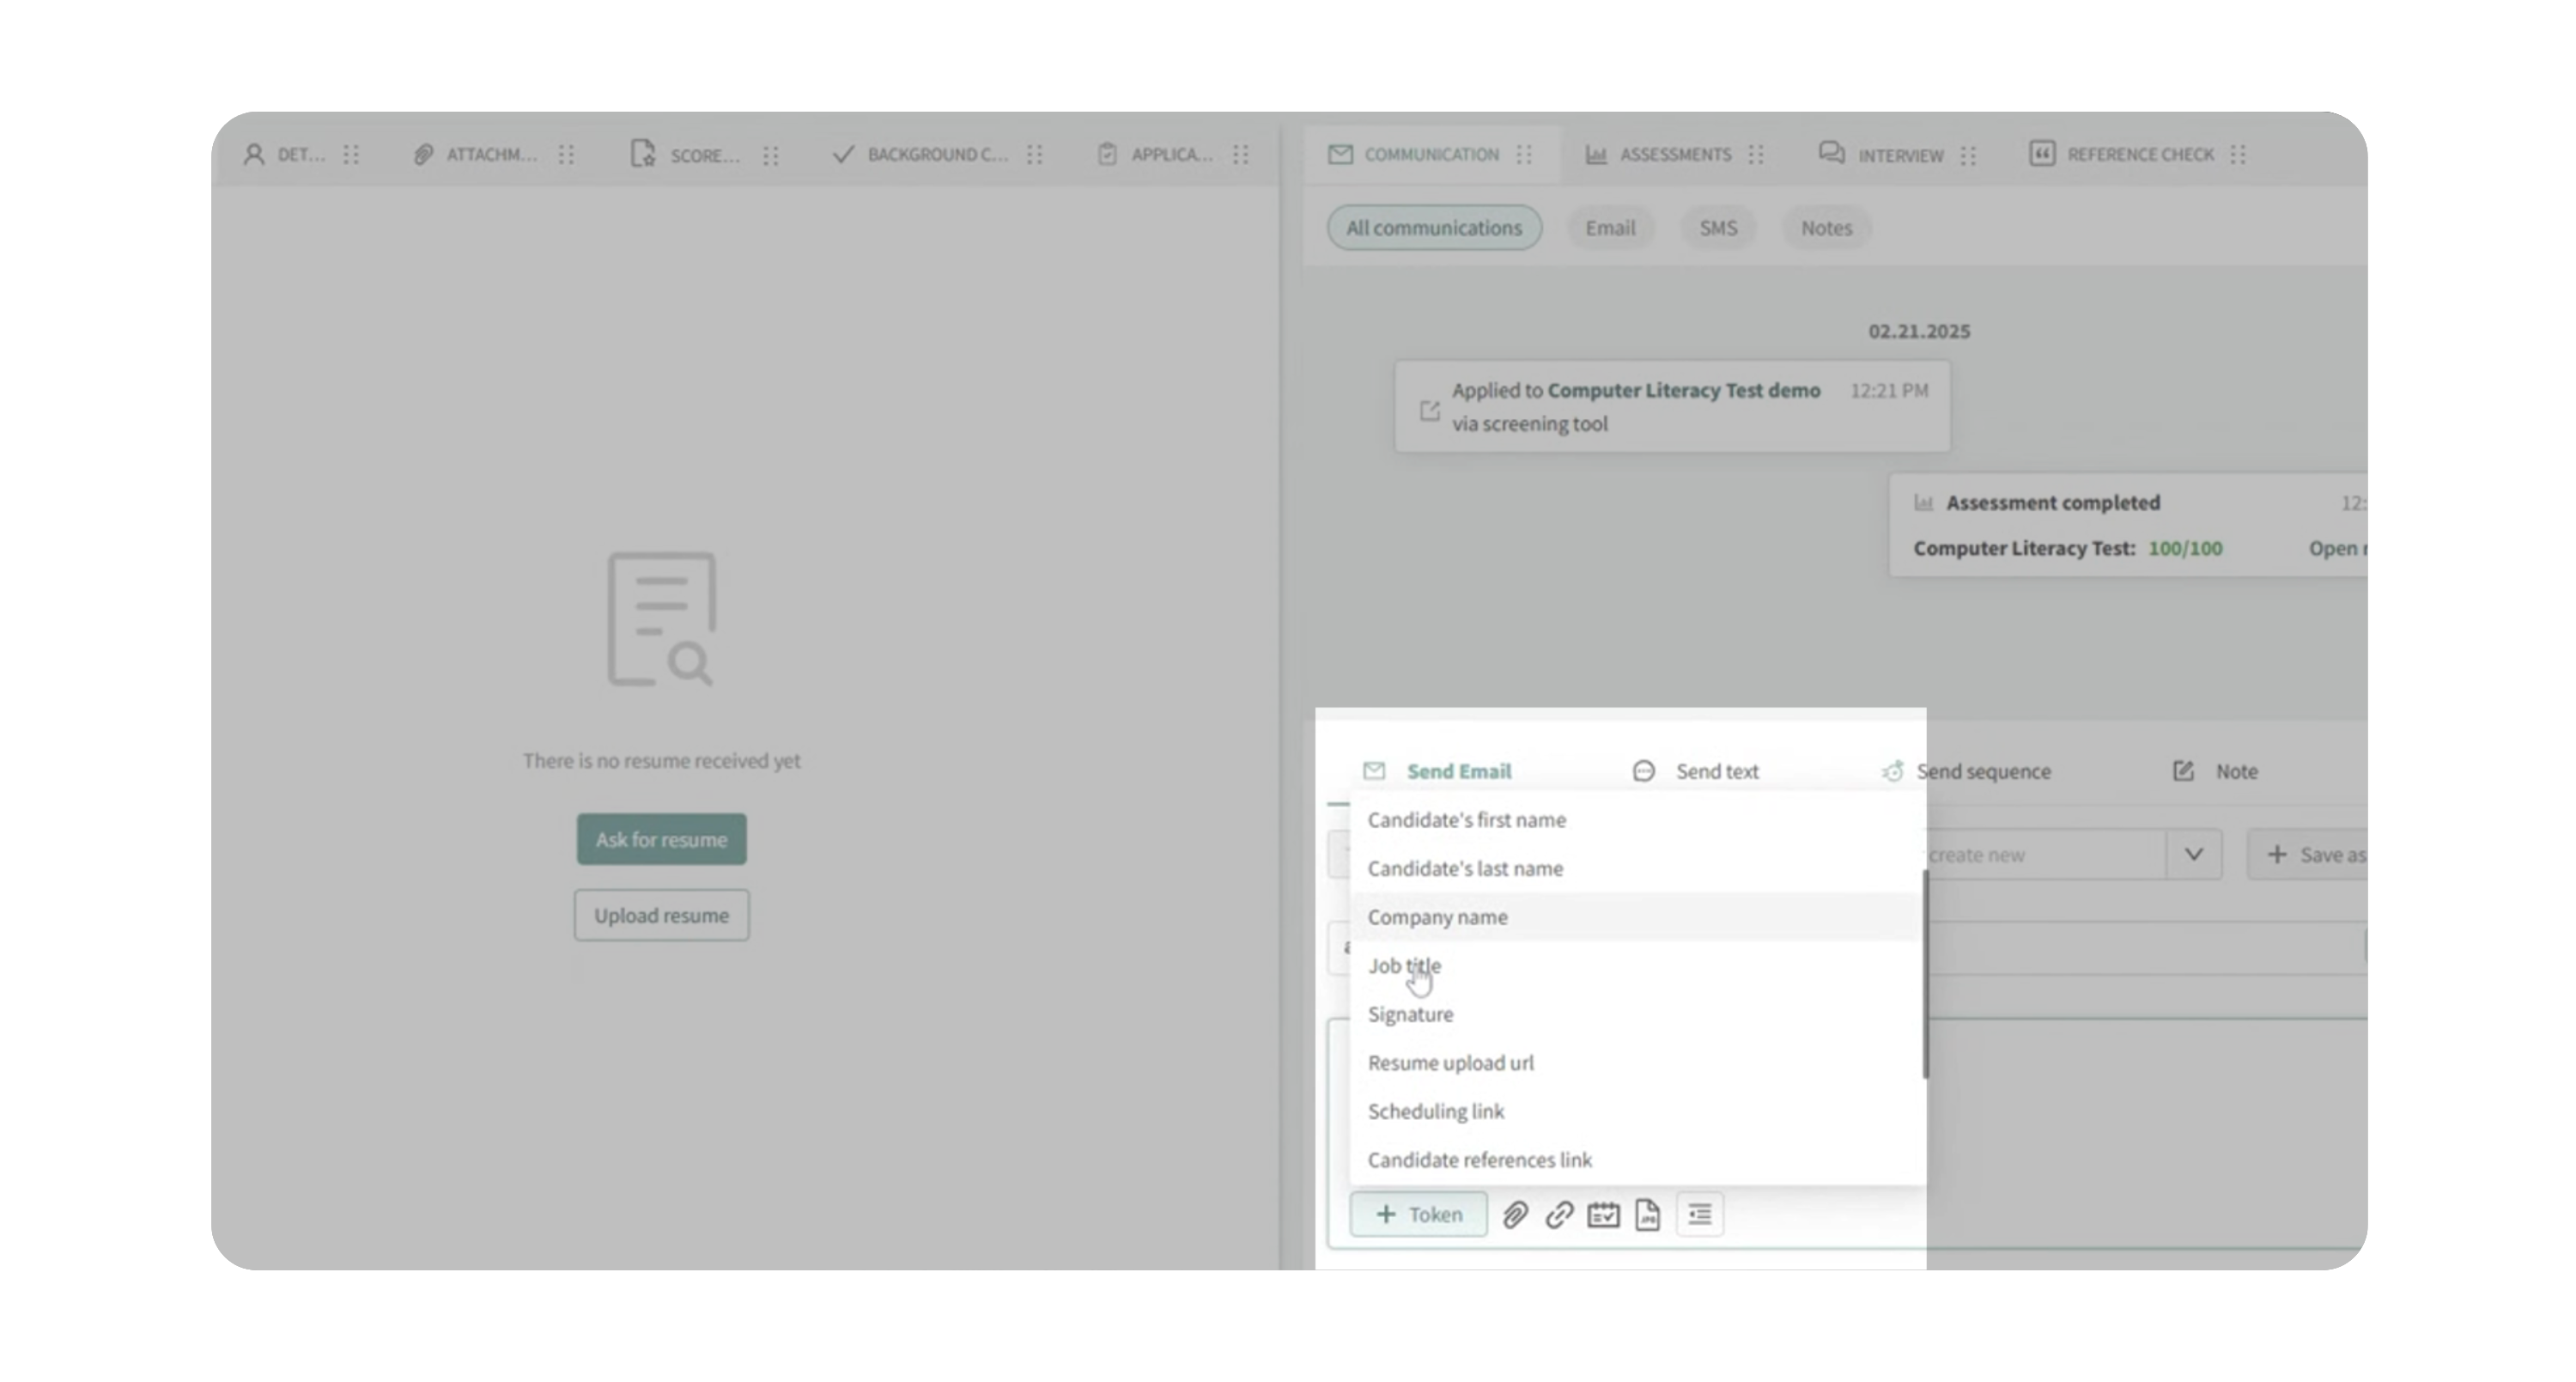
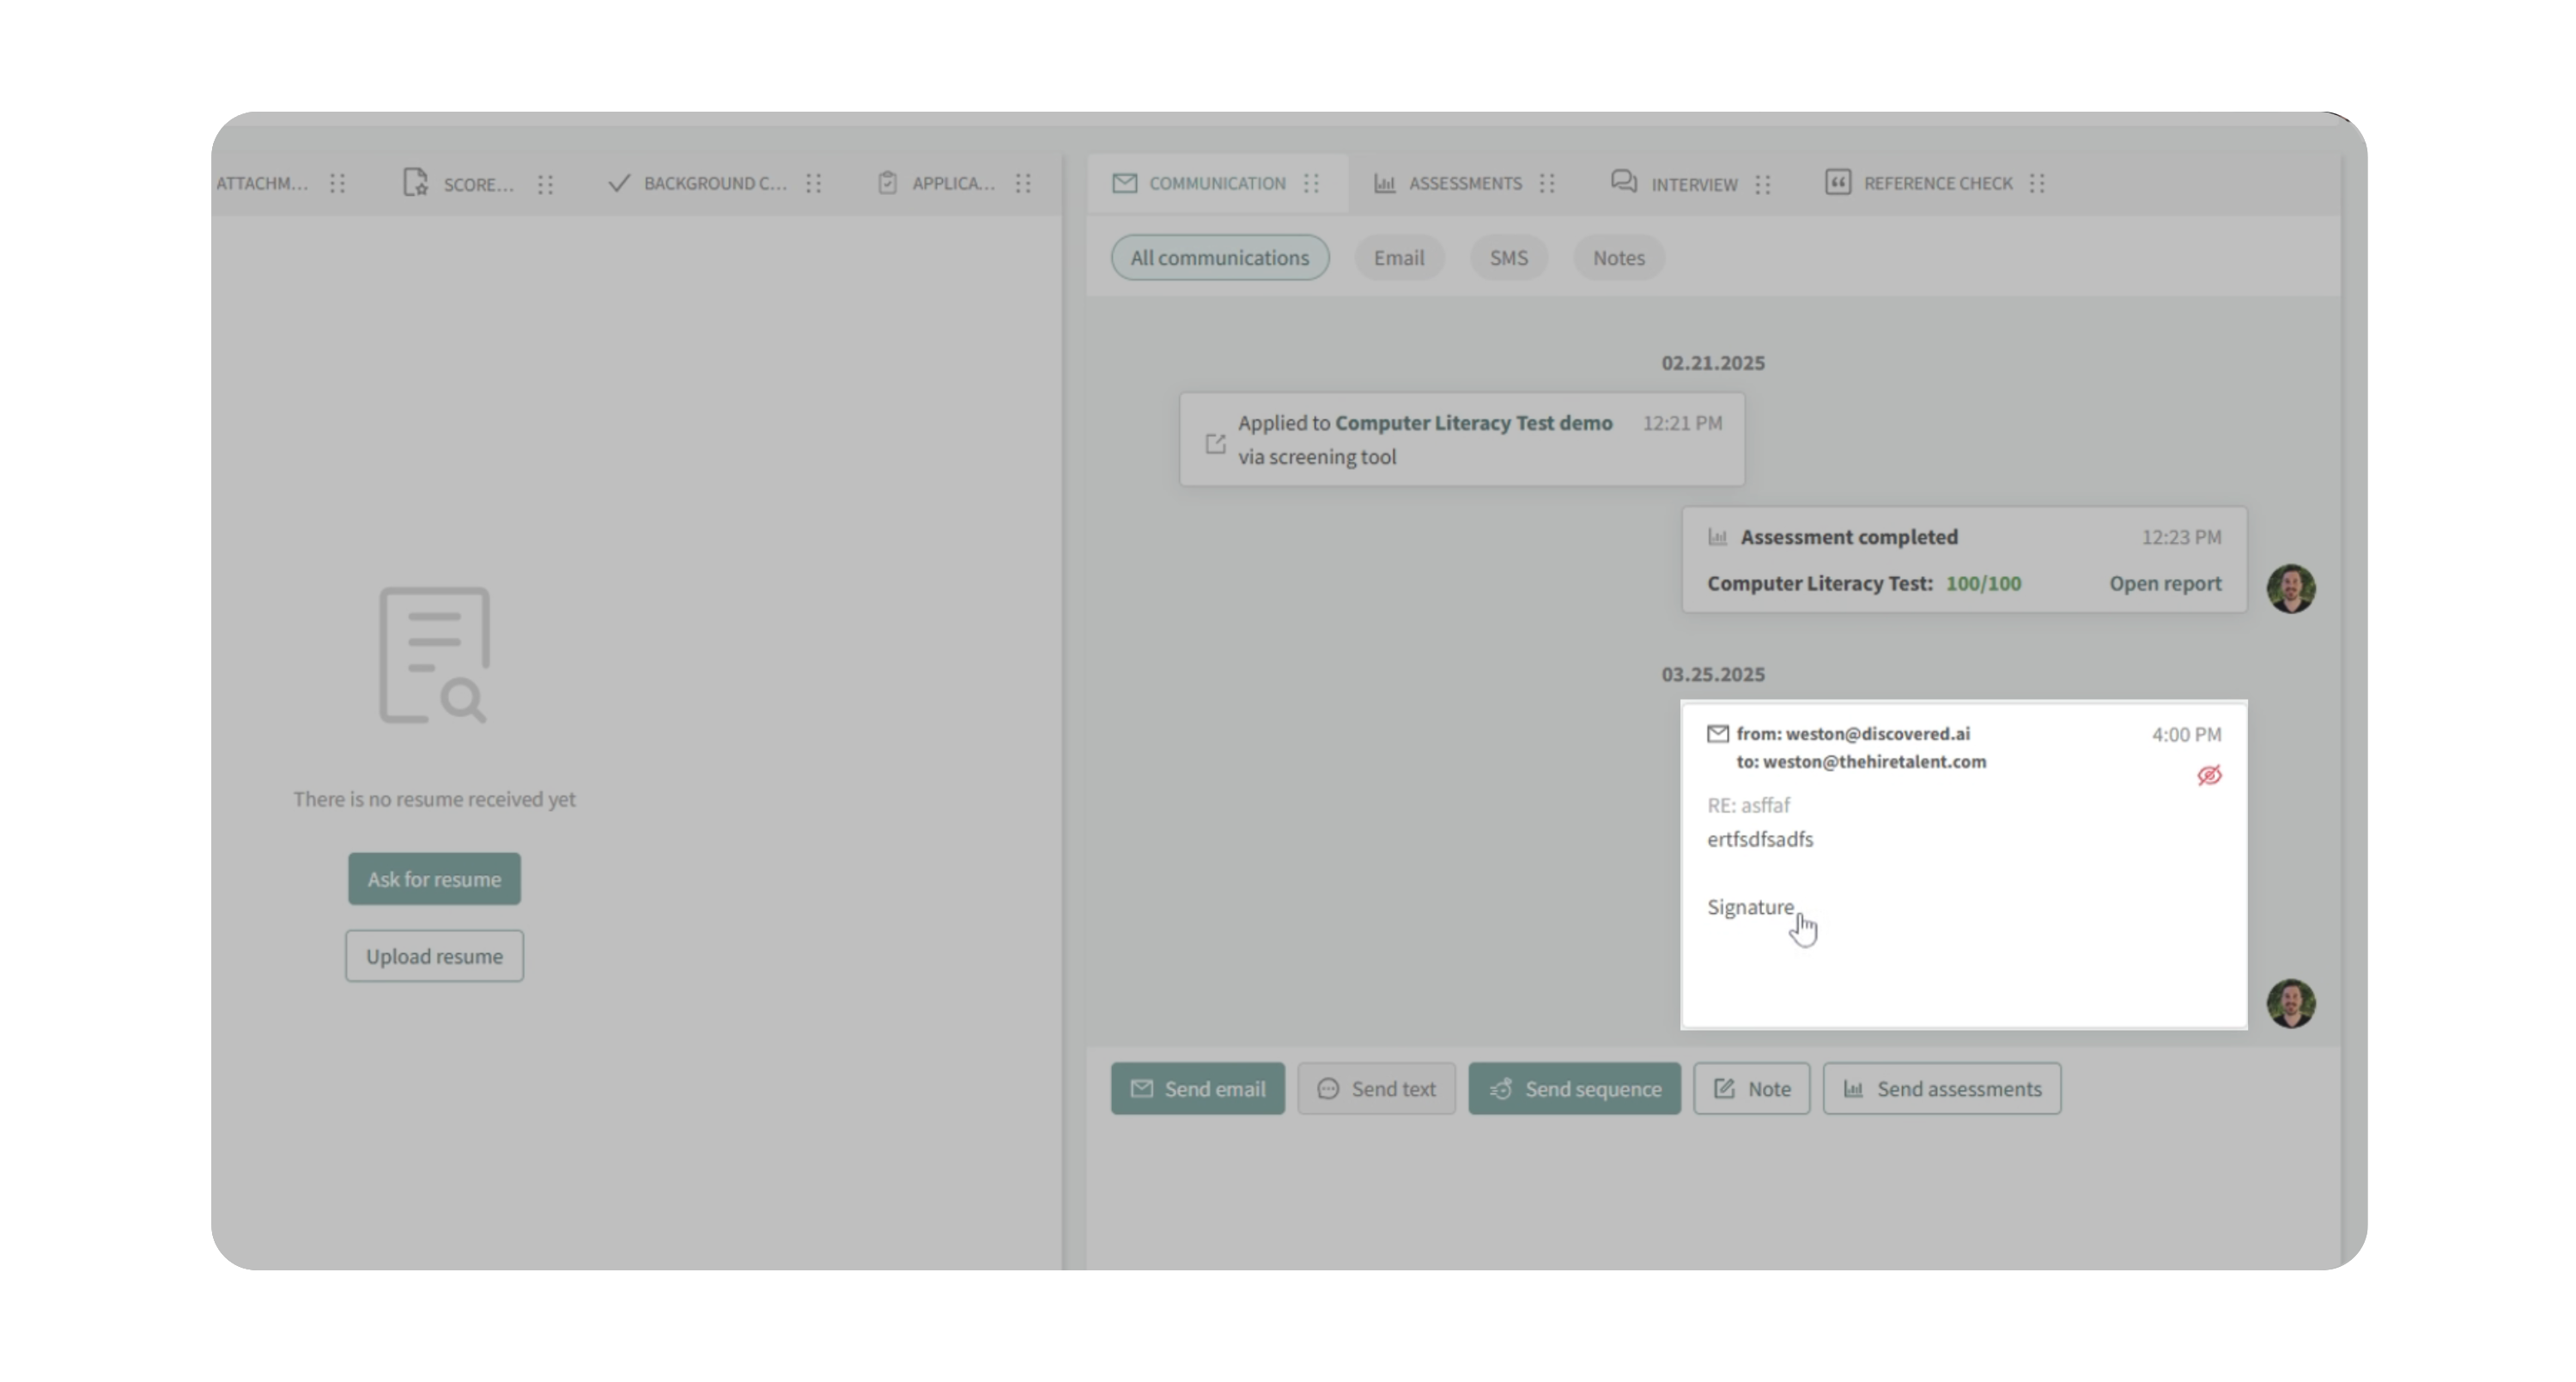
- The system will automatically fill in your saved signature when the message is sent.
Candidate-Facing Contact Information:
When you send certain candidate tasks through Discovered, such as an assessment or a One-Way Interview, the request may include contact information from your Discovered user profile.
This may happen when:
- You are the owner of the job posting.
- You trigger the request by moving a candidate to another status.
- You enroll the candidate in a sequence or initiate another candidate-facing action.
Your phone number can be removed from your profile if you do not want it displayed. Your account email address is required and cannot be removed.
Connecting your email account is not required for this information to appear. The contact details shown to candidates may come from the Discovered profile associated with the user triggering the task.
Why This Matters
Correctly configuring your email settings ensures:
- Stronger login protection with 2FA.
- Higher email deliverability by sending directly from your own email address.
- Faster candidate response handling, with replies going to your inbox.
- Consistent, professional messaging with a pre-set signature.
Use Cases
- You want to prevent unauthorized access by enabling two-factor authentication.
- You prefer candidates’ replies to go directly to your inbox instead of a generic system email.
- You want candidates to easily schedule meetings with you via your connected calendar.
- You want to standardize and save time with an auto-filled signature.
How It Works
- 2FA prevents unauthorized access by requiring extra login verification.
- Email integration replaces the system-generated address with your actual email, improving deliverability.
- Calendar integration generates a scheduling link for candidates automatically.
- Signature settings save time and ensure consistent professional messaging.
Best Practices
- Always use two-factor authentication, at a minimum, for new devices.
- Connect your Google or Microsoft email immediately for smoother candidate communication.
- Save your email signature to avoid retyping it each time.
- Test your email and calendar integration to confirm everything works properly.
What Happens Next
Once configured:
- Logins are protected with your chosen 2FA method.
- Candidate messages appear directly in your email inbox.
- Your calendar link is available for scheduling.
- Every candidate email automatically includes your signature.