
Create Custom Assessments
Build role-specific assessments when existing tests don’t fit, and evaluate candidates with your own custom-designed questions.
Overview
Custom Assessments let you design tests tailored to your job’s unique requirements. Instead of relying only on Discovered’s assessment library, you can create skill groups, define skills, and build questions that measure exactly what matters for the role. Each assessment can include instructions, scoring, and candidate-facing messages. For speed and consistency, you can also use Kingsley (AI) to auto-generate a complete assessment from your job description.
How to Create a Custom Assessment:
1. Open the Custom Assessment Card
- Go to your job posting and click the Find and Evaluate Talent tab.
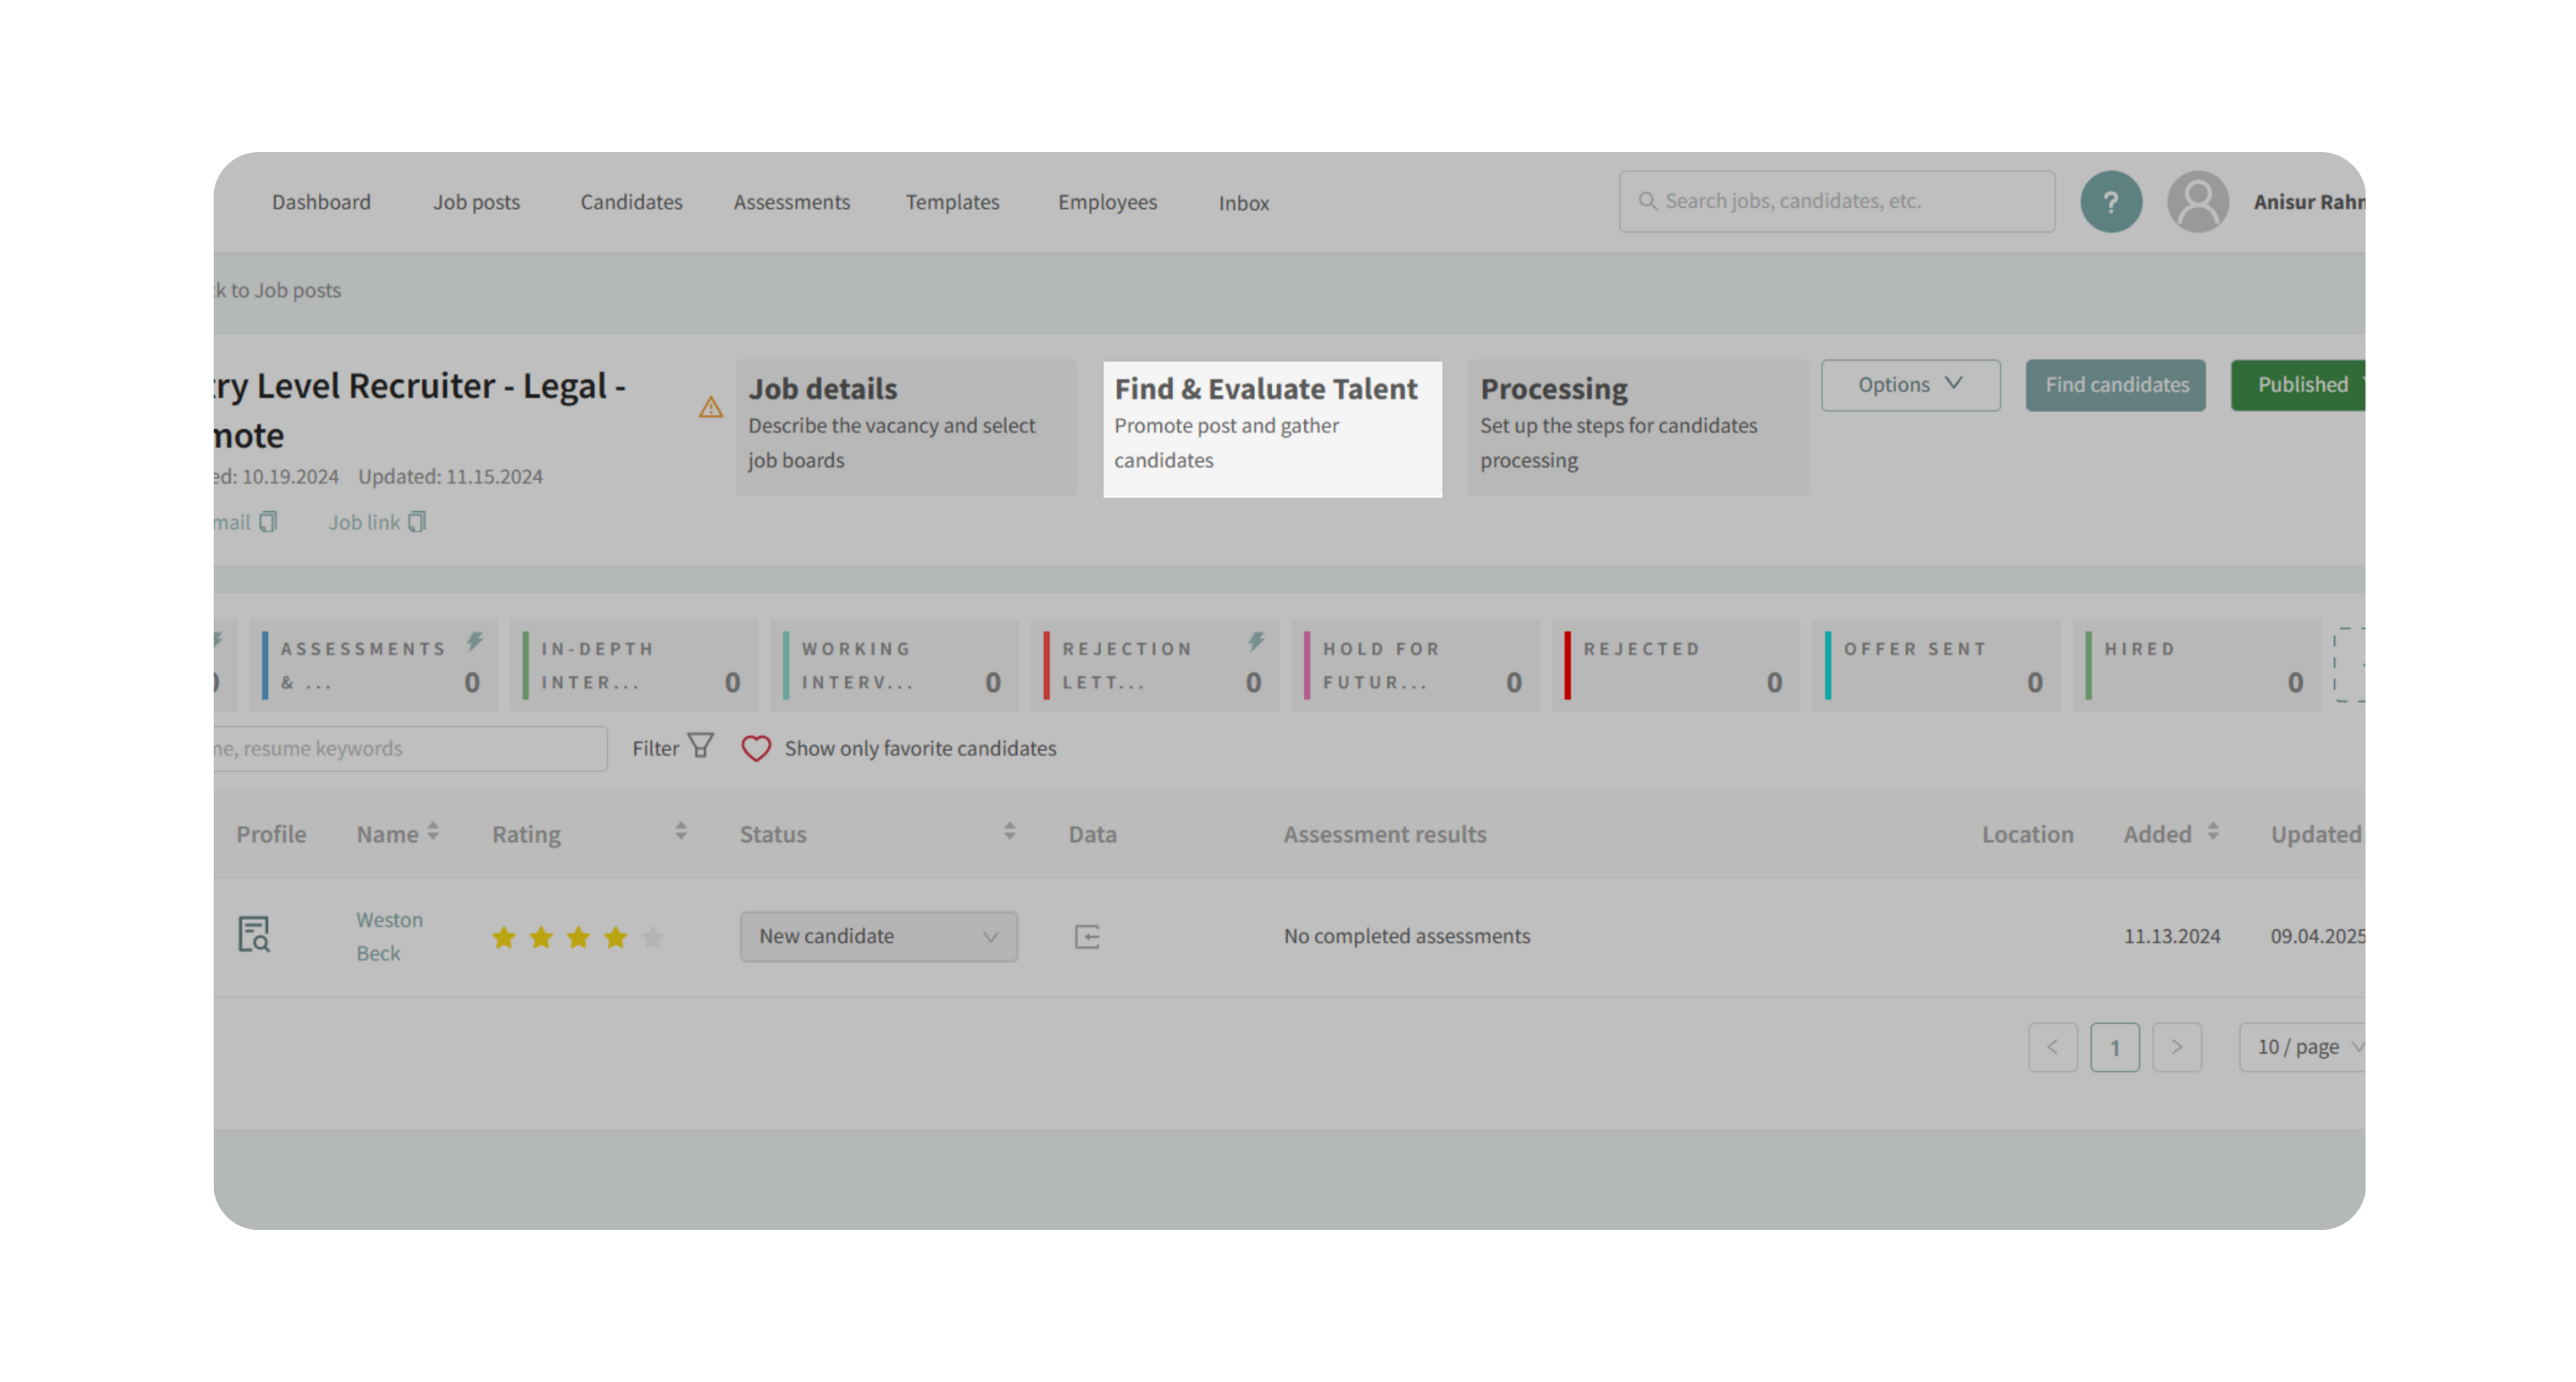
- Scroll down to the Evaluate Candidates section and select Custom Assessment.

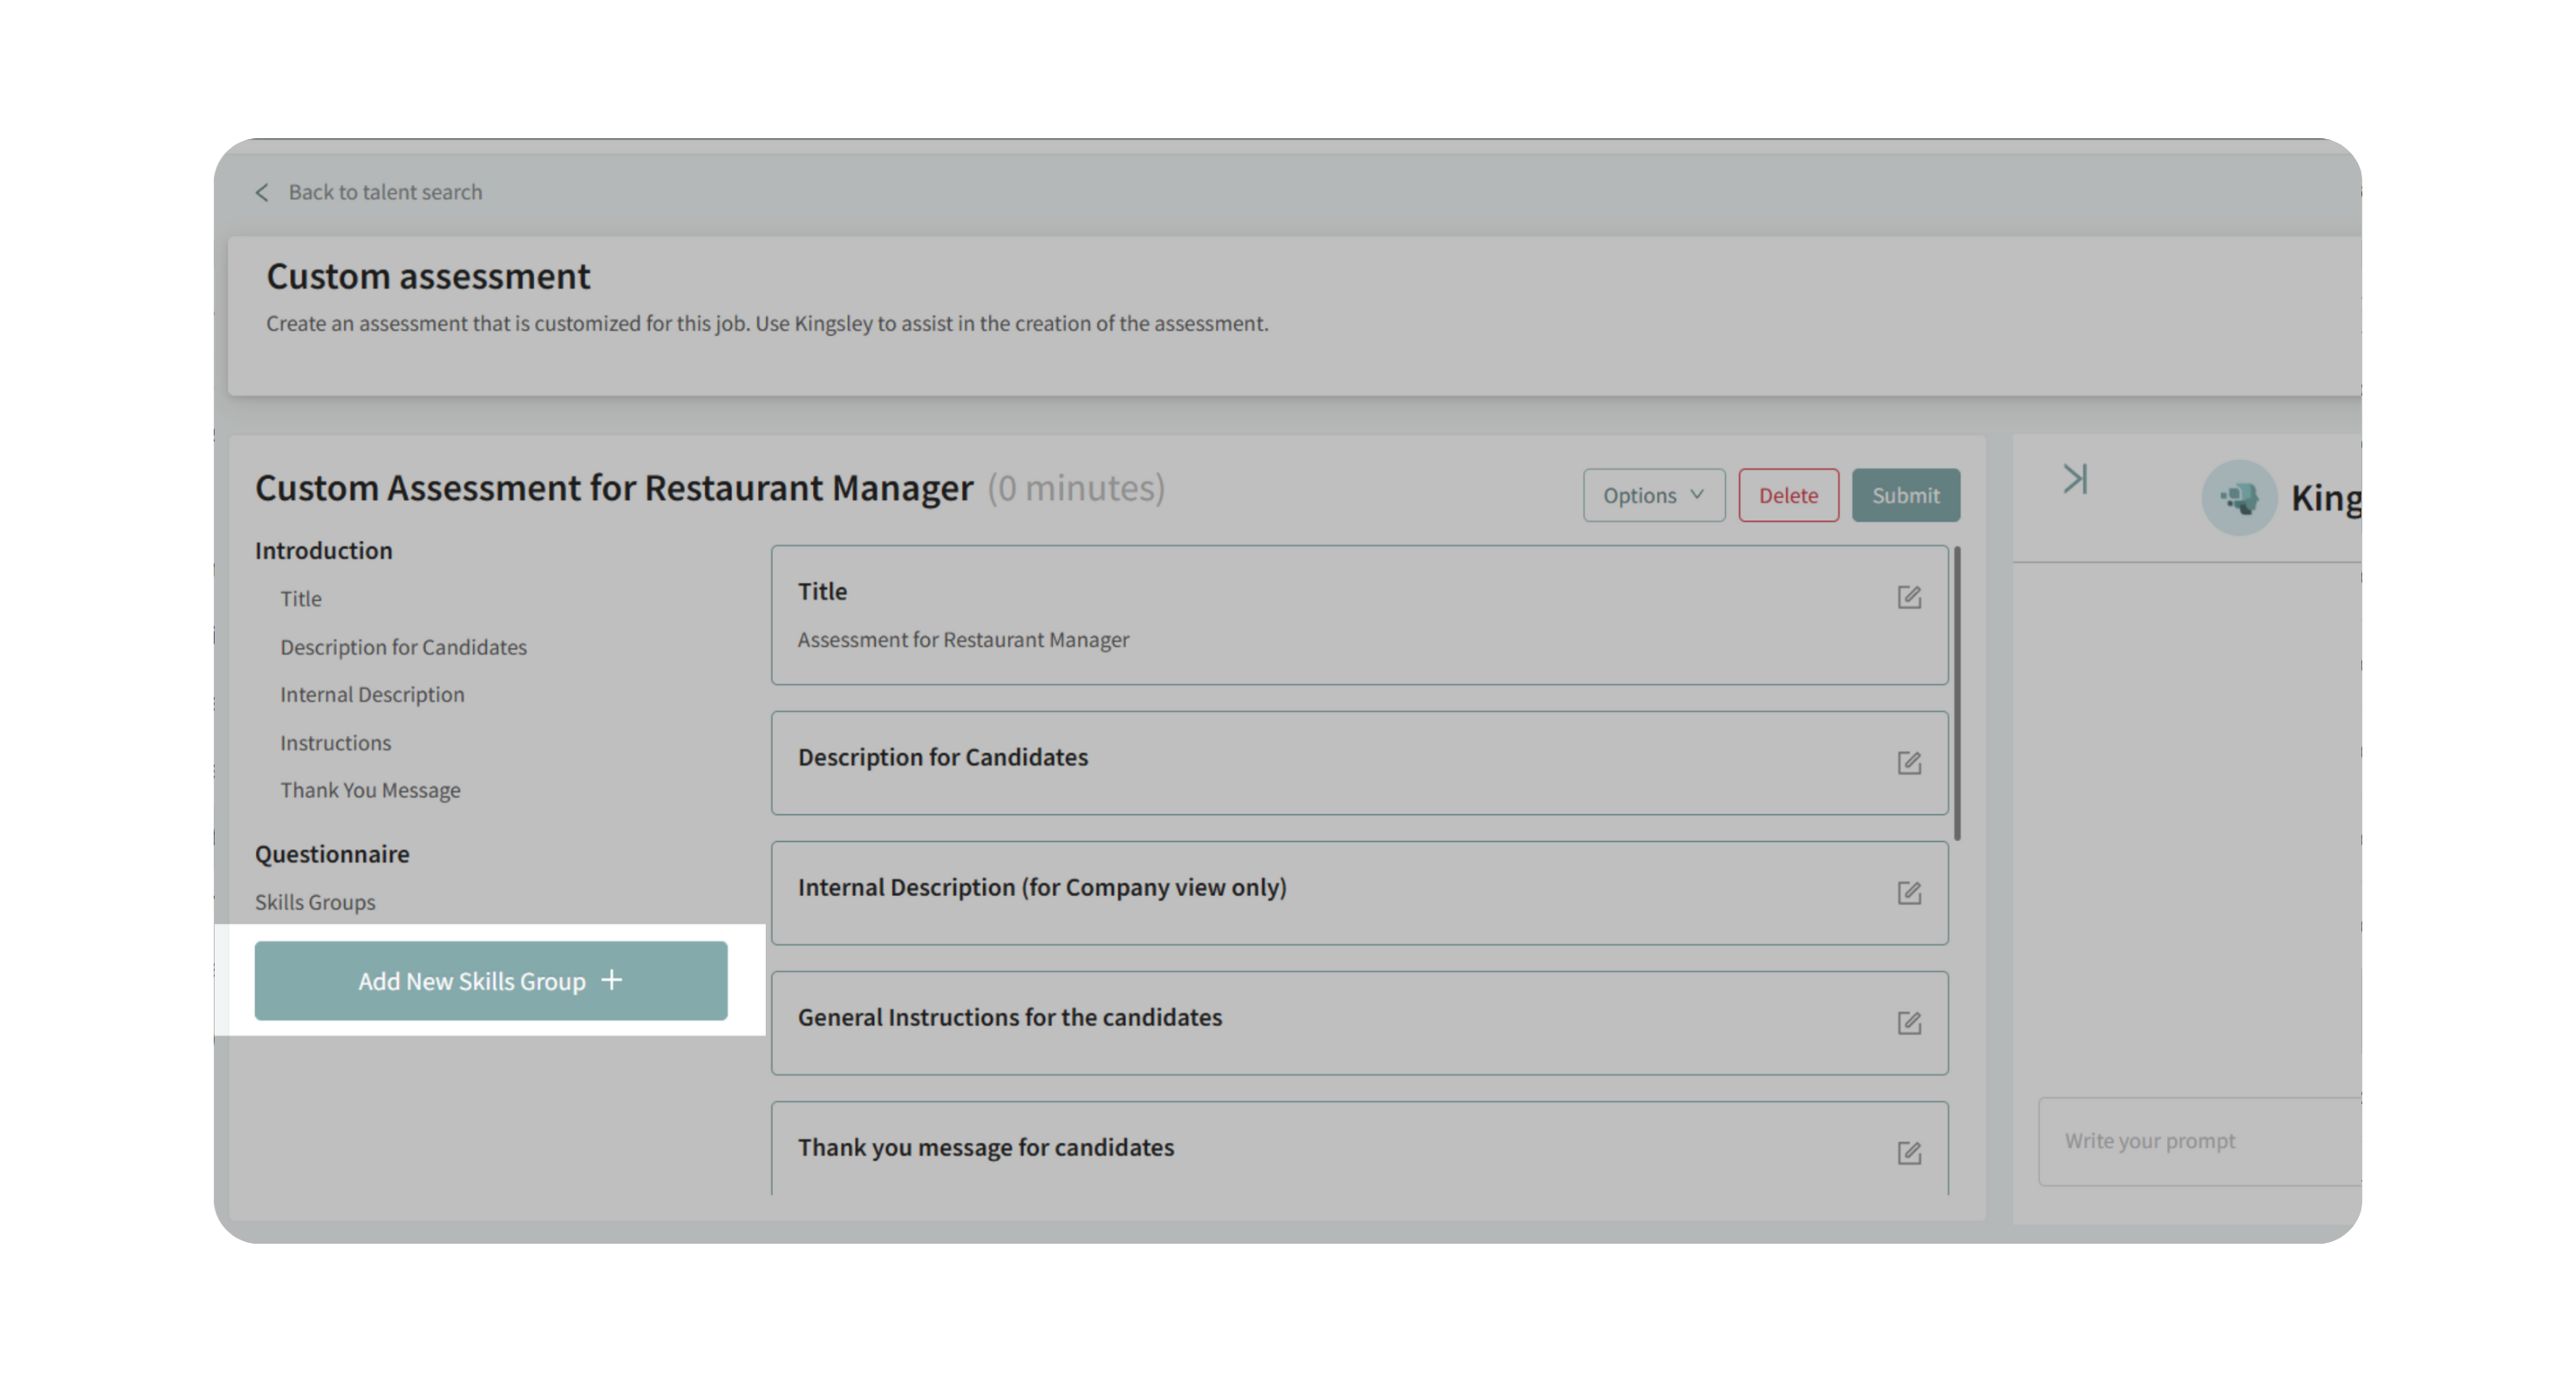
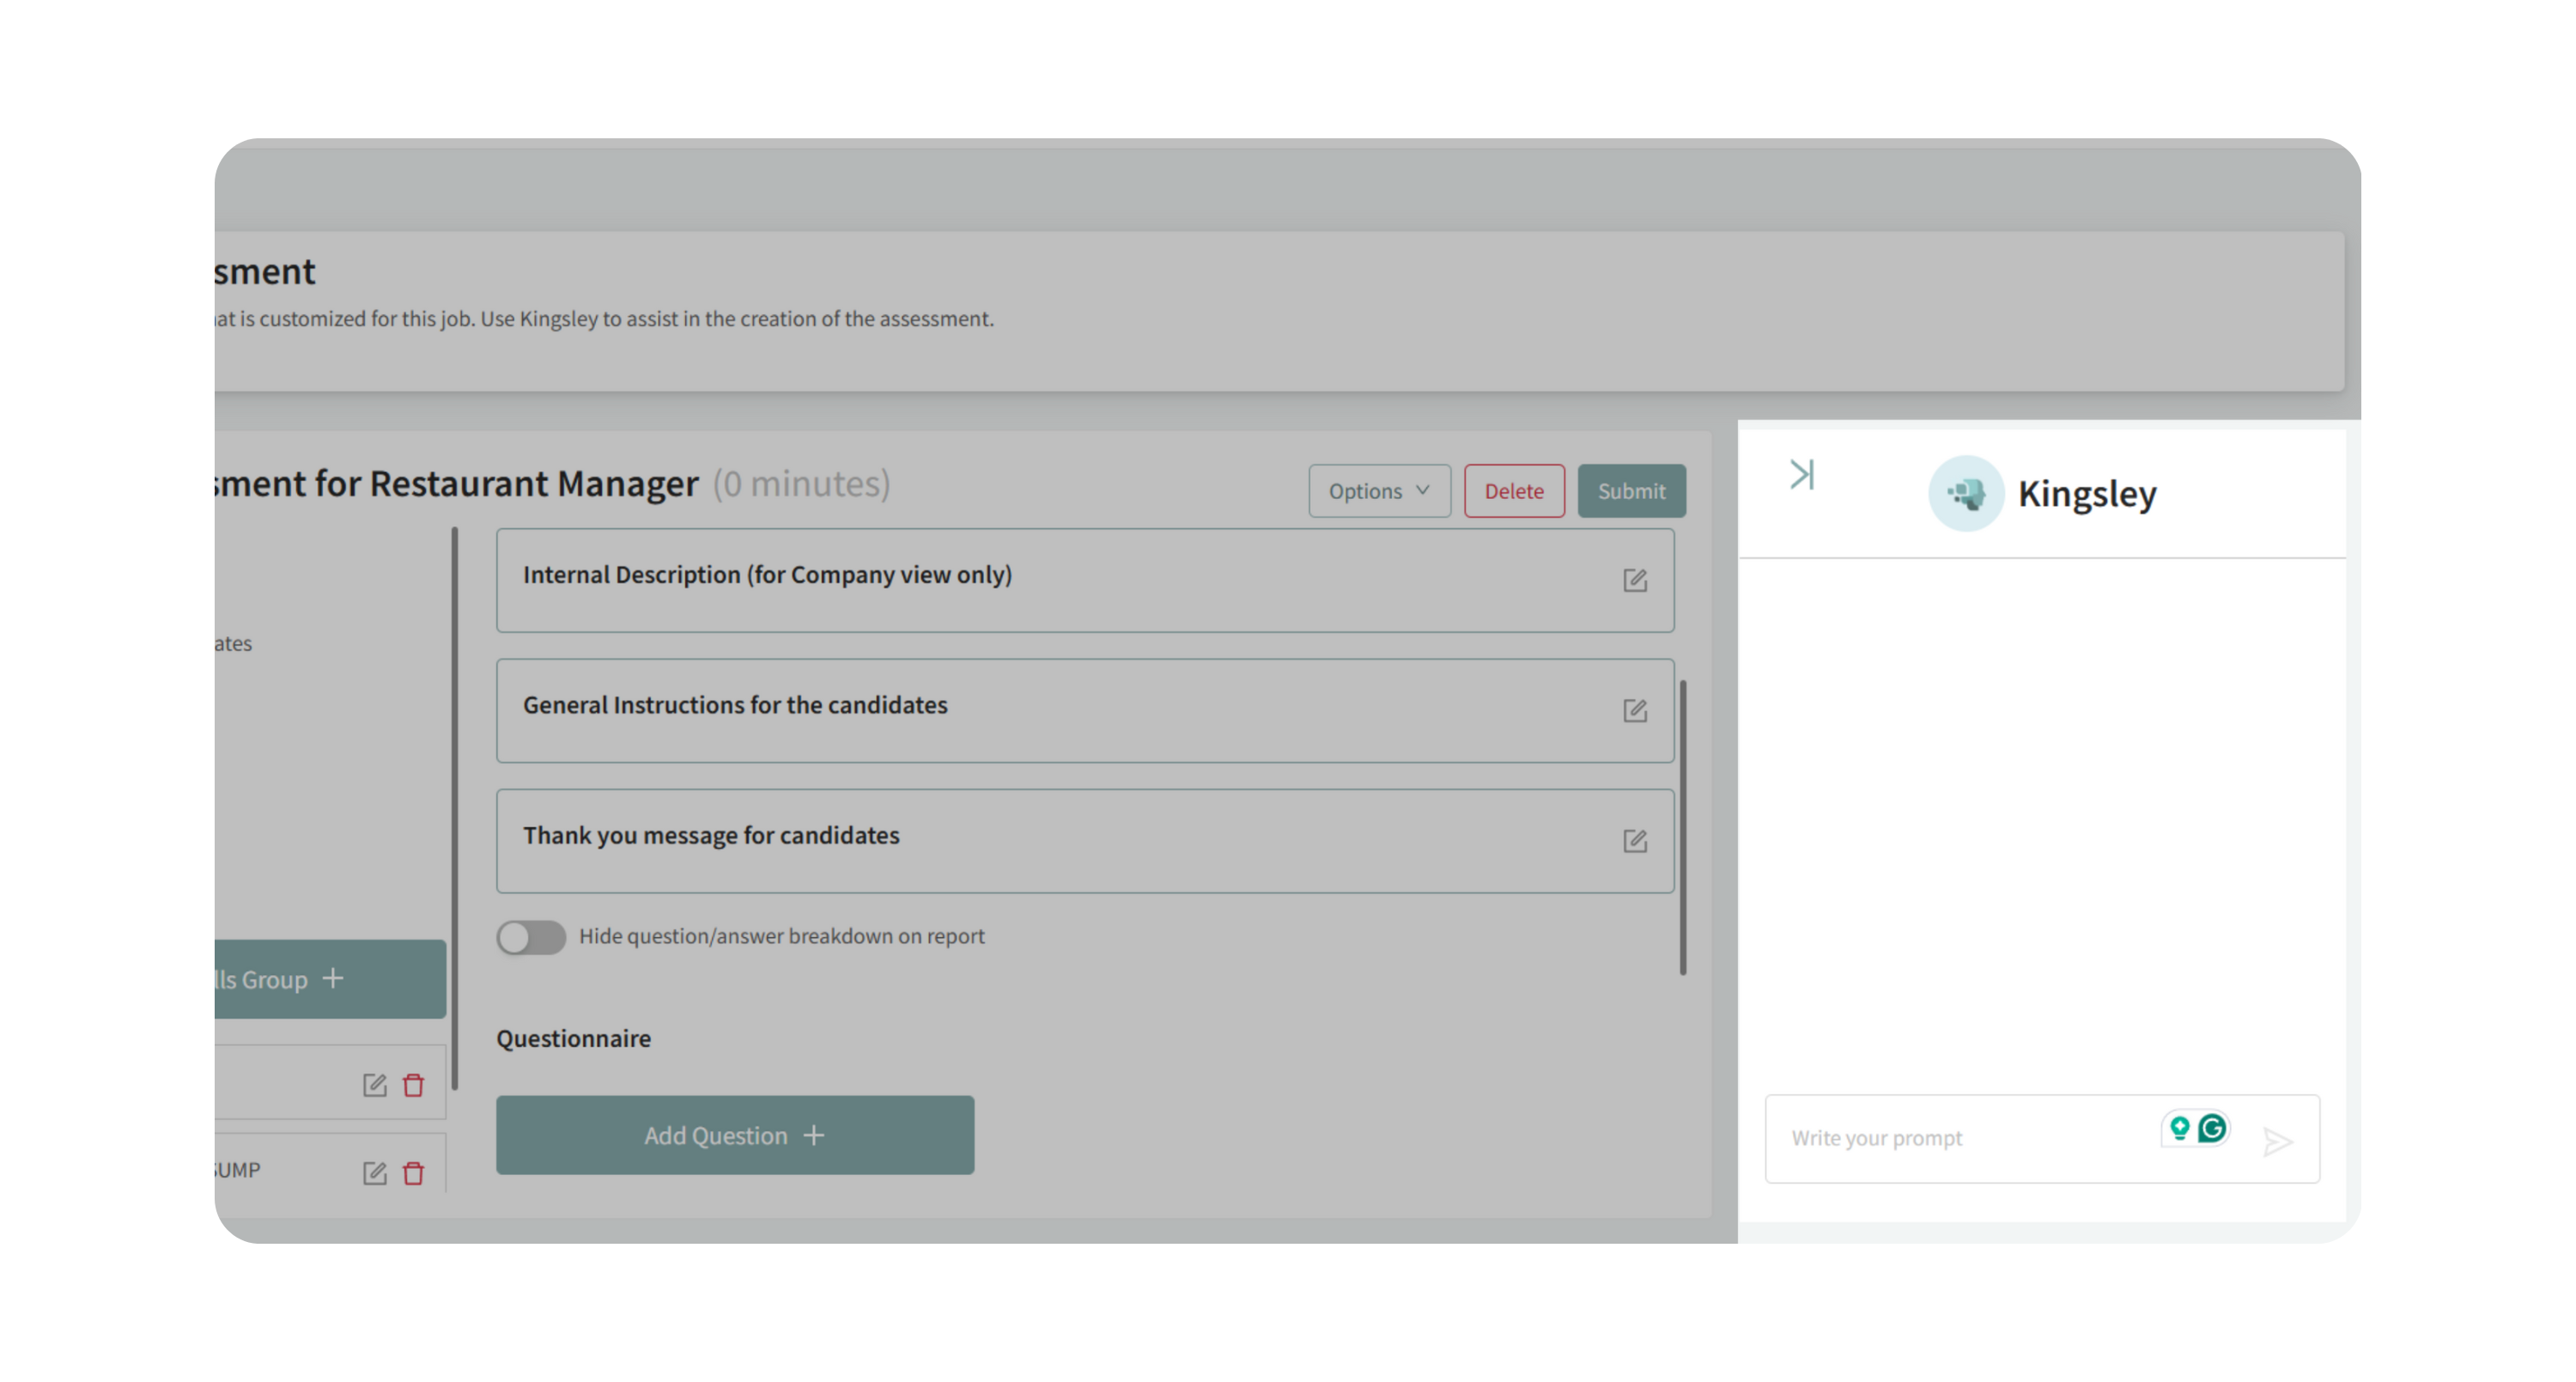
2. Enter Assessment Information
Fill in the key details that set expectations for candidates and your team:
- Title – Defaulted to the job title, but you can edit.
- Description for Candidates – A short summary visible to applicants before they begin.
- Internal Description – Notes visible only to your hiring team.
- General Instructions for the candidates – (Optional) Guidelines that apply across all questions.
- Thank you message for candidates – A closing note shown to candidates after completion.
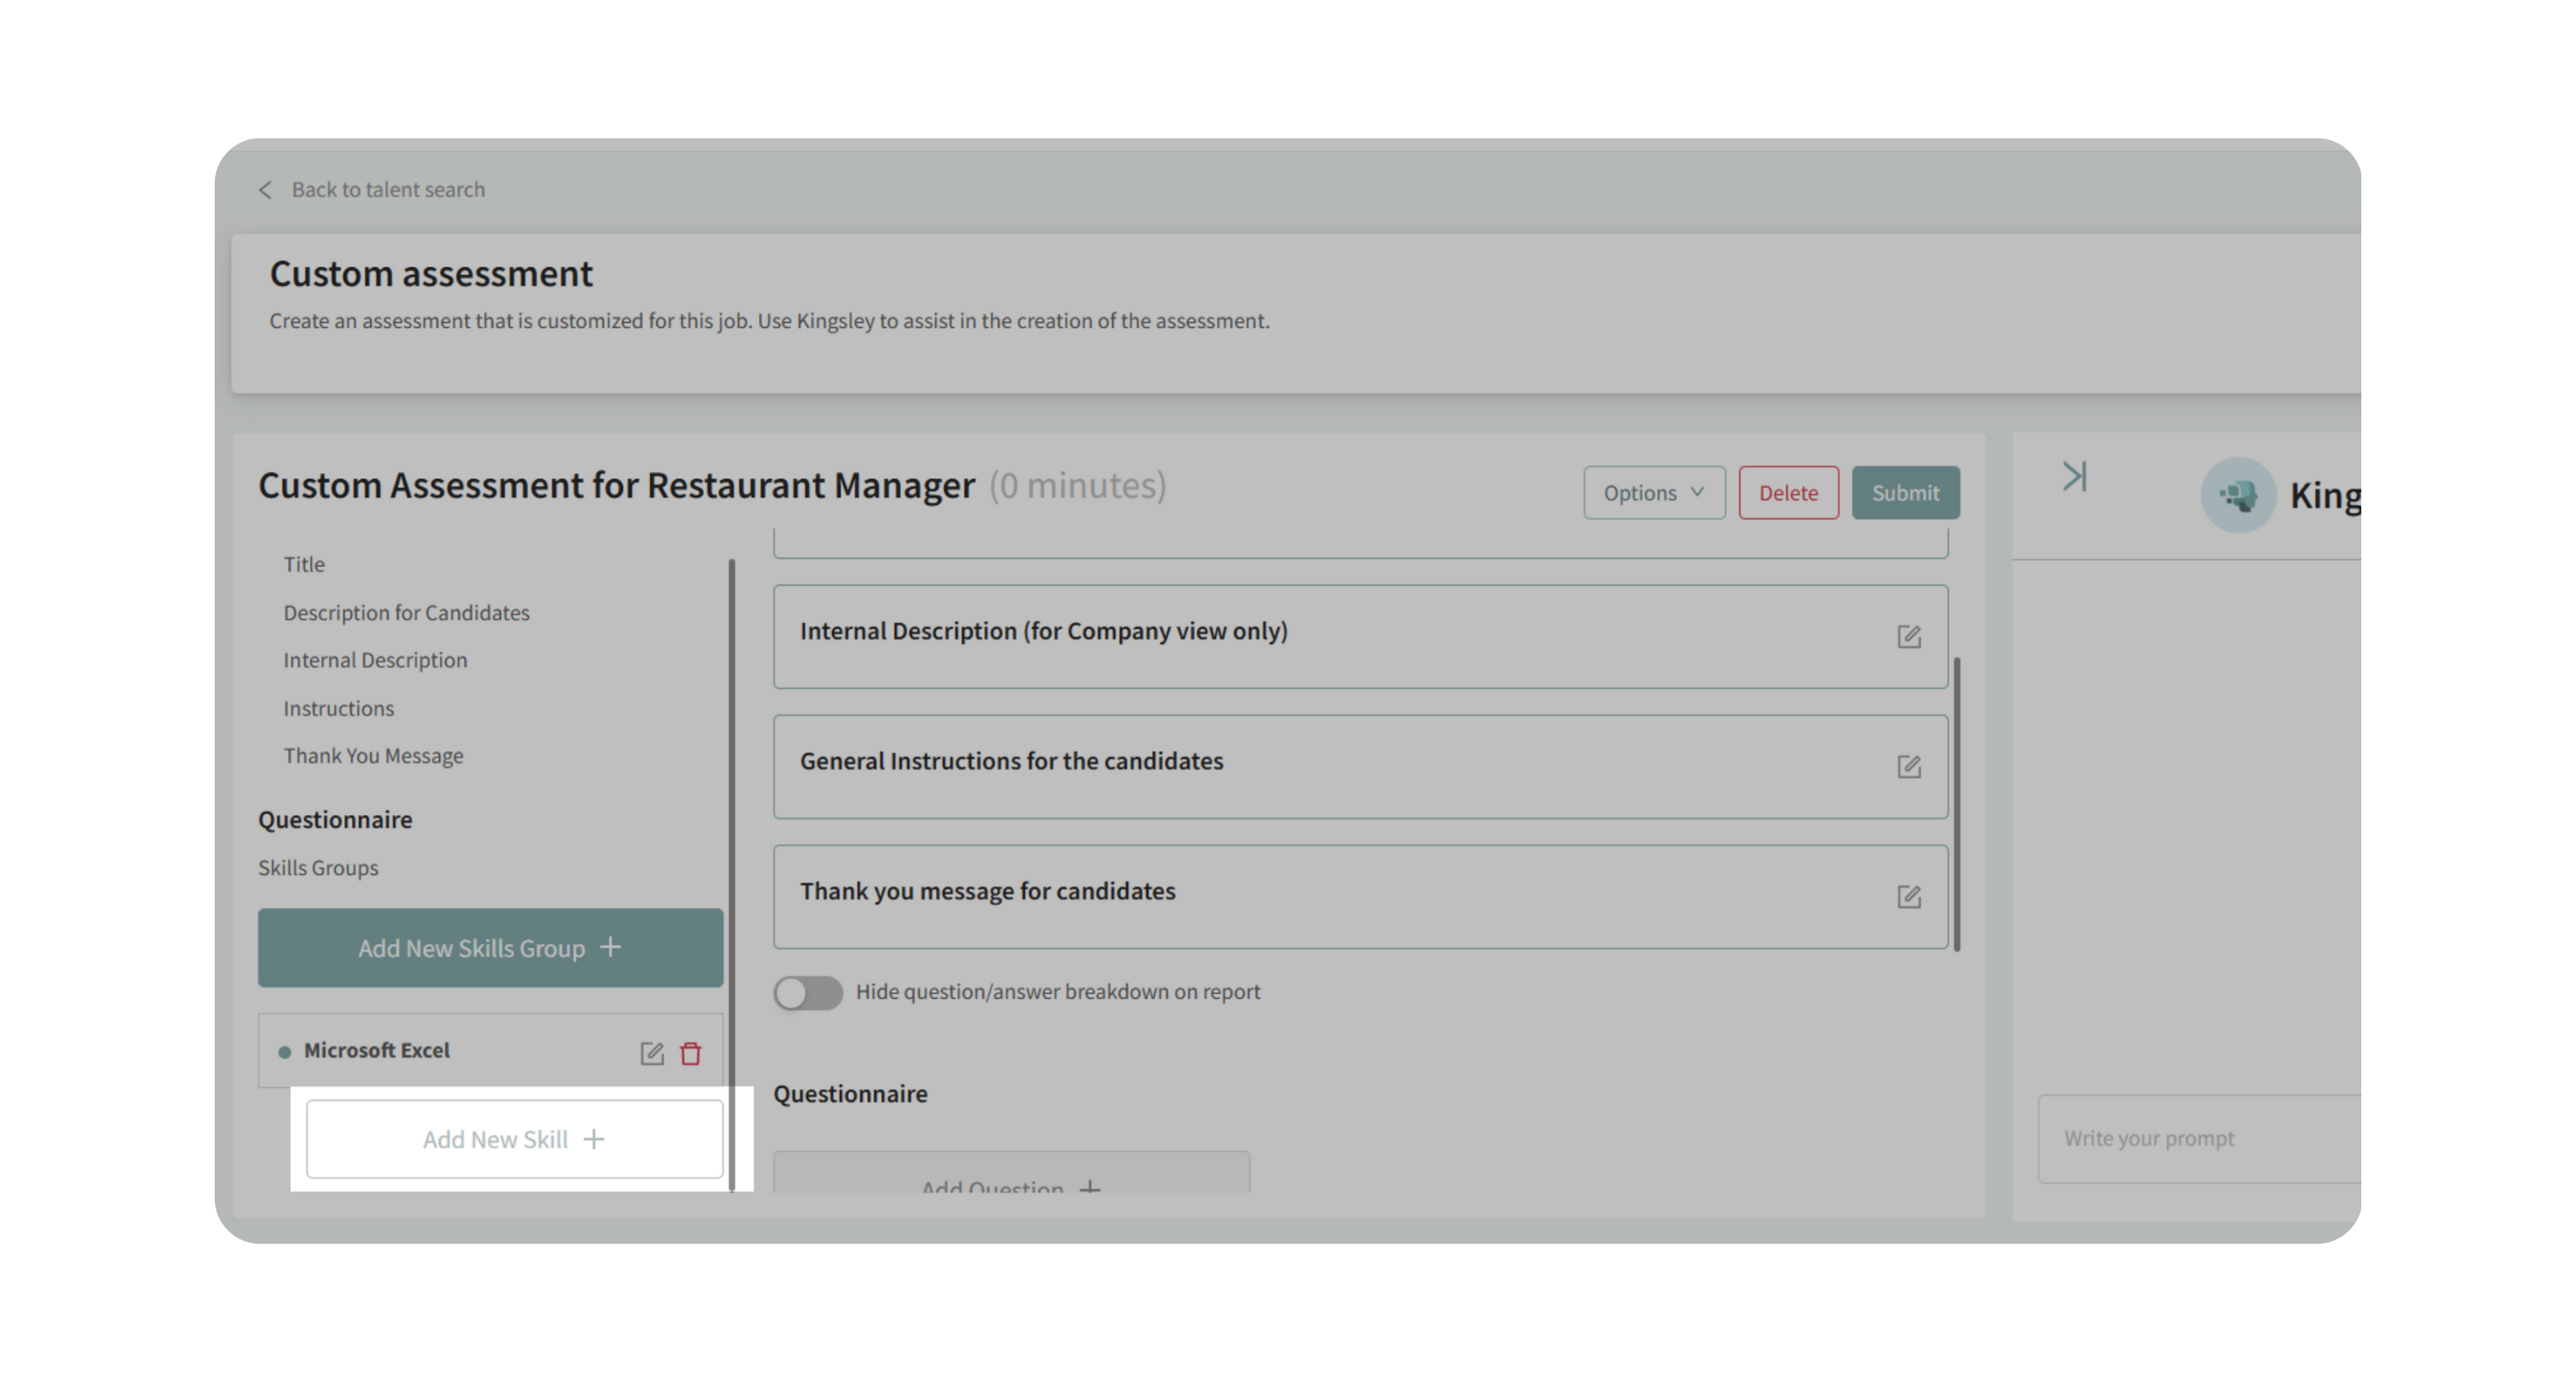
3. Create Skill Groups and Skills
- Click on Add New Skills Group to create skills group.
- Organize your assessment into skill groups (e.g., “Microsoft Excel,” “Tax Knowledge”).
- Add skills within each group (e.g., “VLOOKUP,” “SUMIF”) and write descriptions to clarify what’s being measured.
4. Add Questions
- Click on Add Question.
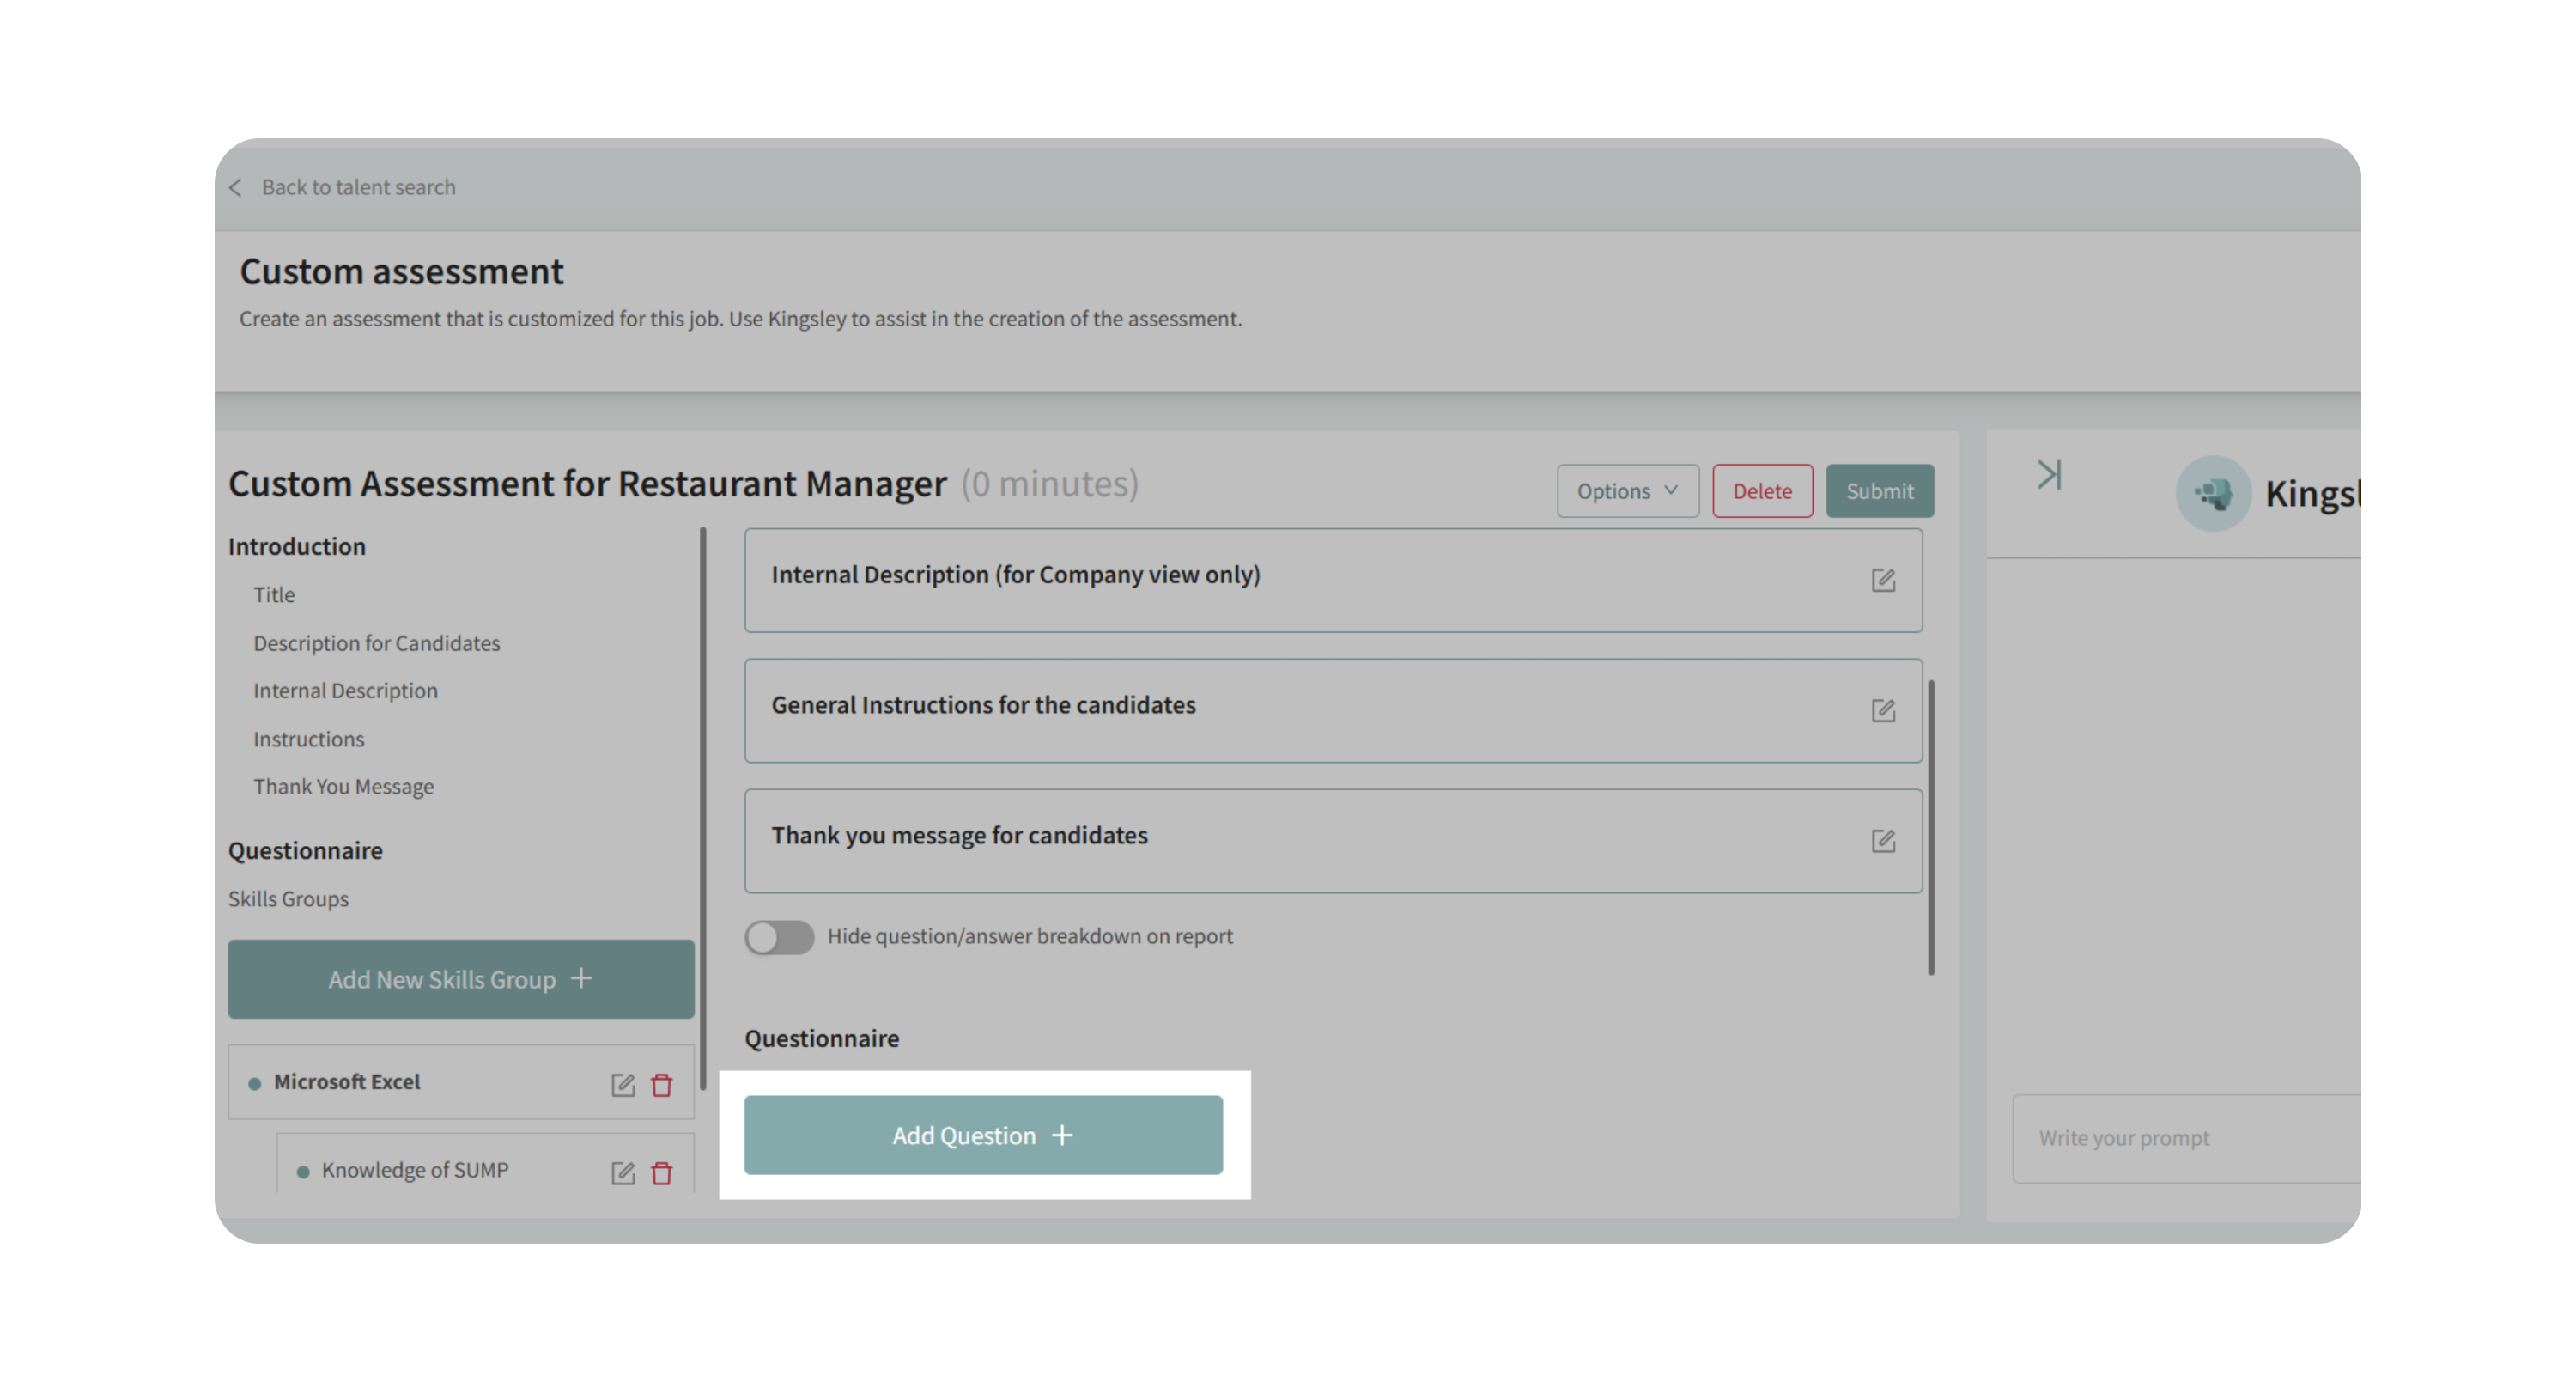
- For each skill you can create questions and assign them to the appropriate group.
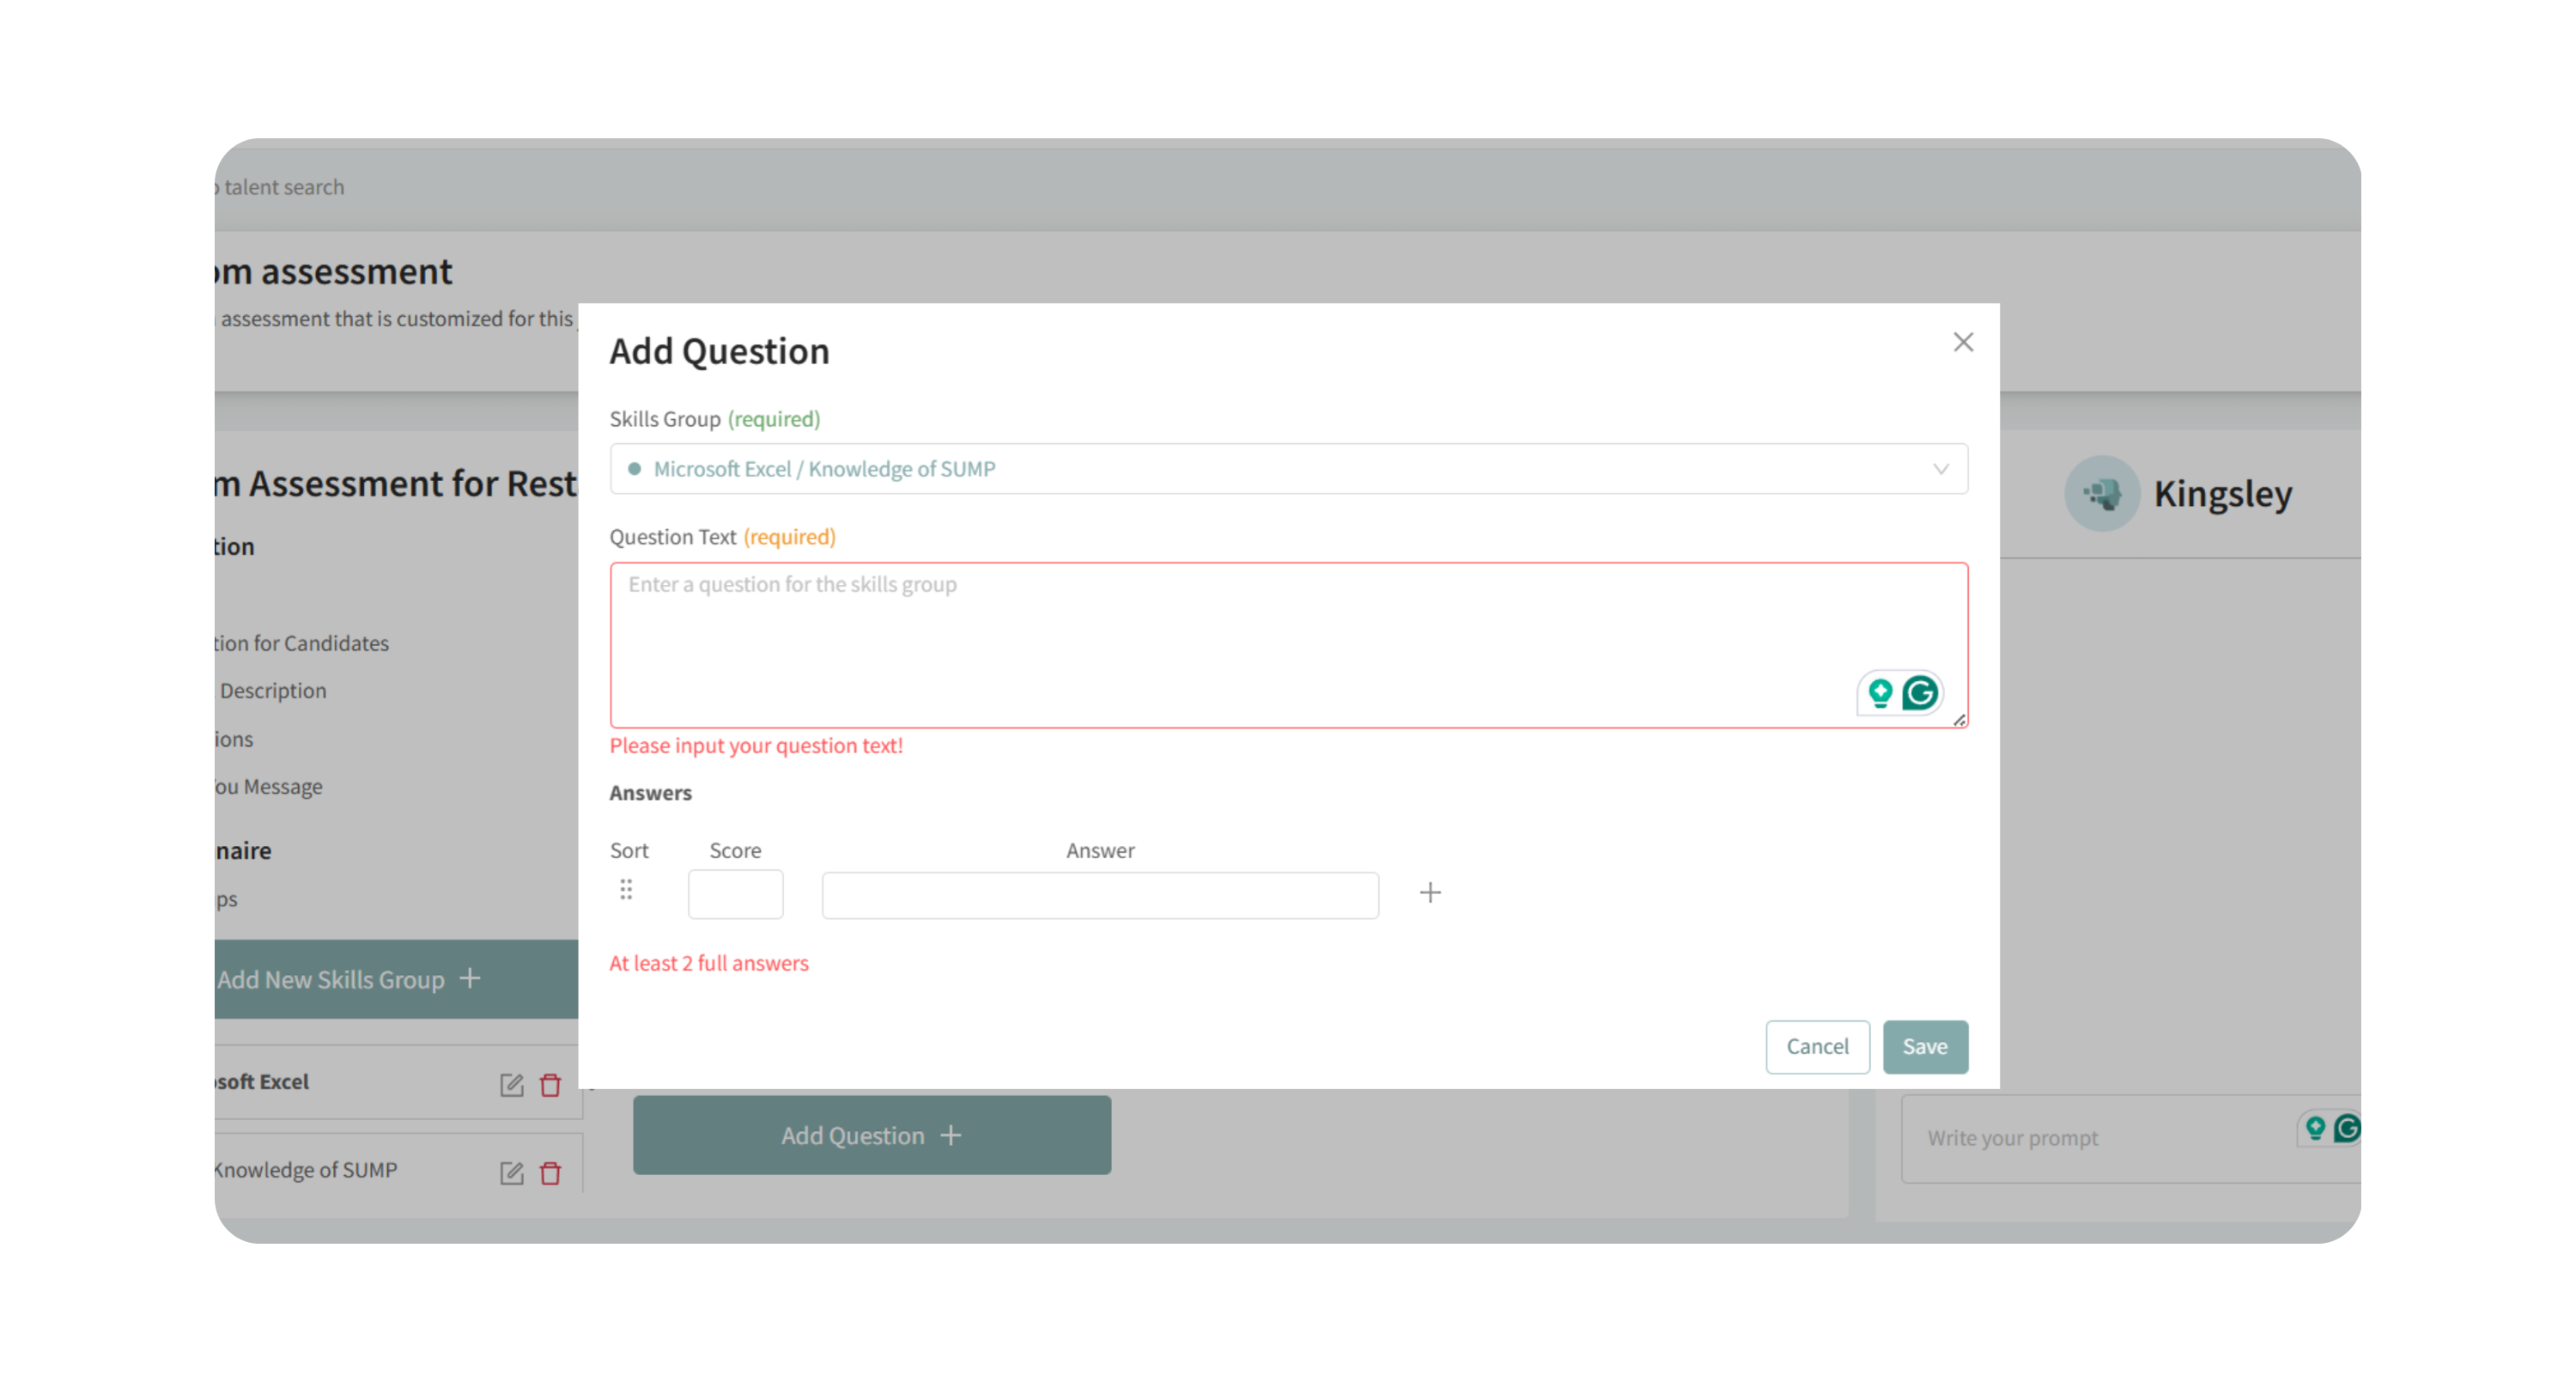
- Provide answer options and assign point values (e.g., 1 point for correct, 0 for incorrect).
- Preview candidate view to confirm formatting.
5. Generate with Kingsley (AI)
- On the right side, write your prompt in Kingsley and Kingsley will analyze your job description.
- Kingsley creates skill groups, skills, and sample questions automatically.
- Review the suggested assessment, edit as needed, and approve.
6. Submit and Send
- Click Submit once your assessment is ready.
- Add it to your candidate workflow and send it as a required step in the hiring process.
7. Review Candidate Results
- Open candidate profile and click on Assessments tab.
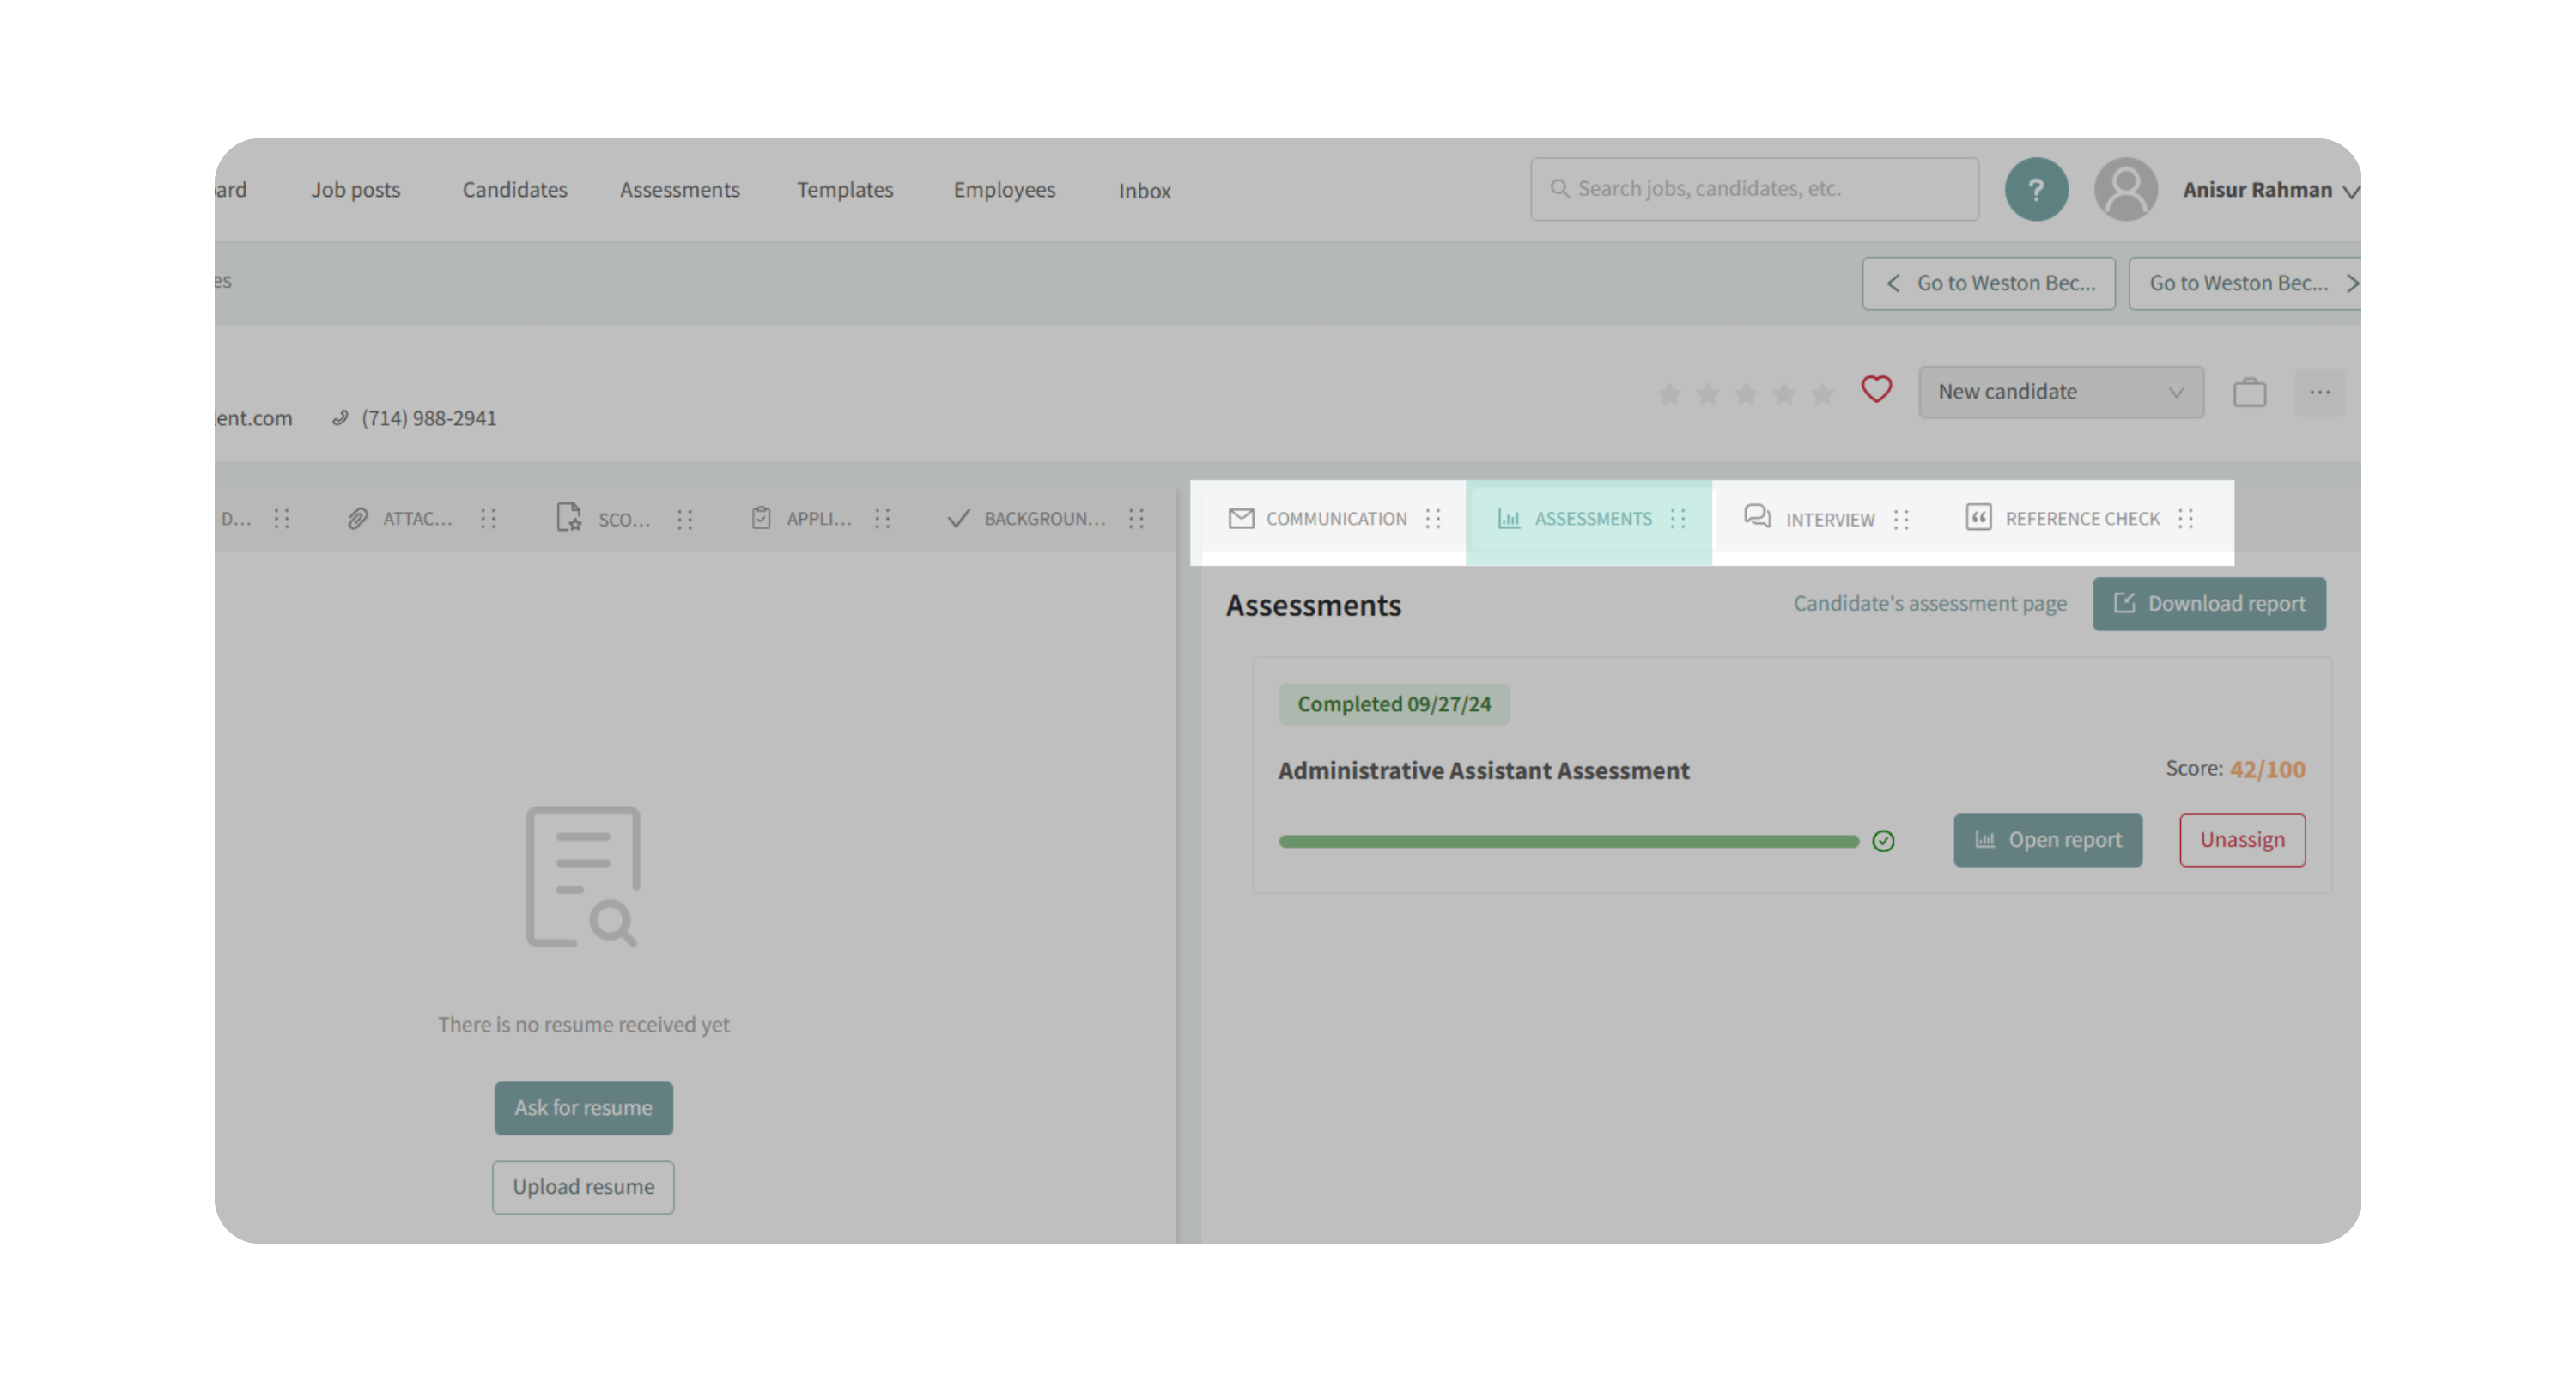
- Then, click on Open report or Download Report.
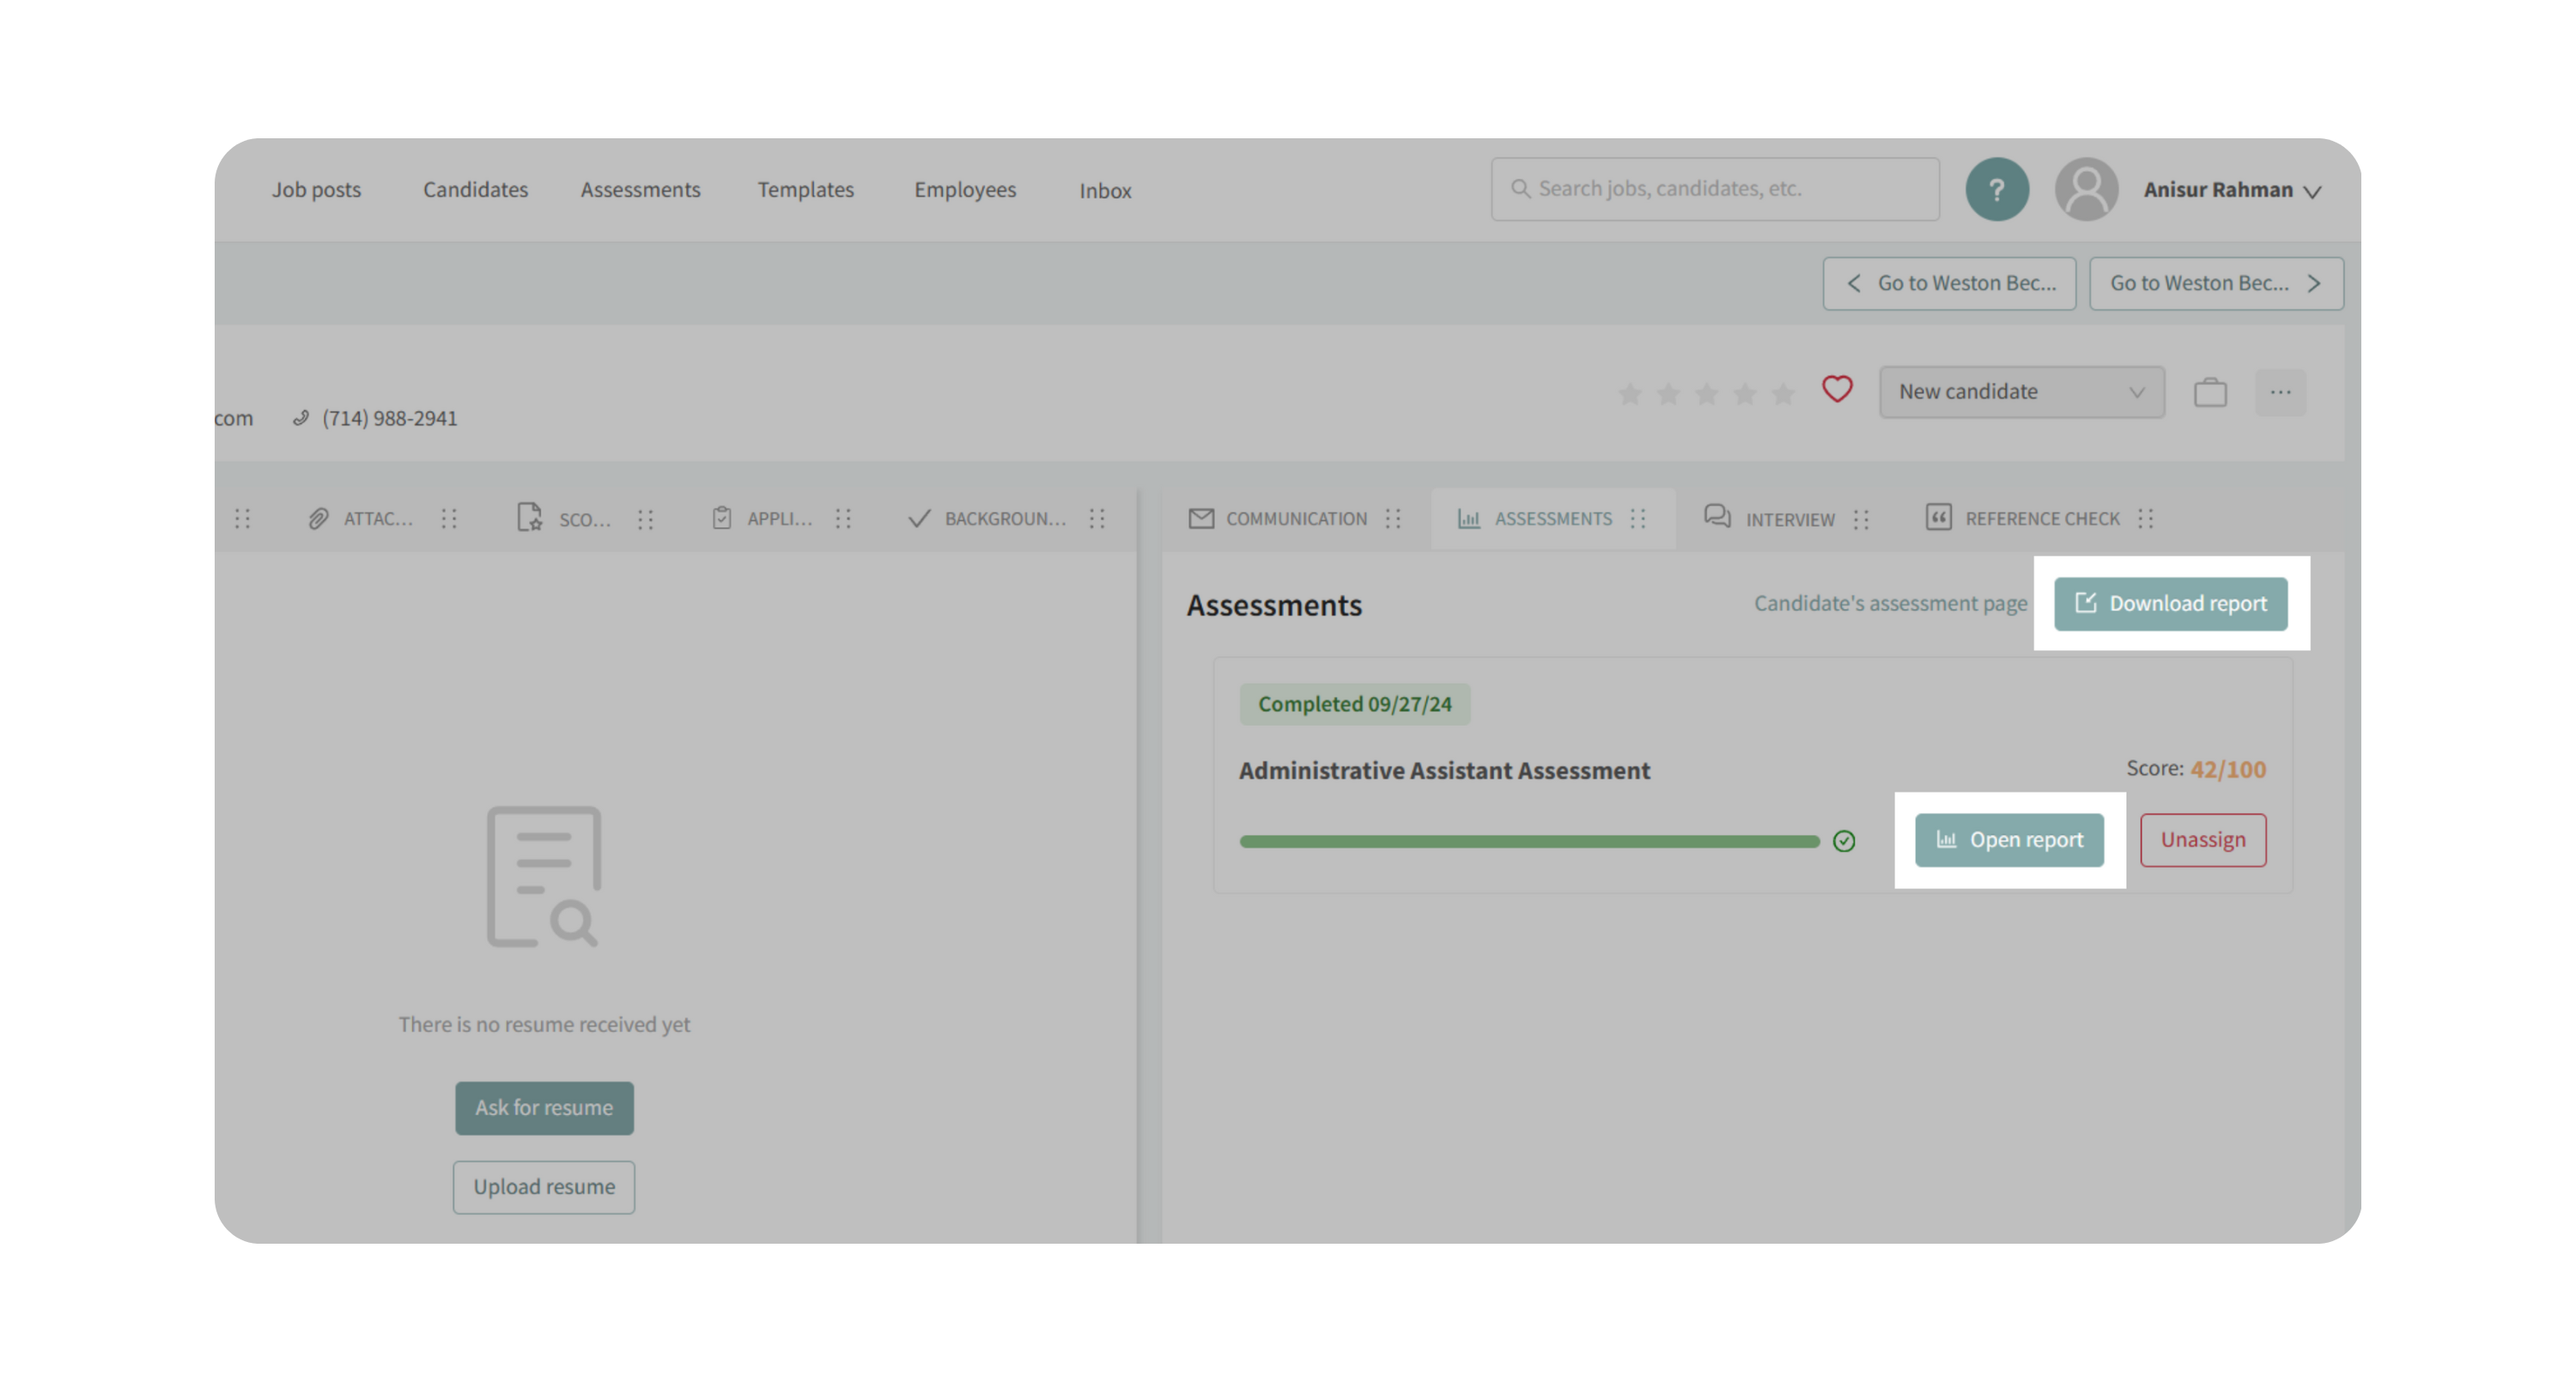
- Reports include:
- Time taken to complete the assessment.
- Scores broken down by skill group and skill.
- (Optional) Question-level breakdowns, which you can enable or disable.
Why This Matters
- Ensures your hiring process can measure role-specific knowledge not covered by standard assessments.
- Adds flexibility when hiring for niche roles or unique skill sets.
- Maintains fairness with structured scoring while customizing to your organization’s needs.
Use Cases
- Building an Excel-heavy assessment for an accounting role.
- Testing regulatory knowledge for compliance-focused positions.
- Creating a technical test for niche software not included in the assessment library.
Best Practices
- Start with Kingsley’s AI generation to save time, then refine manually.
- Keep assessments focused—avoid overly long tests that may cause candidate drop-off.
- Write clear candidate instructions and thank you messages to improve applicant experience.
- Group related skills together to make reports easier to interpret.
What Happens Next
Once a Custom Assessment is saved:
- It appears in the candidate’s profile under the Assessments tab.
- Candidates complete it as part of your hiring flow.
- Results and scoring are stored for side-by-side comparisons across applicants.
- You can reuse assessments by editing or cloning them for future roles.