Use Candidate Rejection Categories
Overview
Rejection categories let you specify why a candidate was rejected at any stage of your hiring pipeline. Instead of using one generic “Rejected” status, you can add custom reasons such as “Candidate Withdrew,” “Not Qualified,” or any labels that make sense for your workflow.
How to Use Candidate Rejection Categories:
1. Access Settings
- Log into your Discovered account.
- Click your name in the top navigation bar.
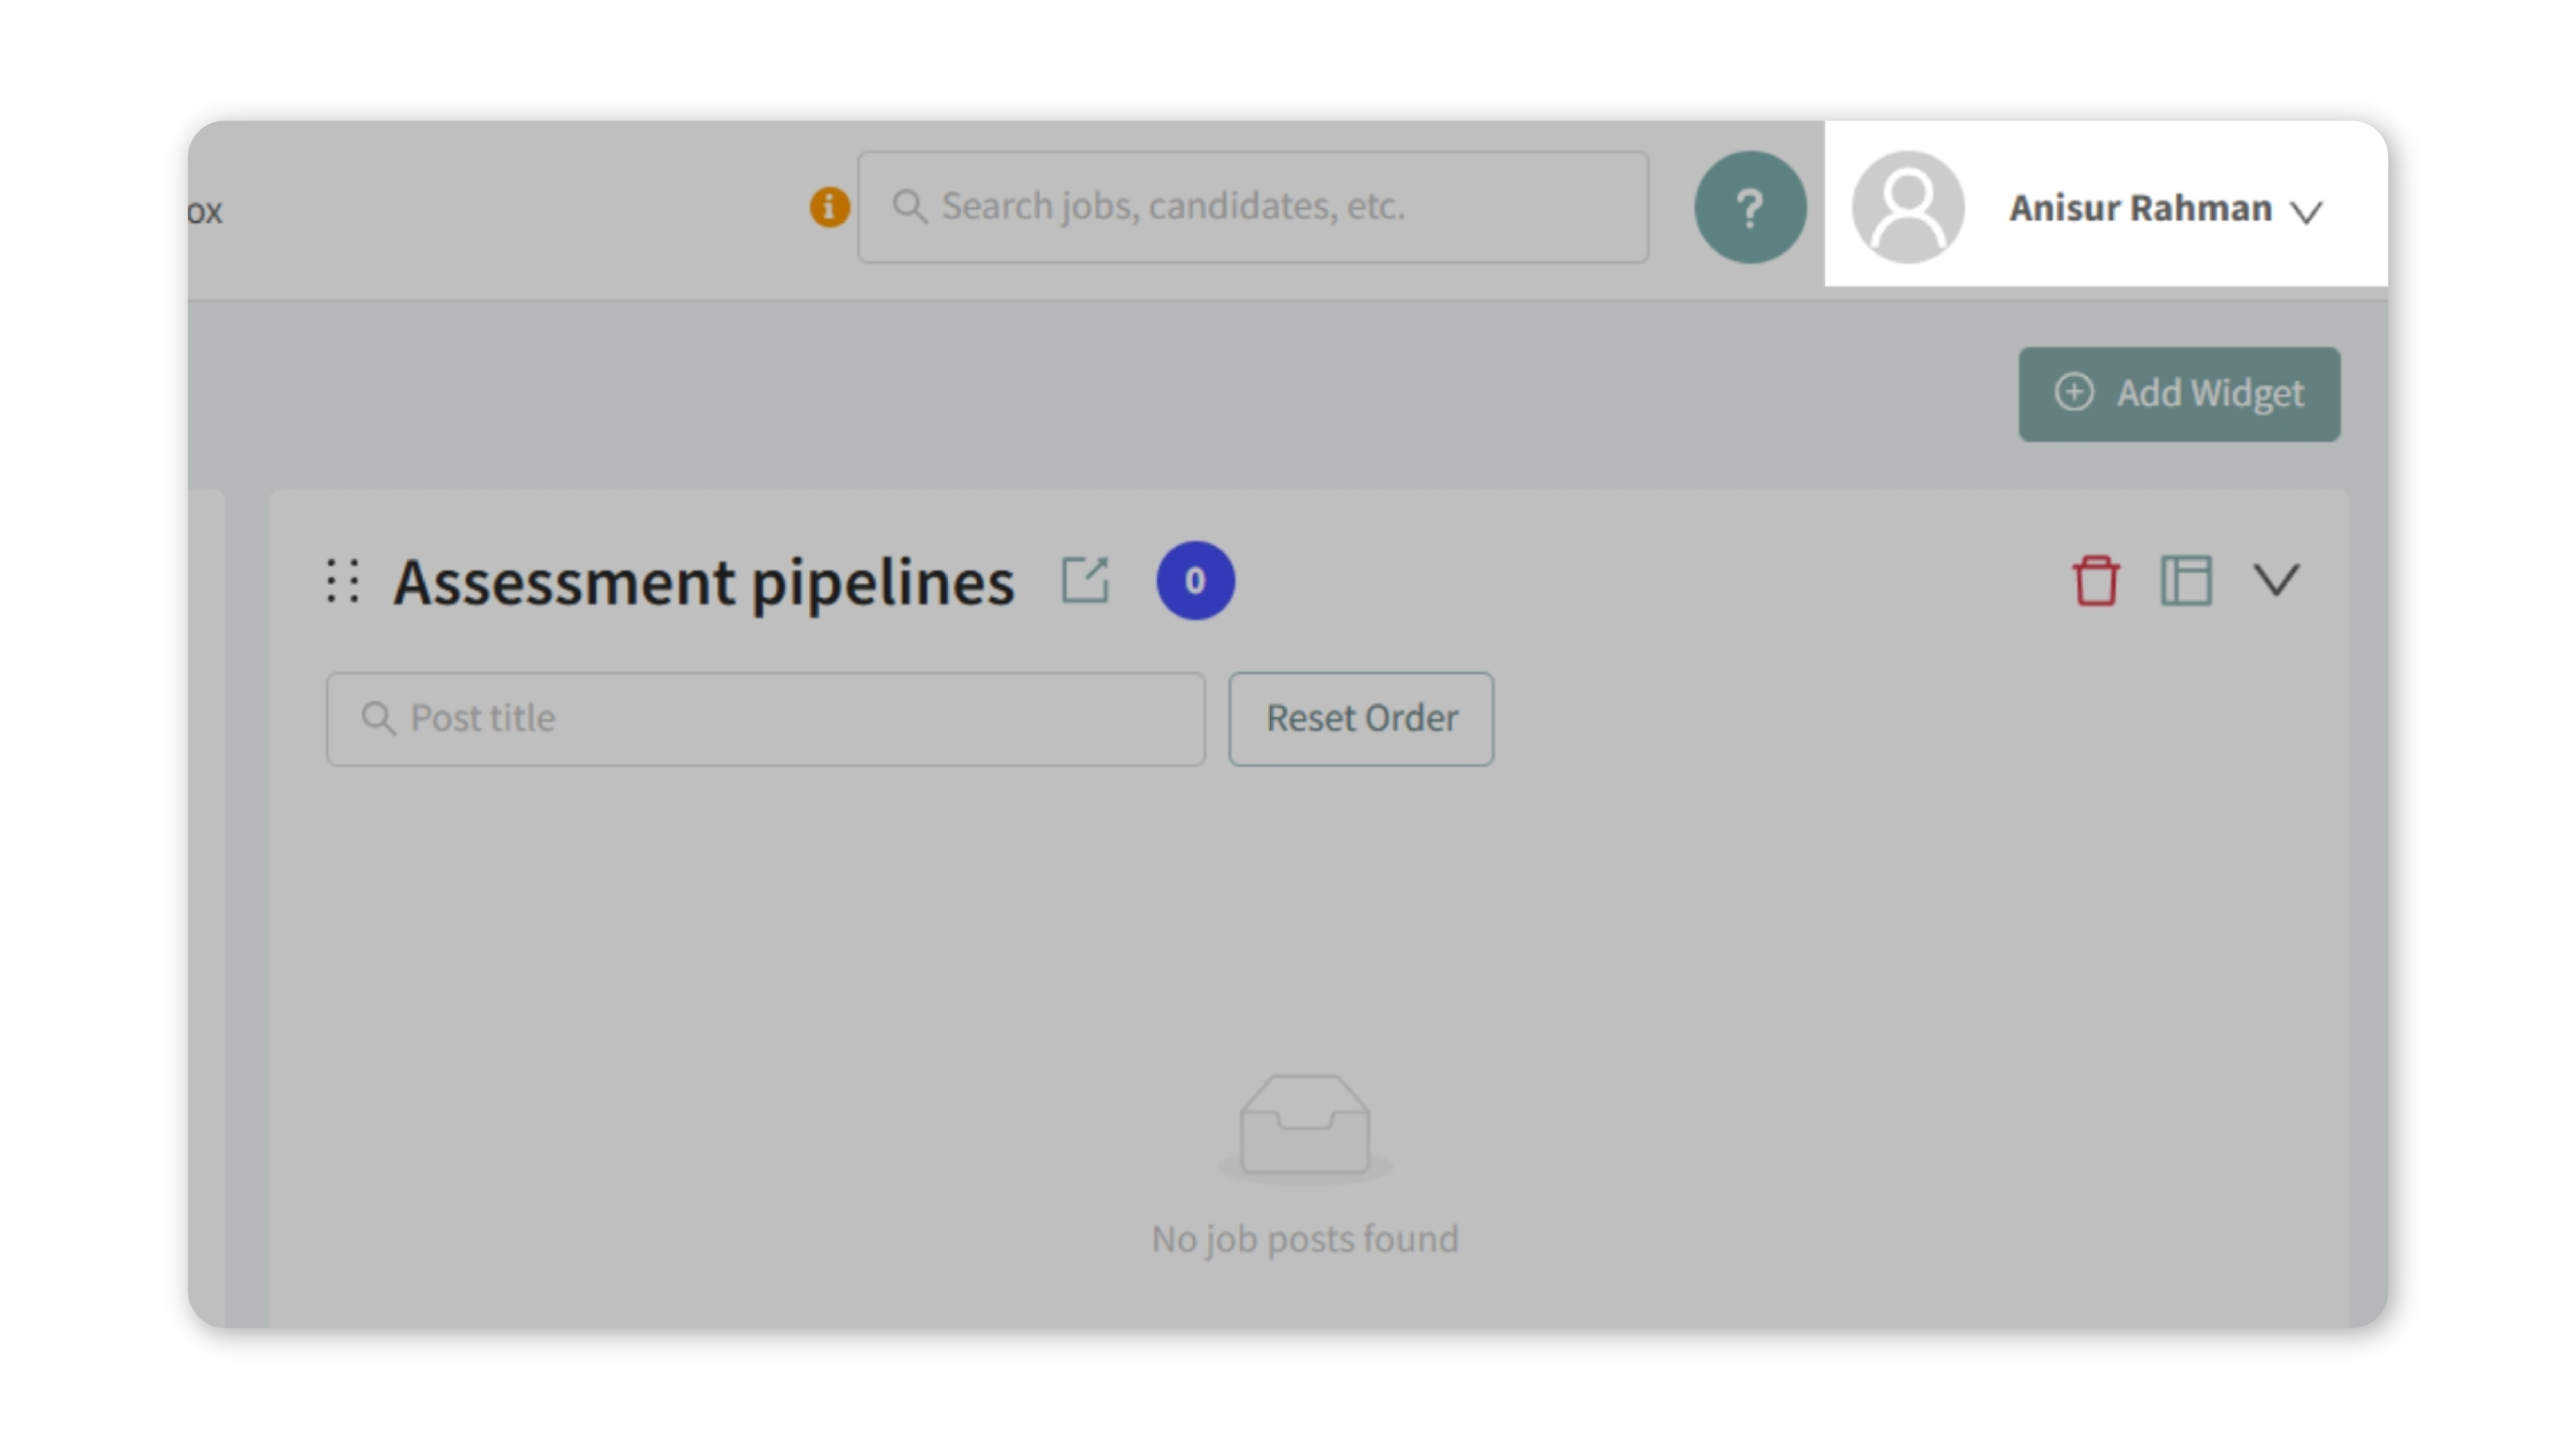
- Select Settings.
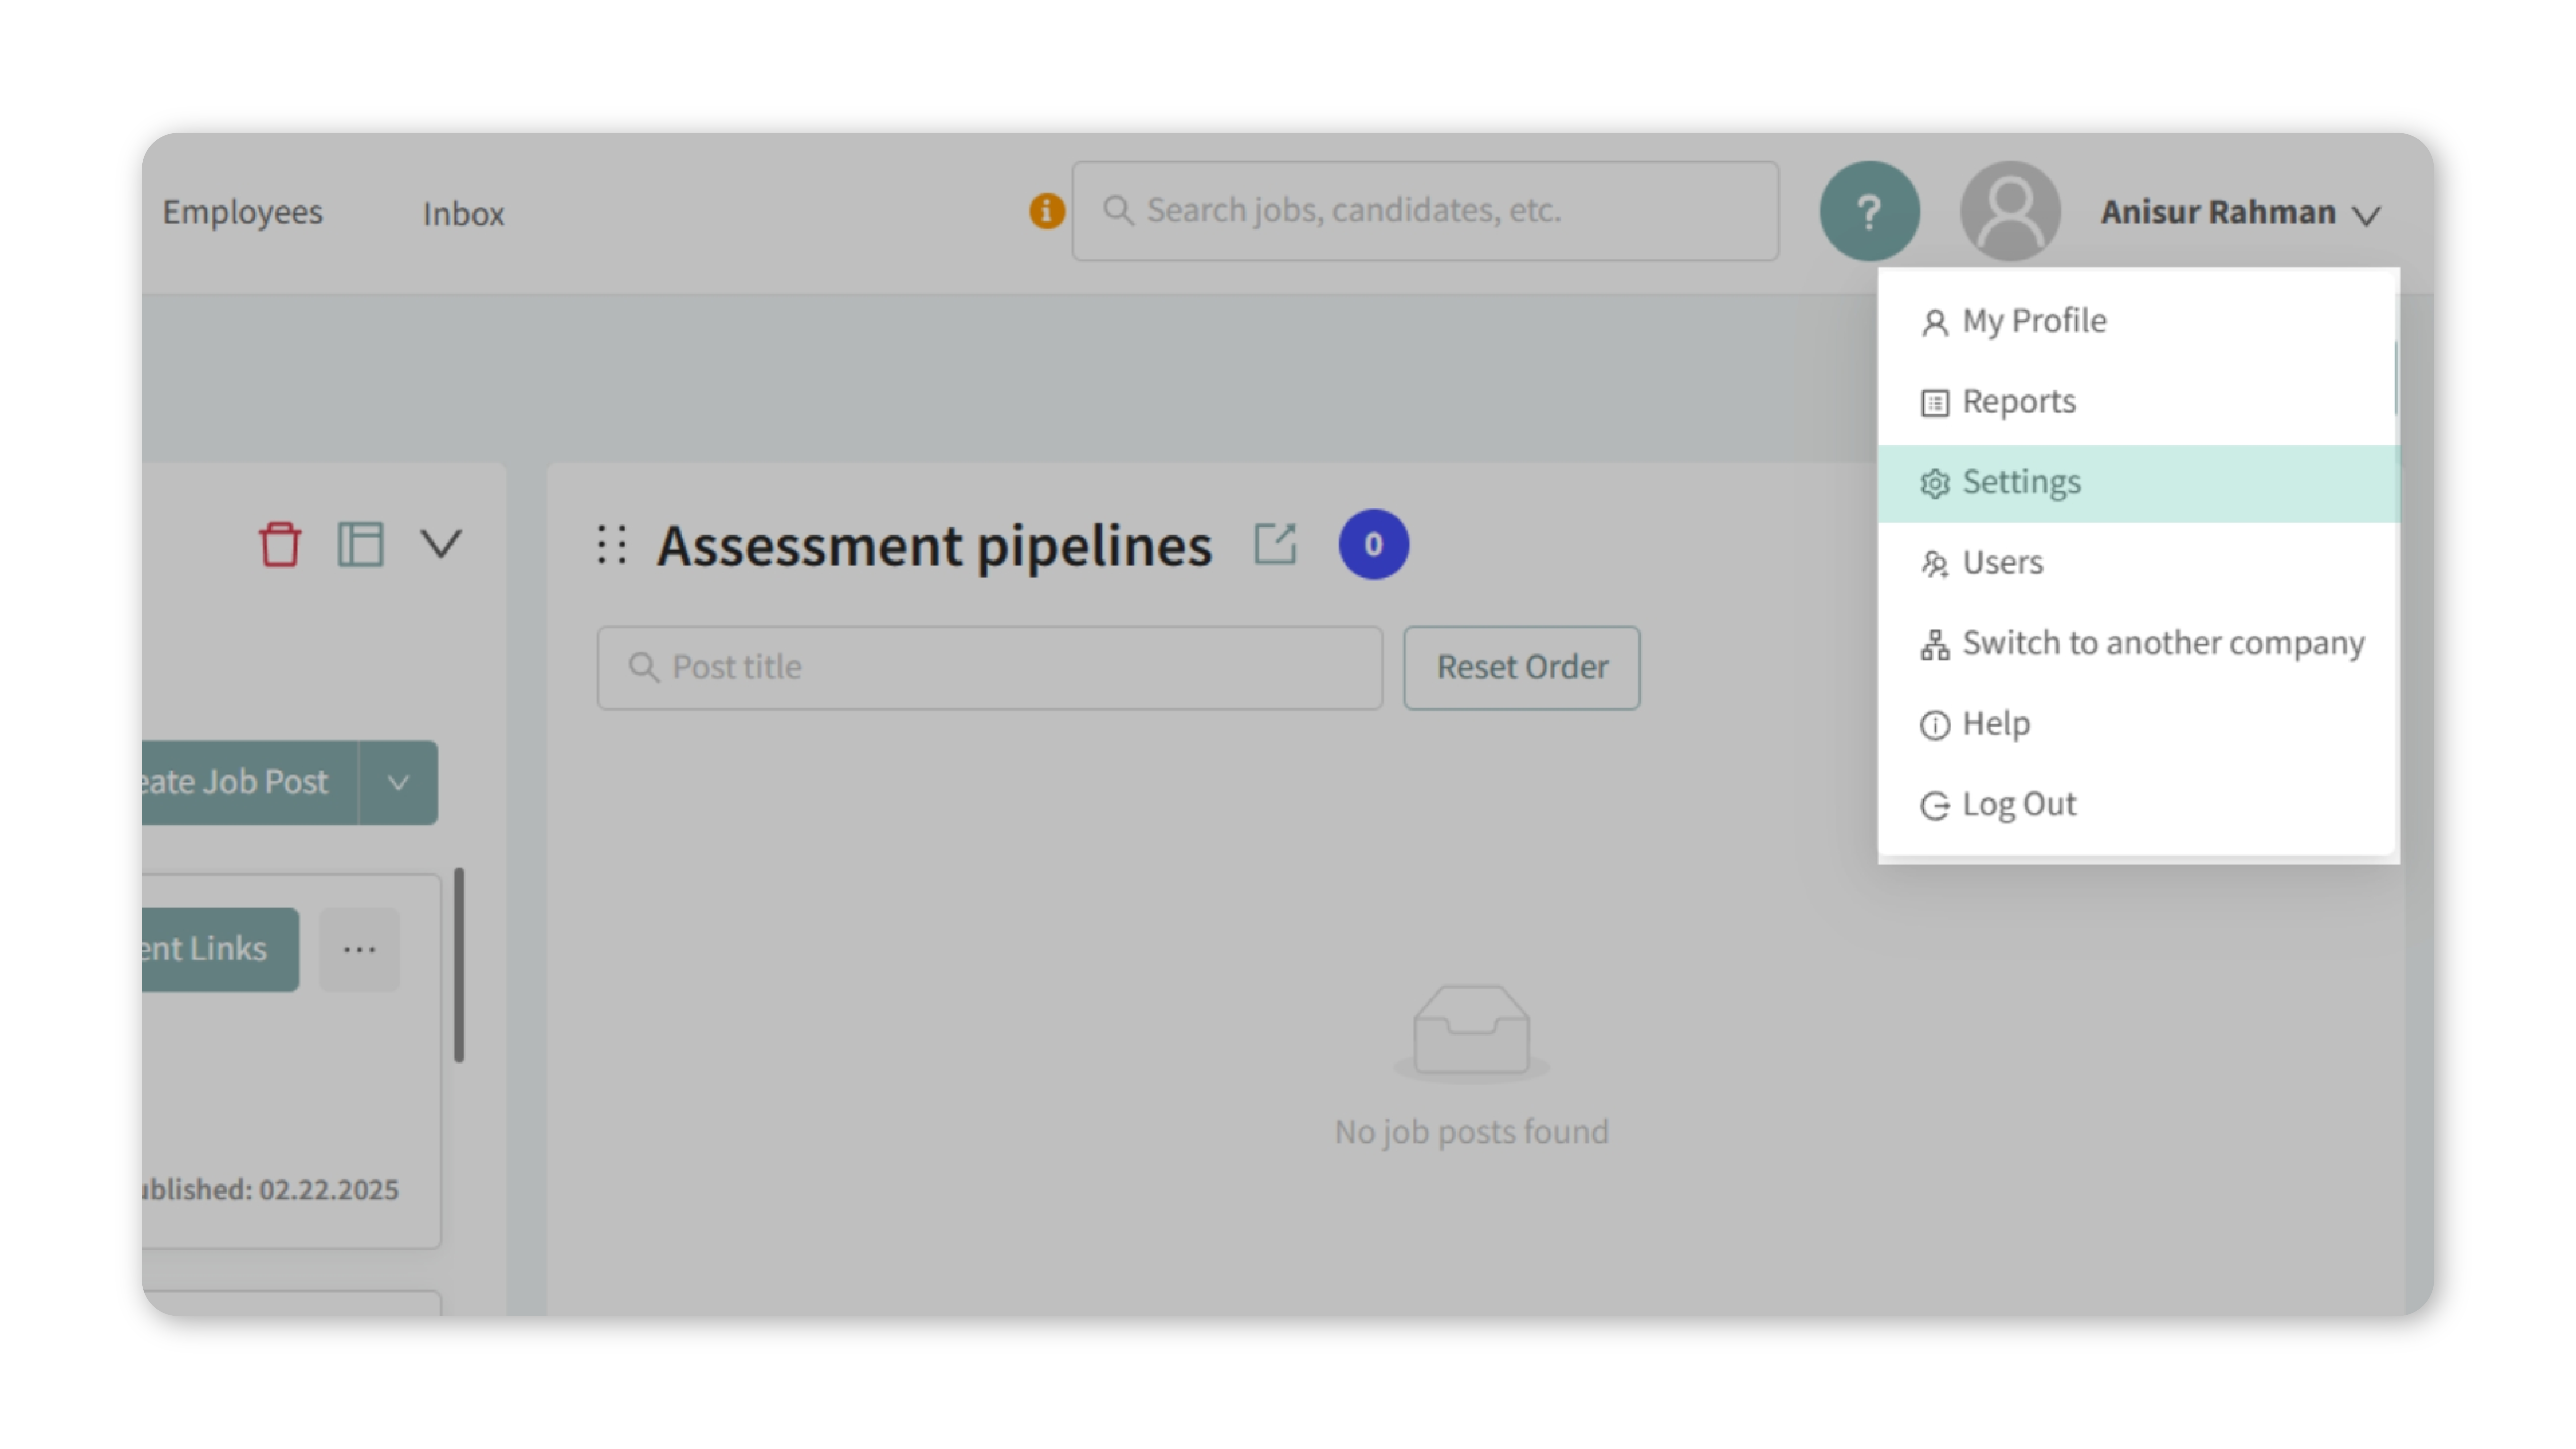
2. Open Status Pipeline Settings
- In Settings, click Statuses Pipeline Settings.
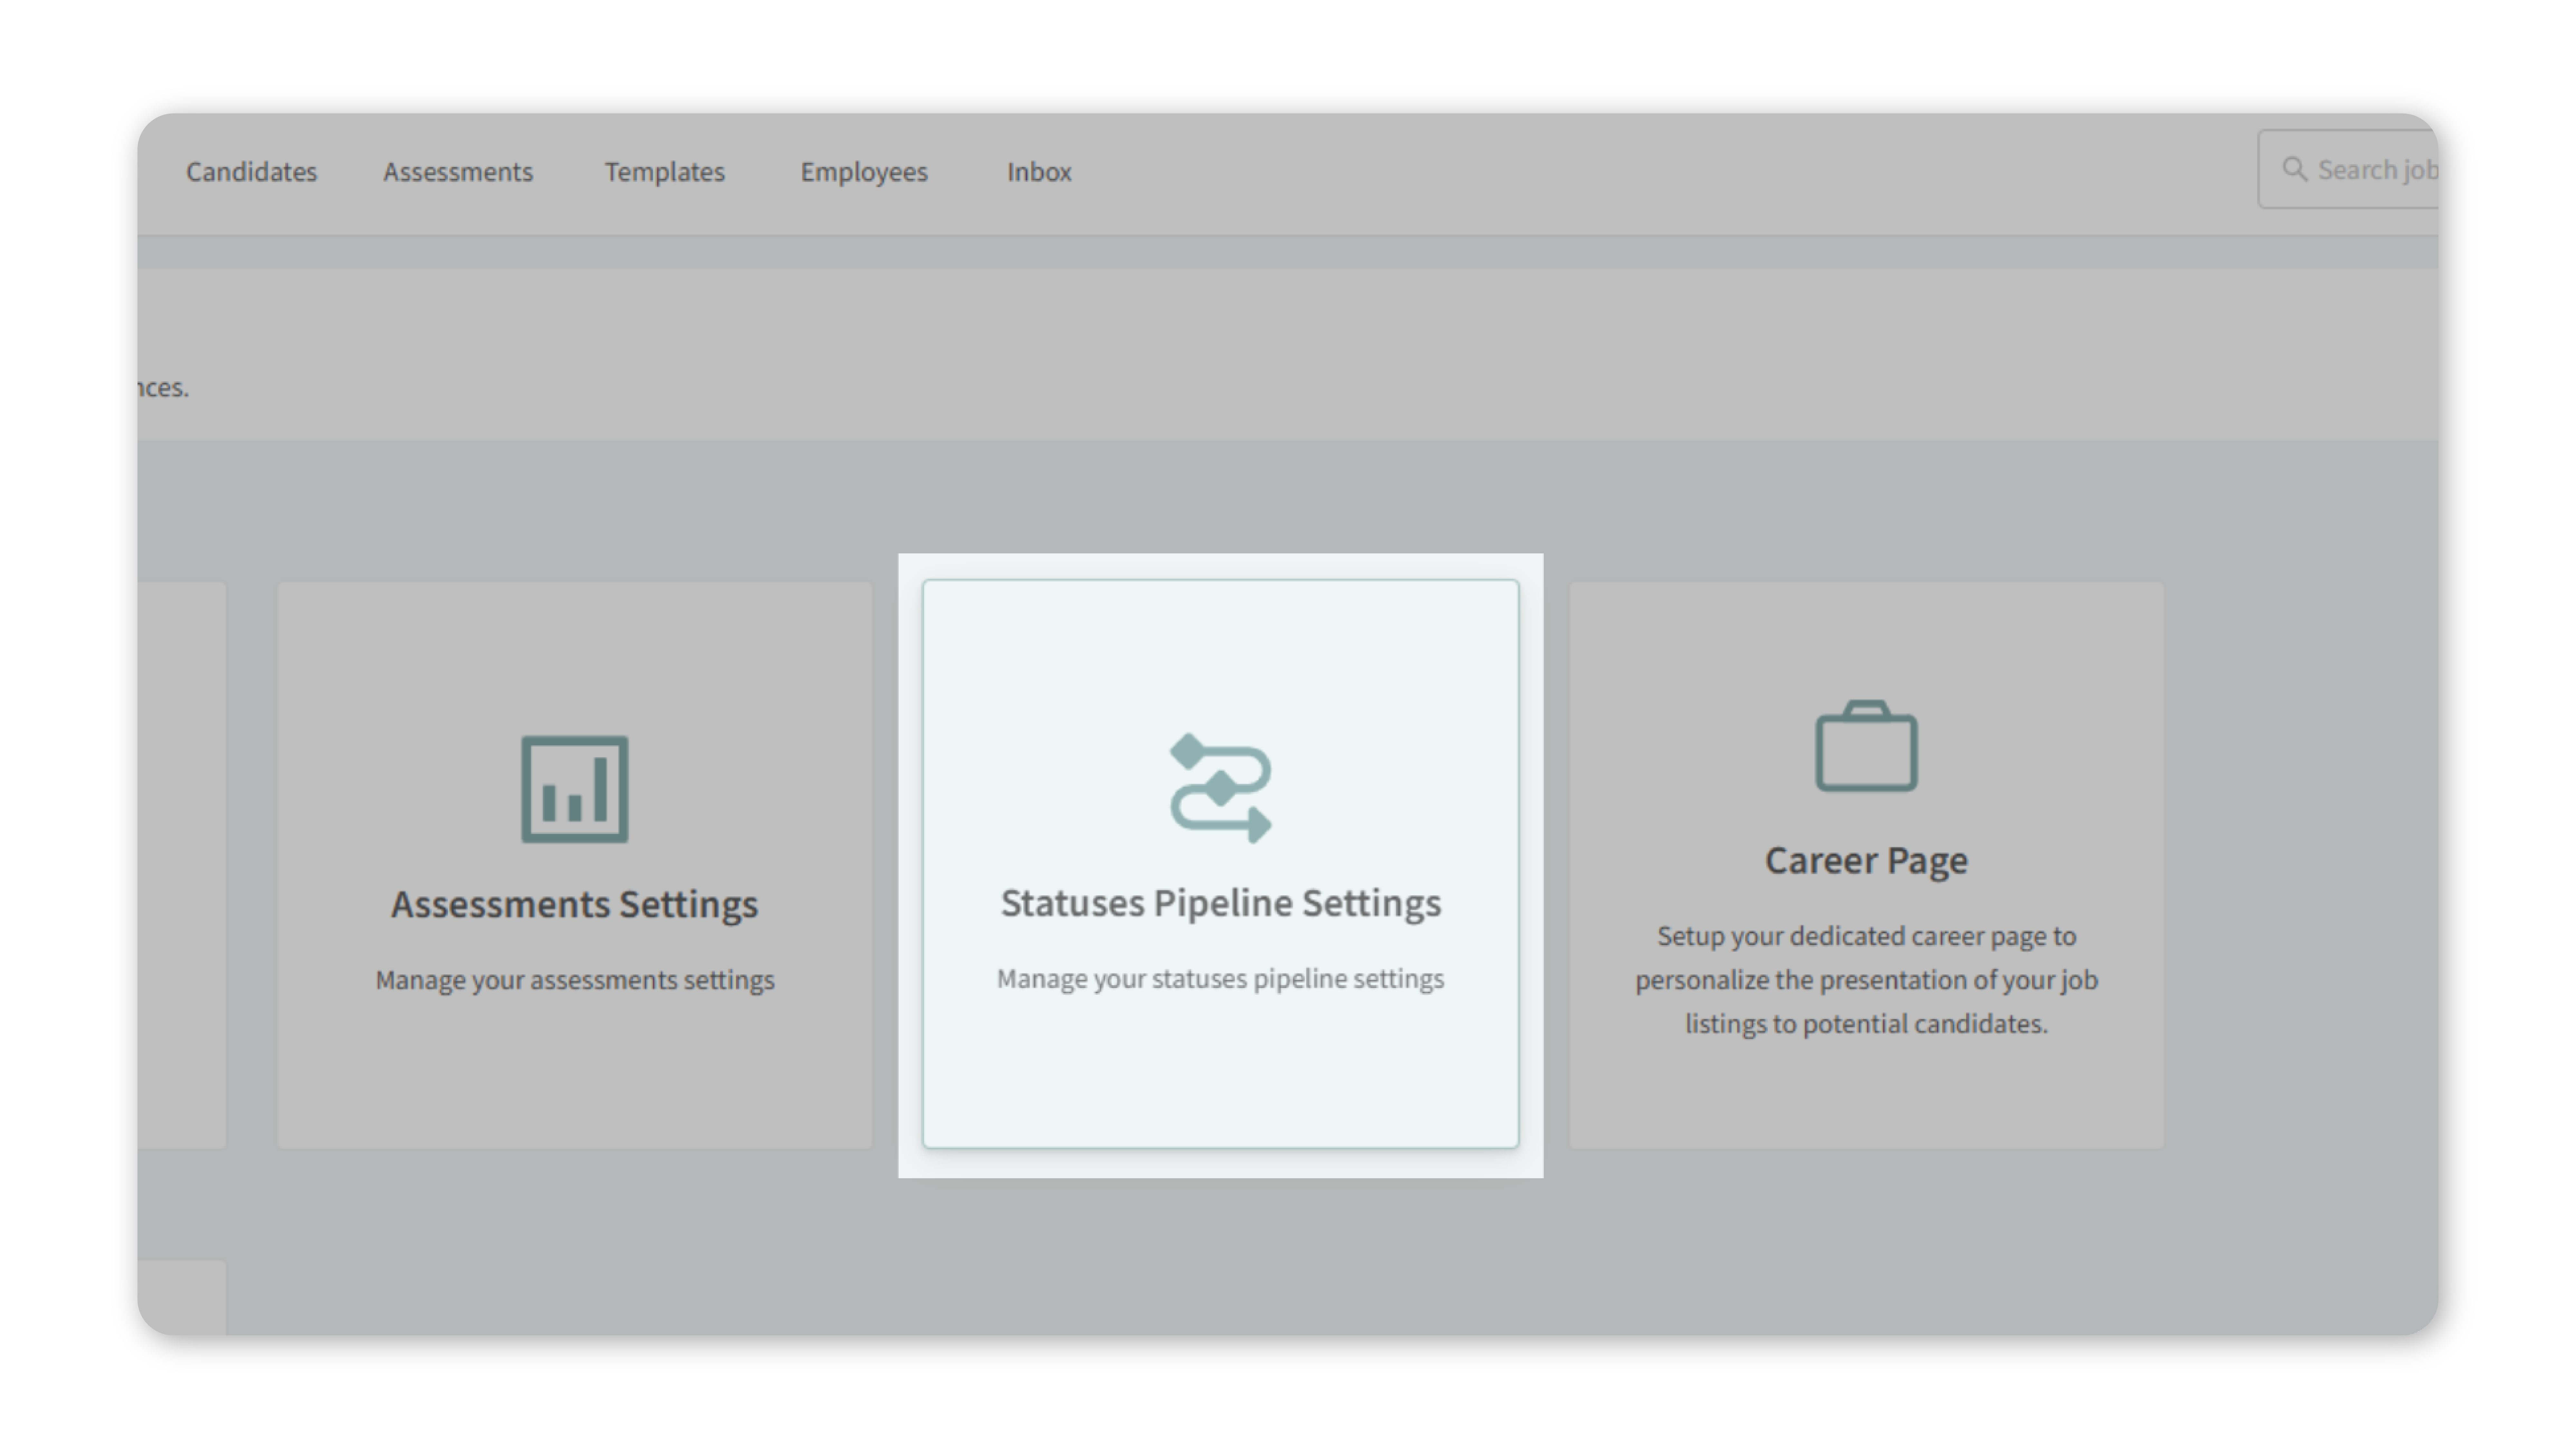
- This is where you can manage and customize rejection categories.
3. Add a New Rejection Category
- Enter the label you’d like to use (e.g., “Candidate Withdrew”).
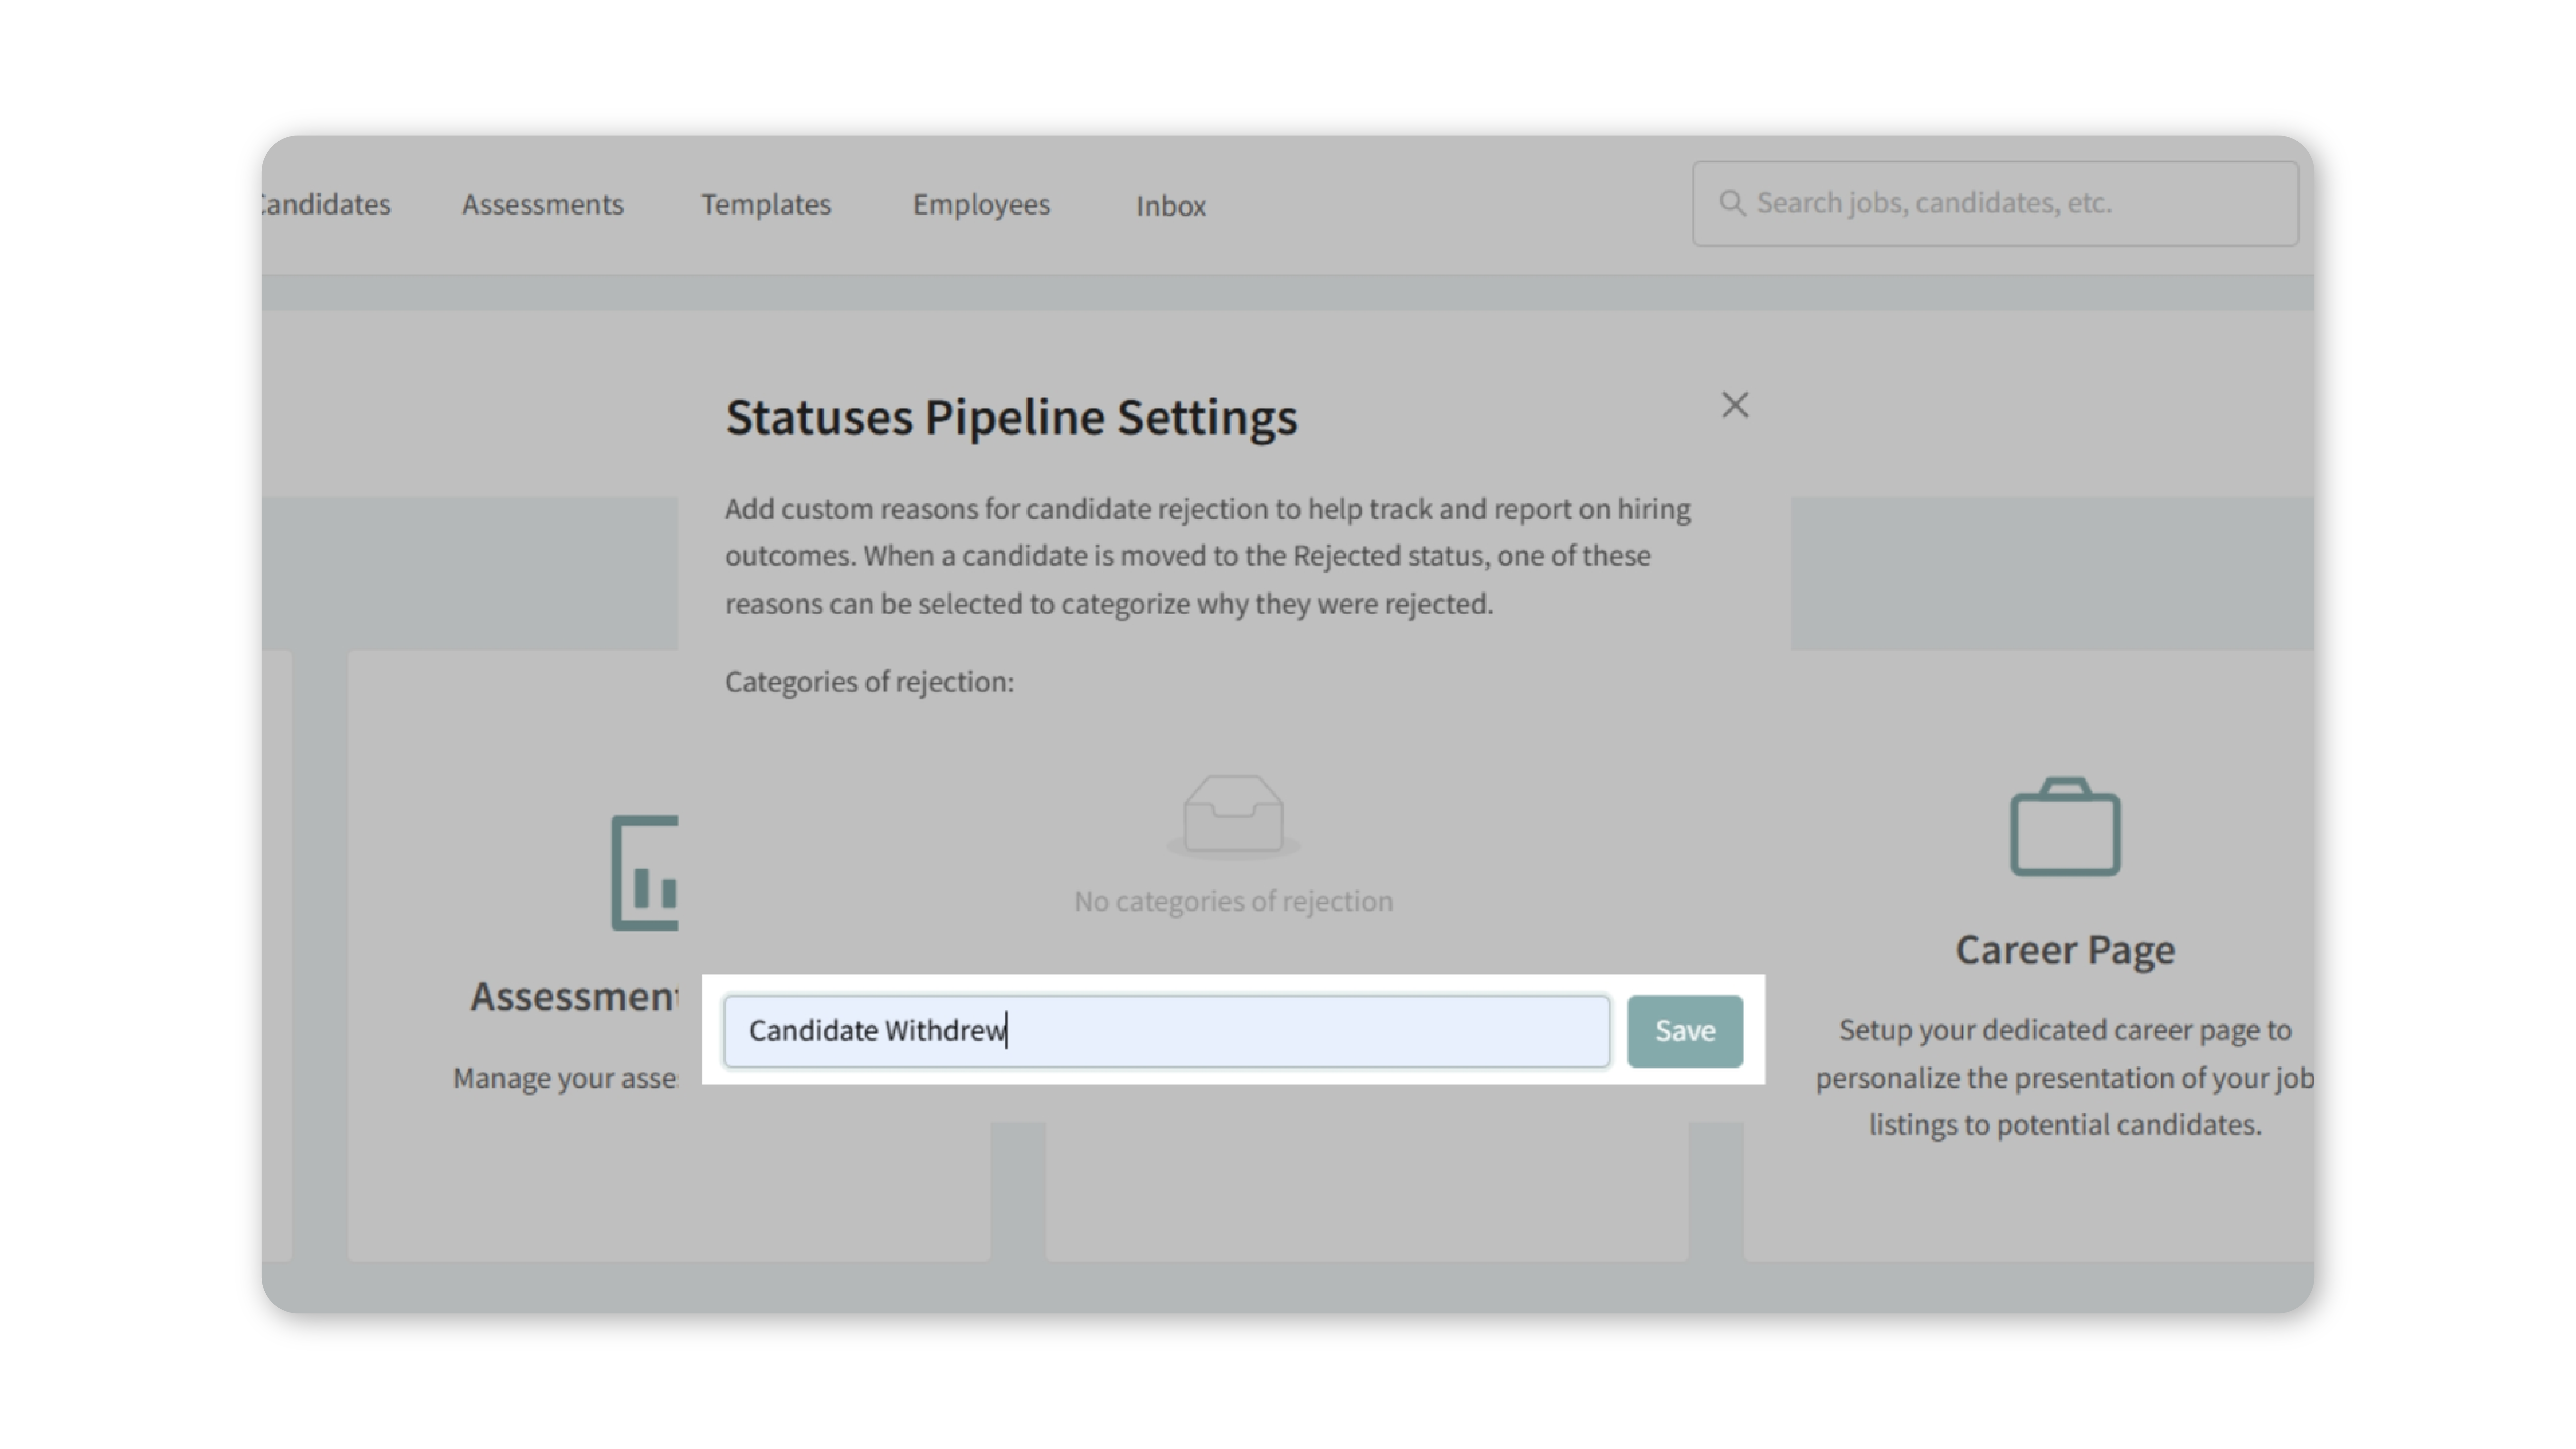
- Save your changes.
- Categories are fully customizable — use whatever naming best fits your workflow.
4. Apply a Rejection Category to a Candidate
- Go to Candidates in the navigation bar.
- Click on the candidate’s name.
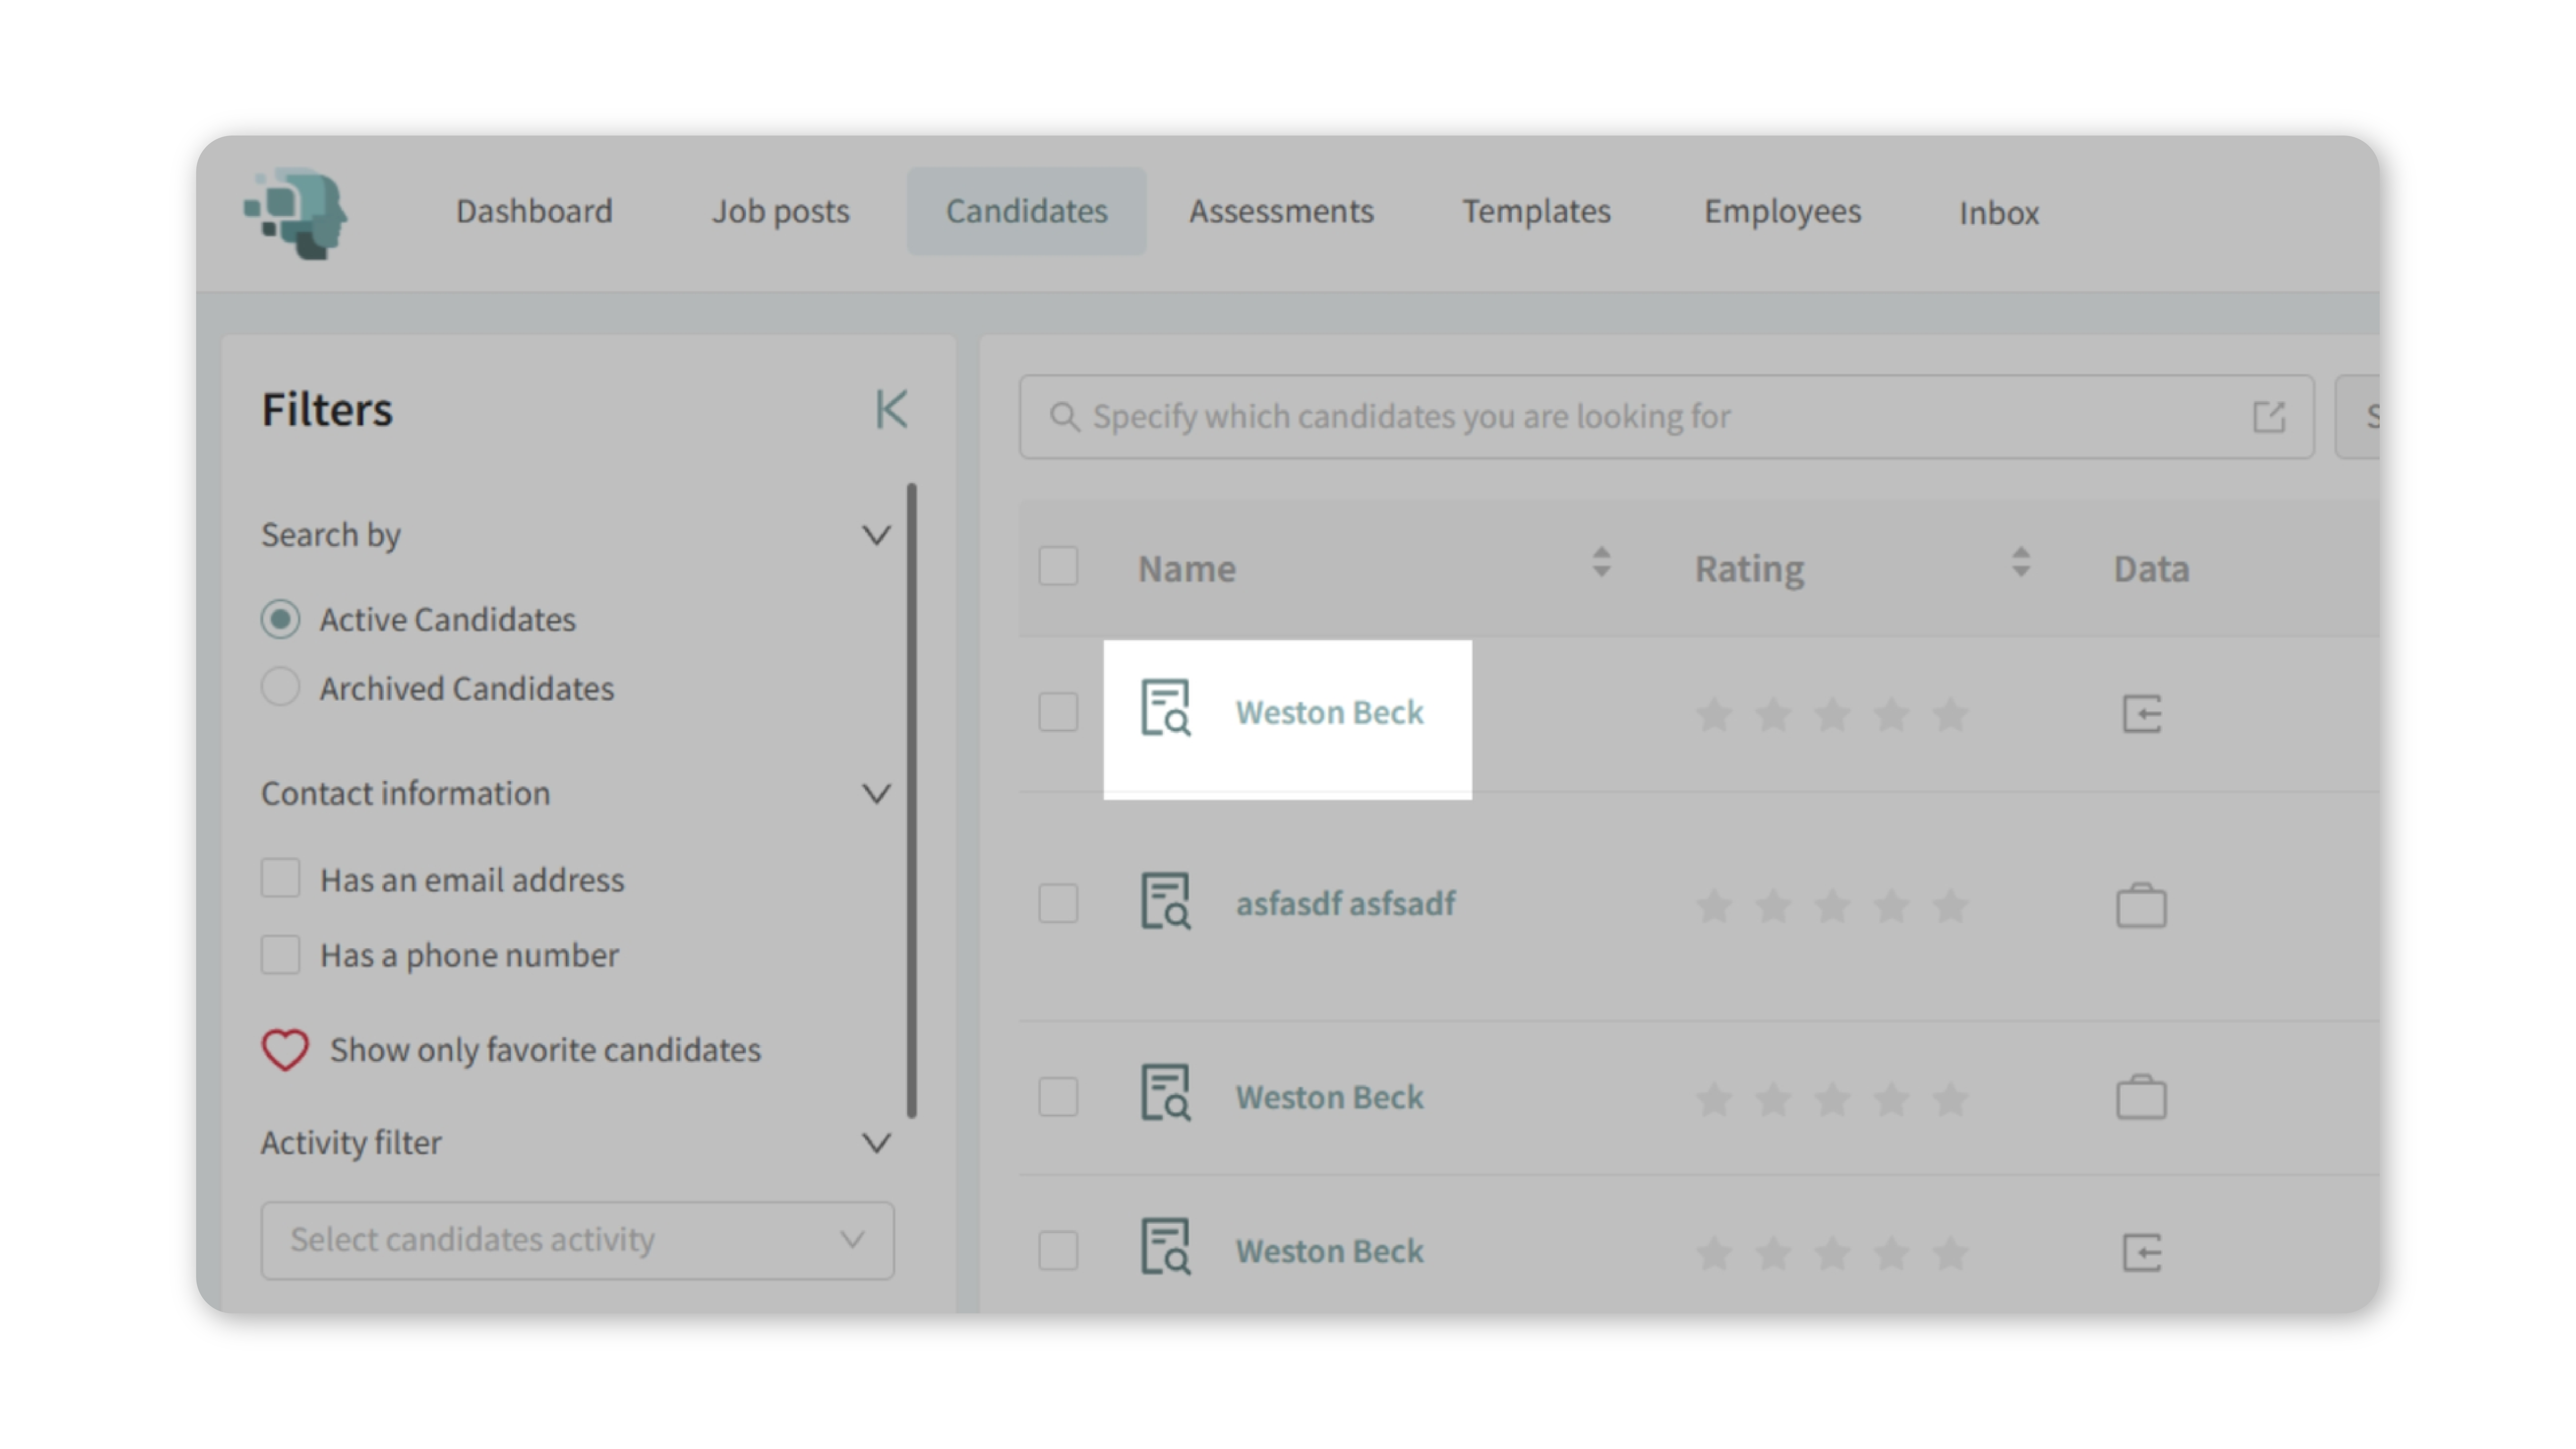
- Change their status to Rejected.
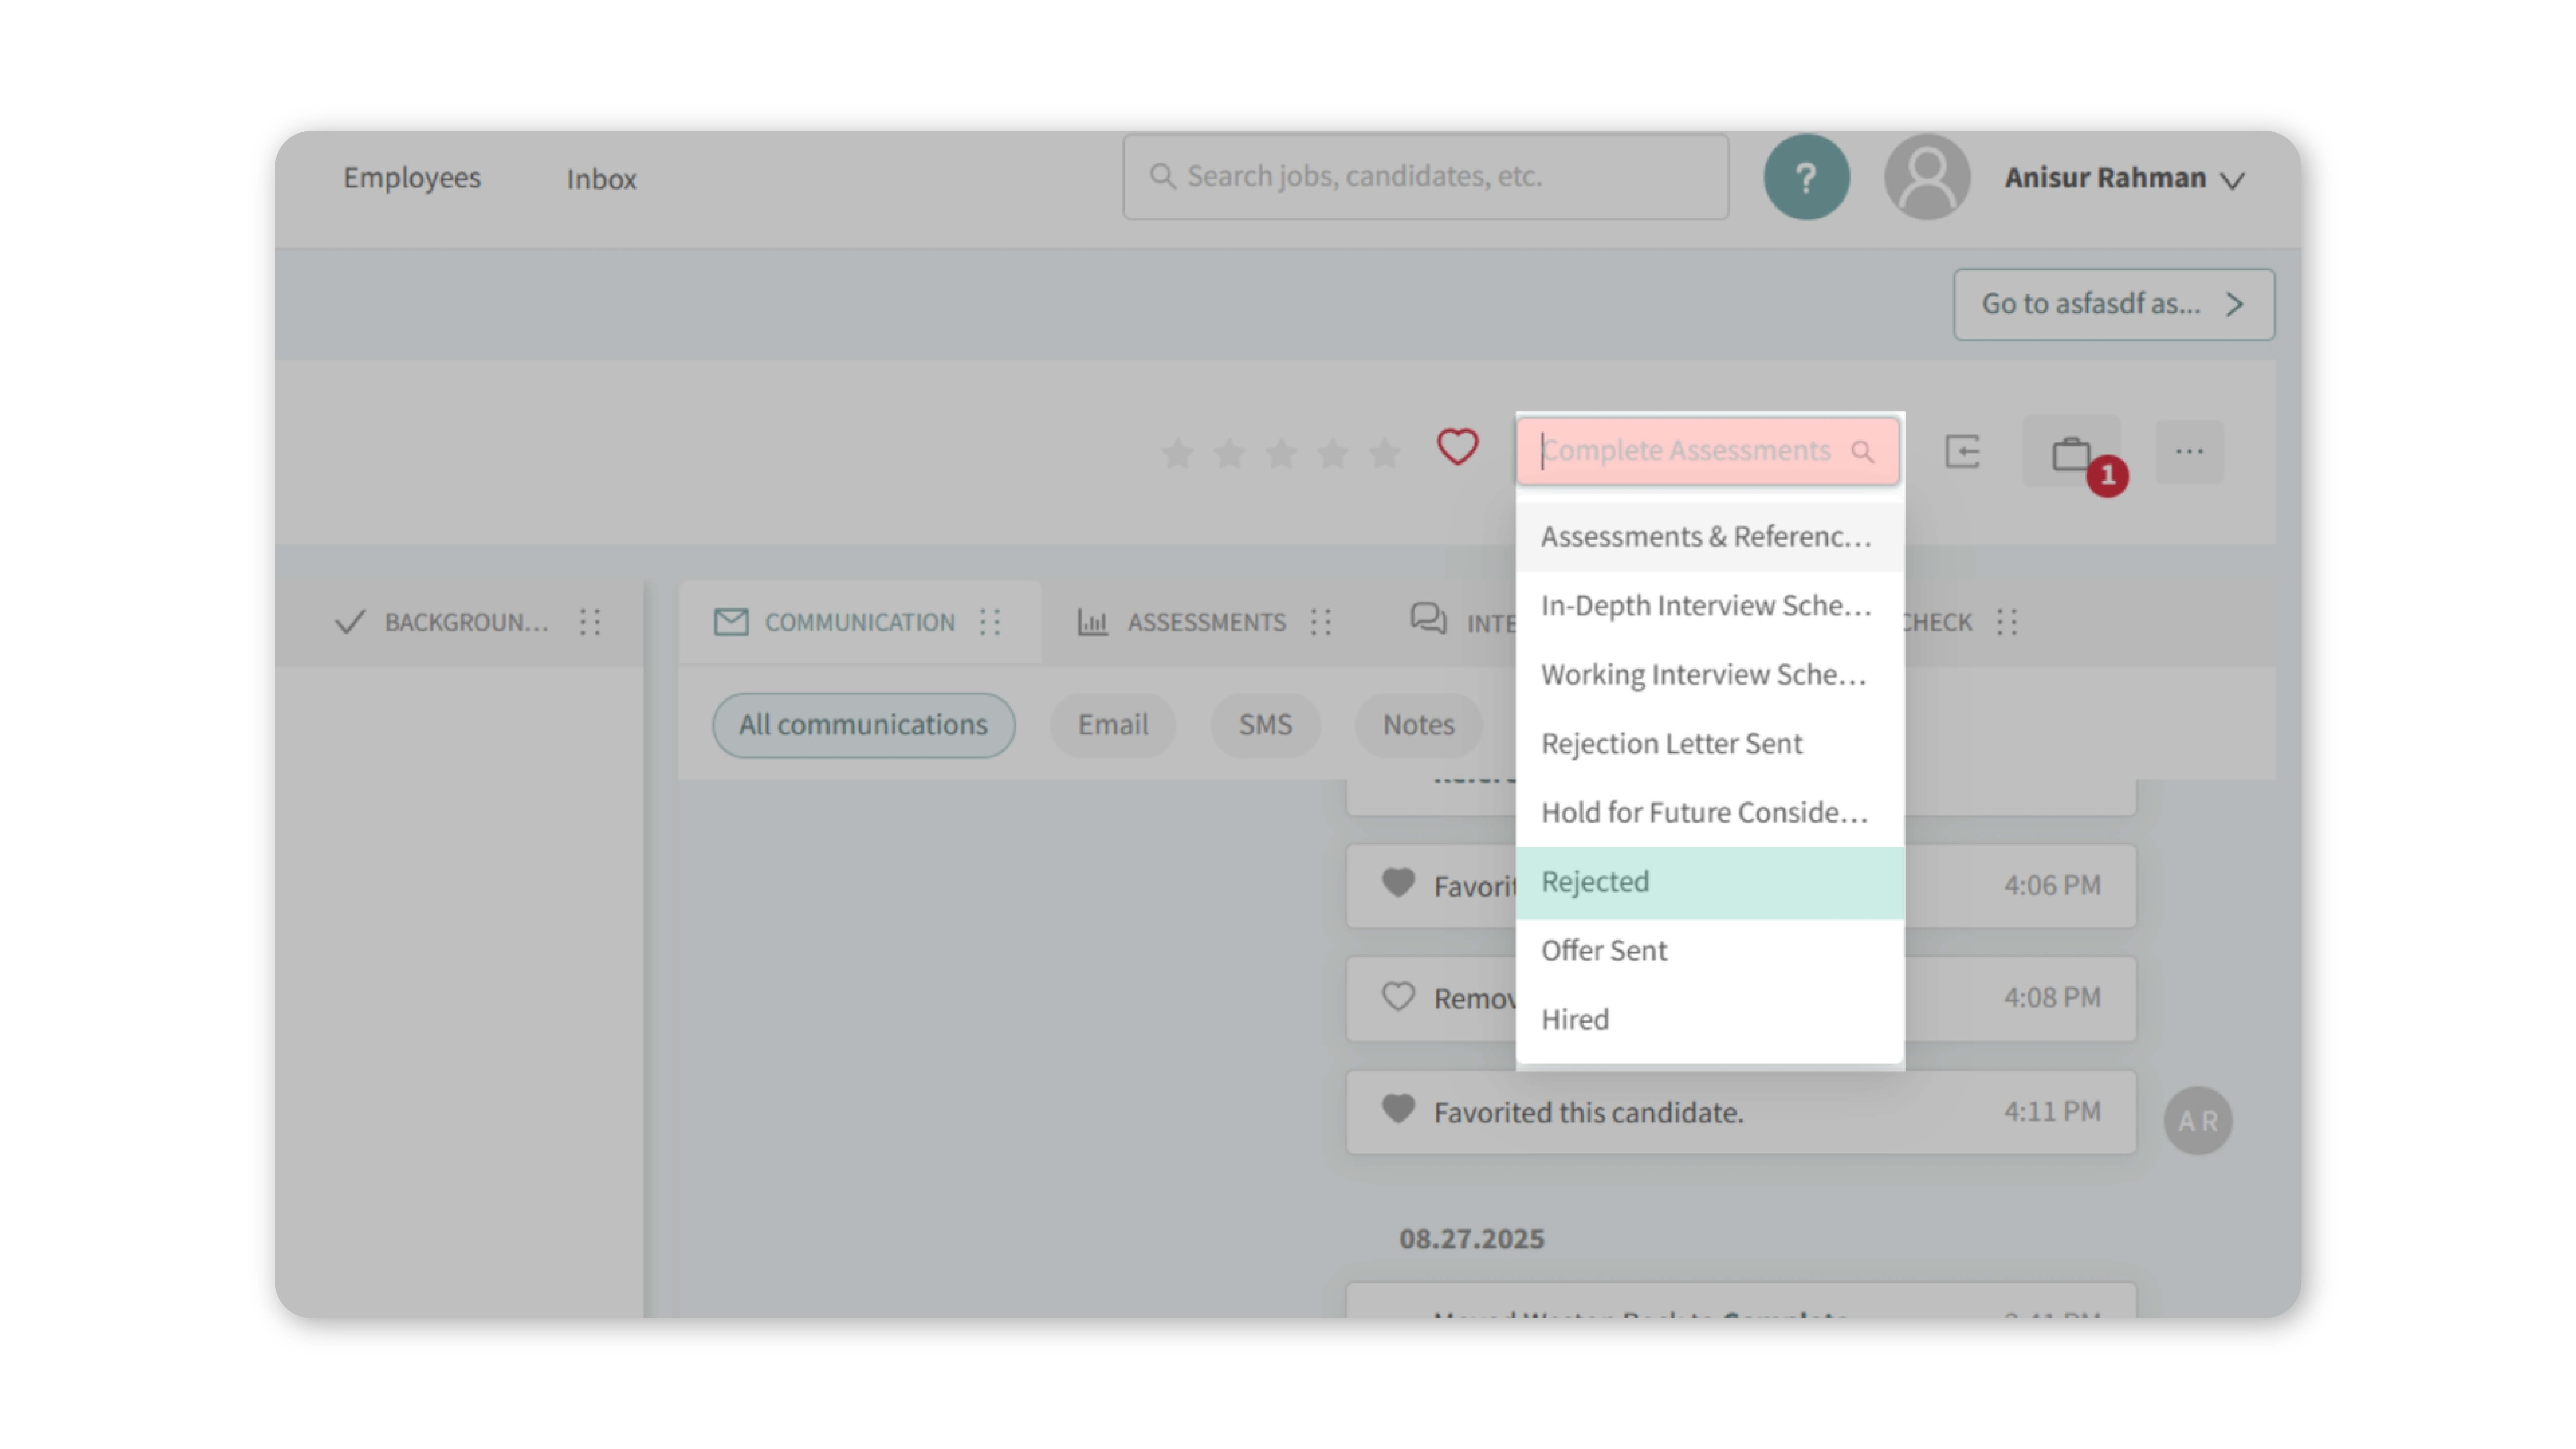
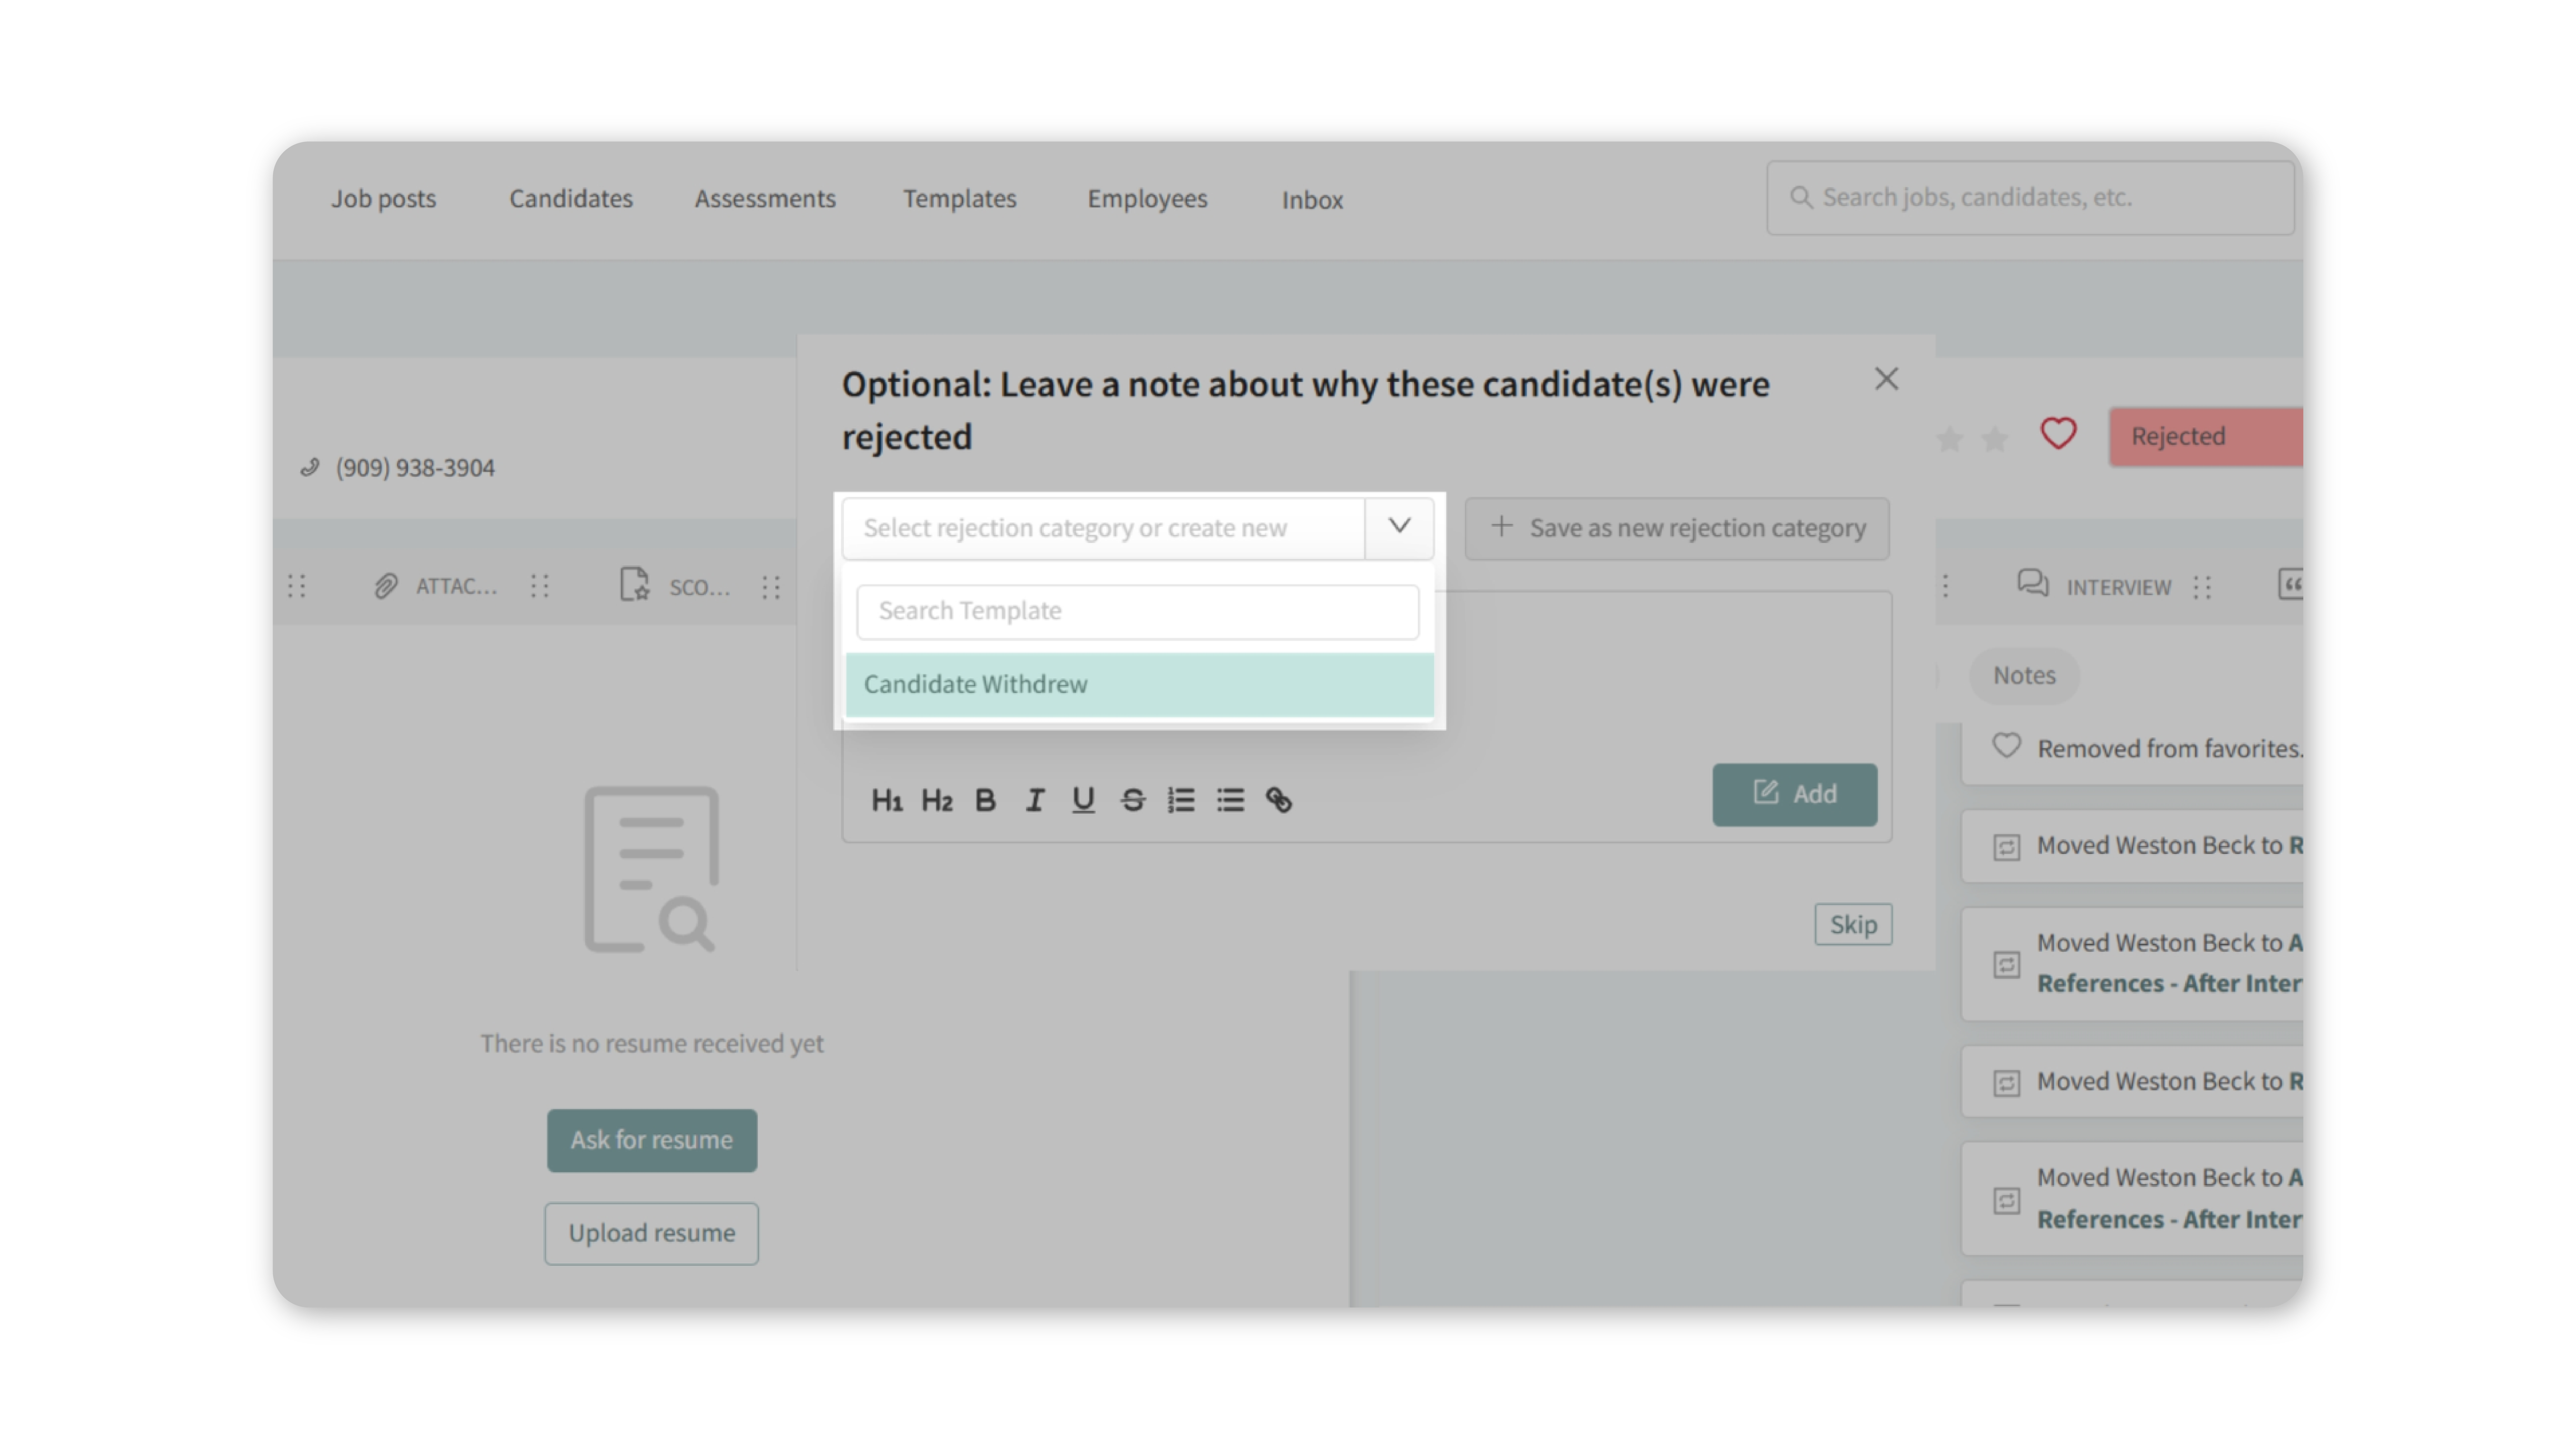
- Select the appropriate rejection category from the dropdown list.
Note: You can add a note in the field for more context.
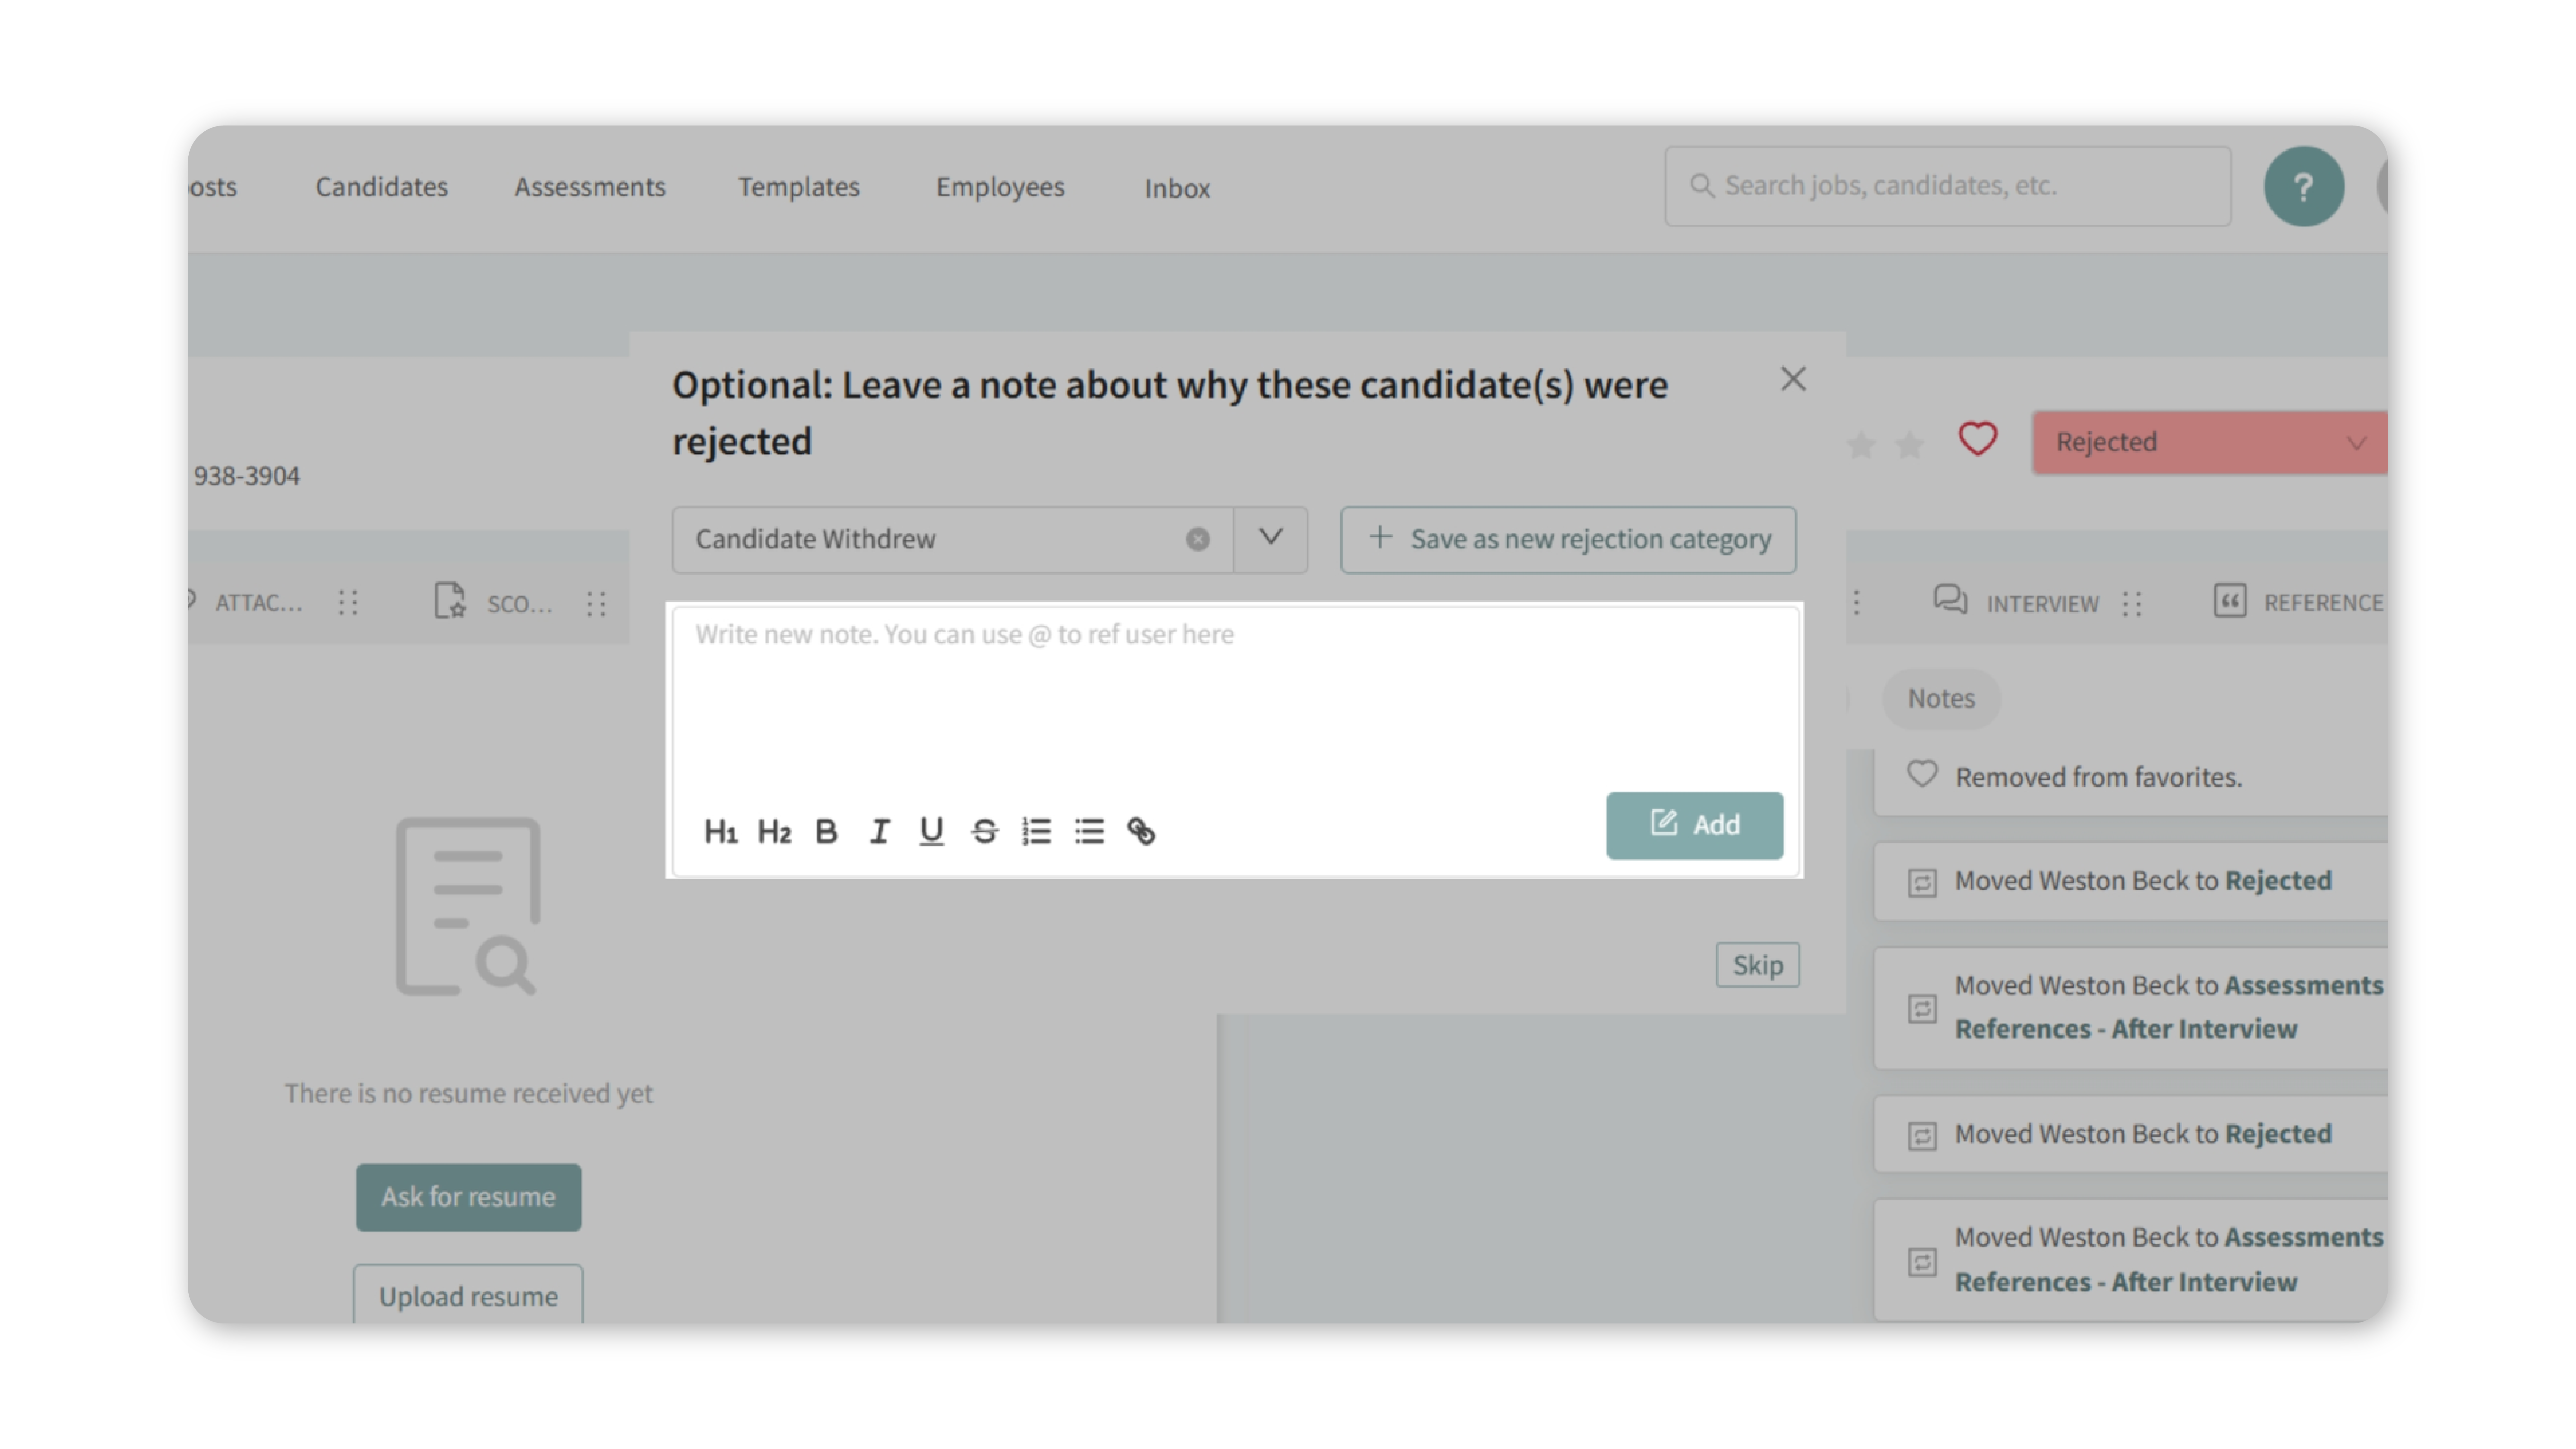
Once saved, the candidate will show as rejected under the category you selected.
Why This Matters
Having clear rejection categories improves the quality of your hiring data. It allows you to:
- Track common reasons candidates don’t move forward.
- Share consistent feedback with your hiring team.
- Spot patterns that help refine job descriptions or sourcing strategies.
Use Cases
- A candidate withdraws after receiving another offer — log it under “Candidate Withdrew.”
- An applicant doesn’t meet minimum qualifications — tag as “Not Qualified.”
- Someone advances to late stages but declines compensation — use “Compensation Concerns.”
By customizing categories, you’ll have a more accurate view of candidate outcomes across roles.
How It Works
Each rejection category is tied to your hiring pipeline and appears whenever you mark a candidate as “Rejected.” Notes you leave alongside categories give added detail for reporting and team visibility.
Best Practices
- Keep categories clear and concise so the team uses them consistently.
- Review categories quarterly to remove duplicates or unused ones.
- Combine categories with notes for more context when needed.
What Happens Next
Once rejection categories are set up:
- They’ll be available for every job posting in your account.
- Any team member rejecting a candidate can choose from the standardized list.
- Over time, you’ll build a dataset of why candidates don’t move forward, helping refine hiring decisions.
