
Adding an Offer Letter to a Job Workflow
Overview
Offer letters can be added to a job workflow through a status automation in Discovered.
This allows your team to send offer letters as part of the hiring process instead of creating and tracking them manually outside the platform. When a candidate reaches the selected status, Discovered can generate the offer letter and send the candidate a message with the offer letter link.
The most common status for this automation is Offer Sent, but you can use another status if your team has a custom offer stage.
Adding an Offer Letter to a Status:
1. Open the Job Workflow
Open the job where you want to use the offer letter.
Go to the job’s processing workflow and select the status where the offer letter should be sent.
The Offer Sent status is usually the best place to add this automation, unless your company uses a custom offer status.
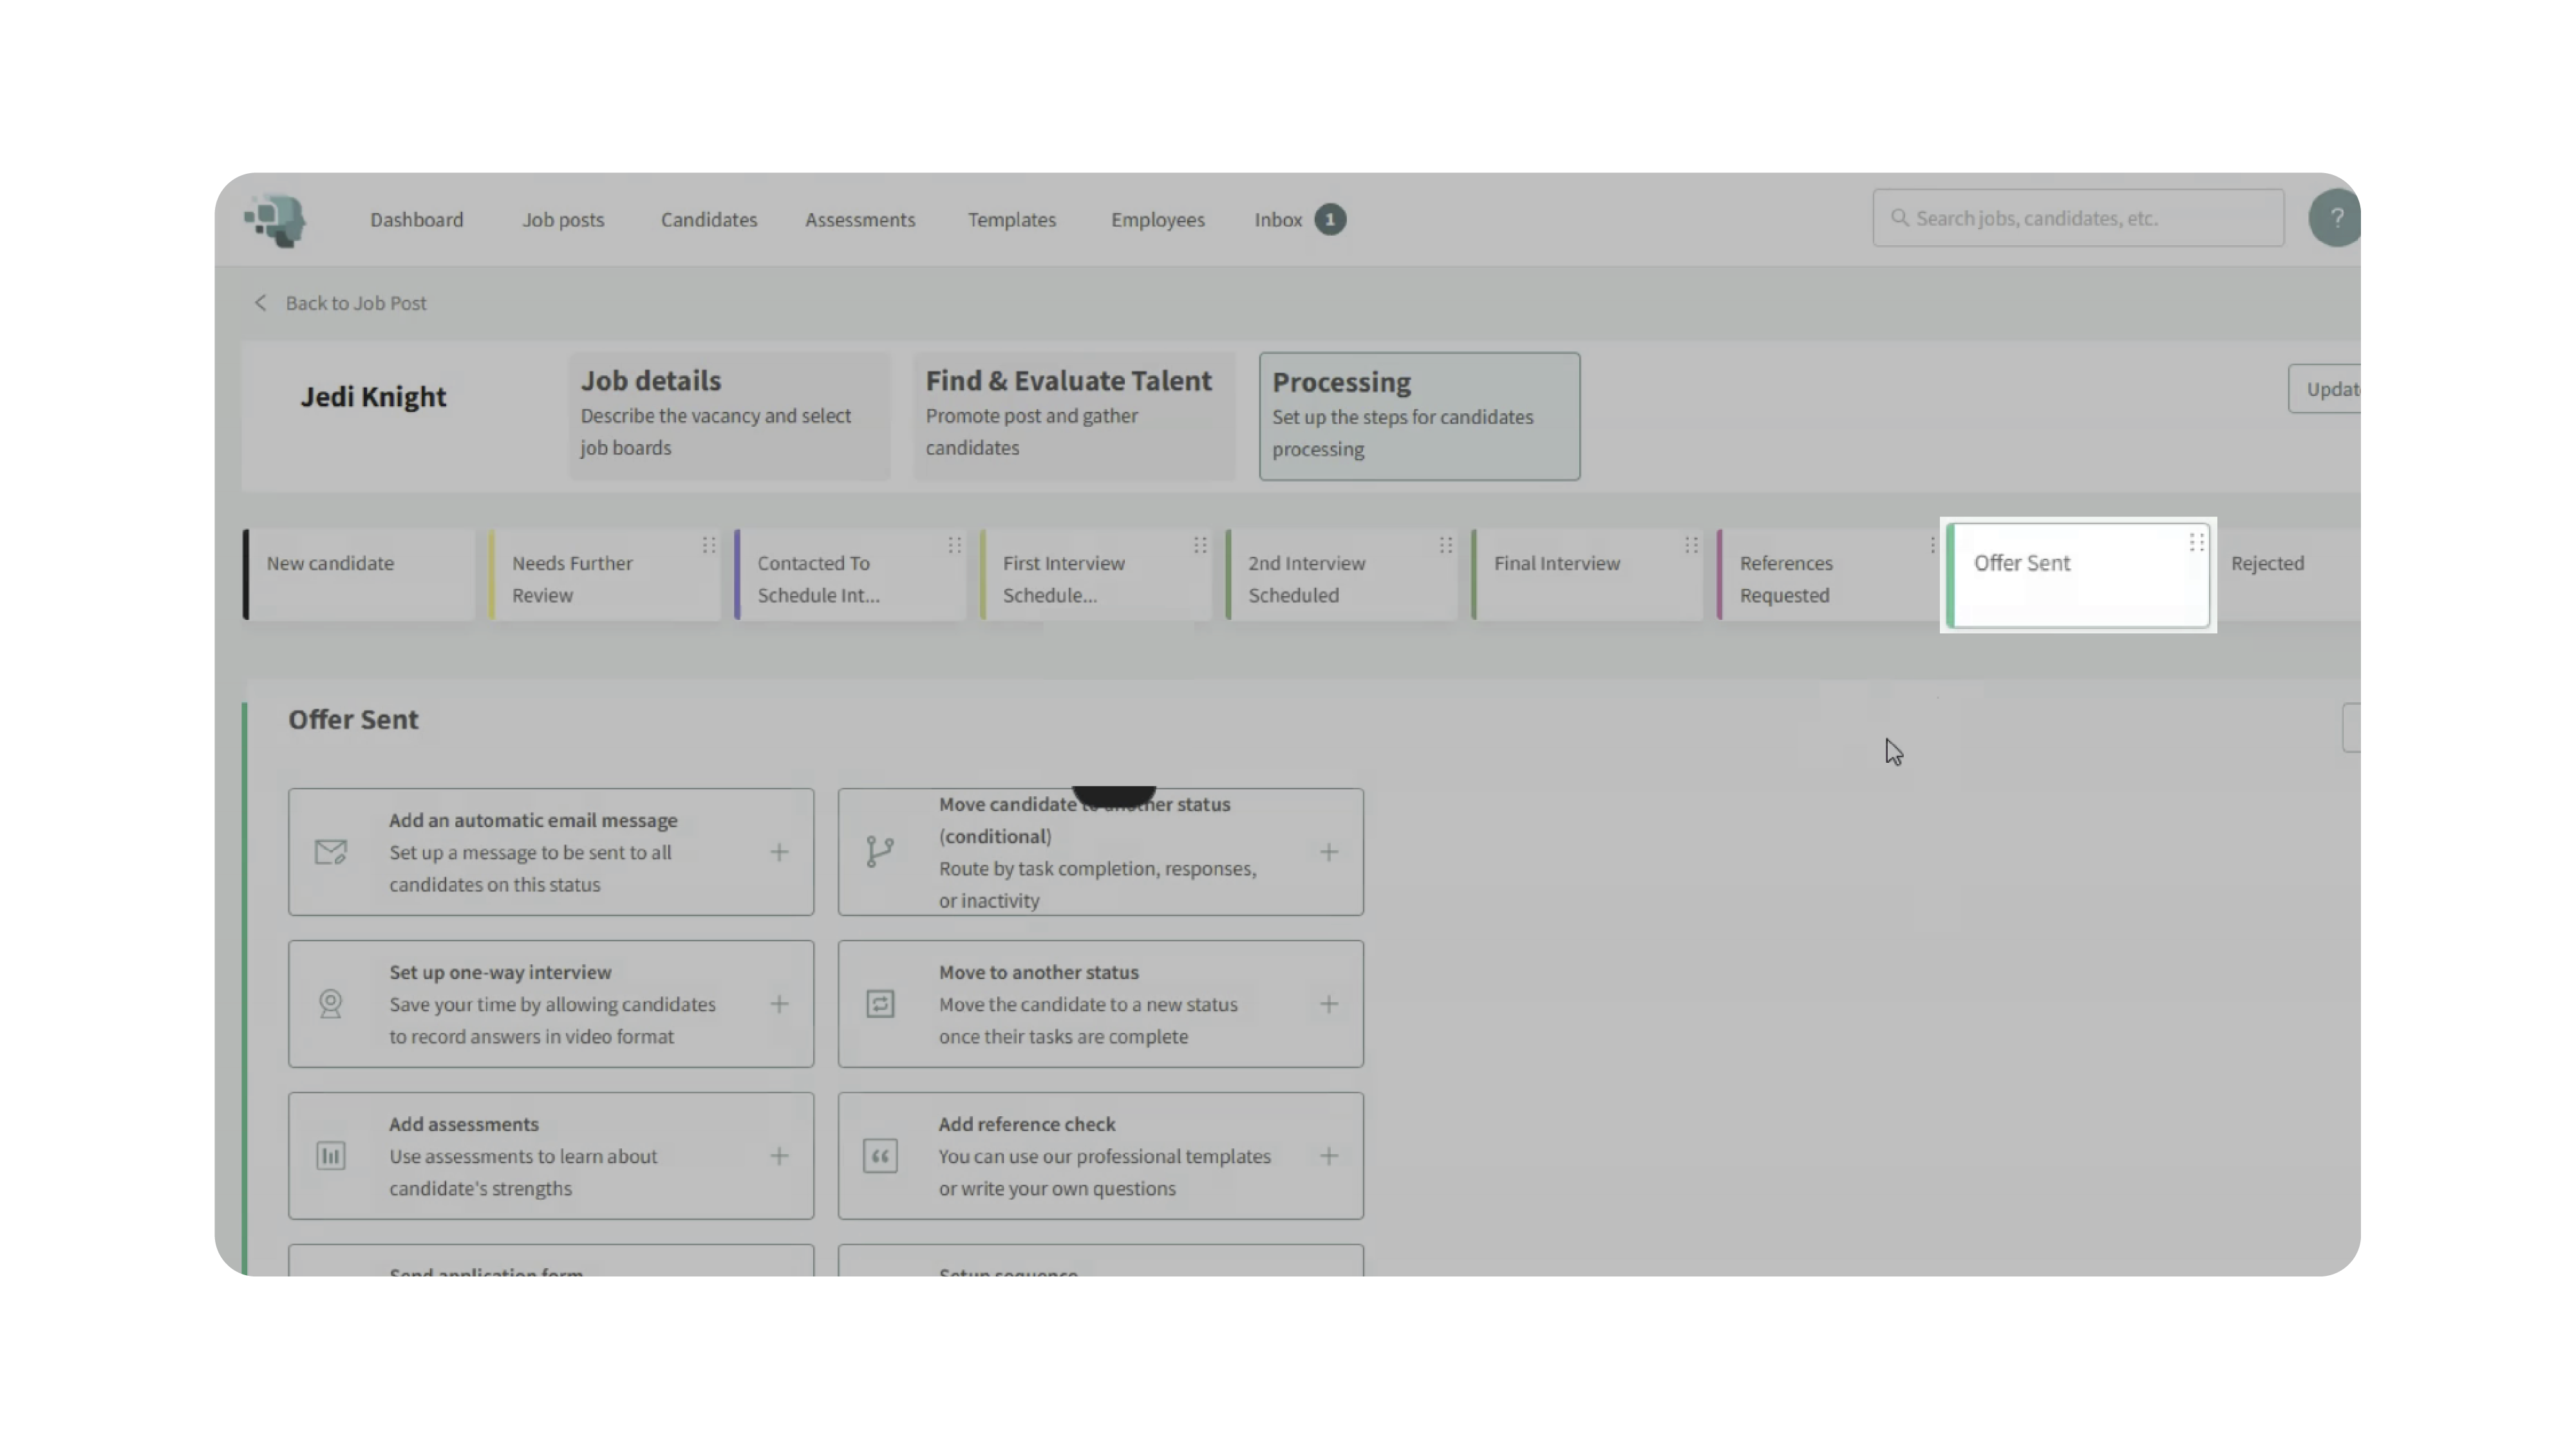
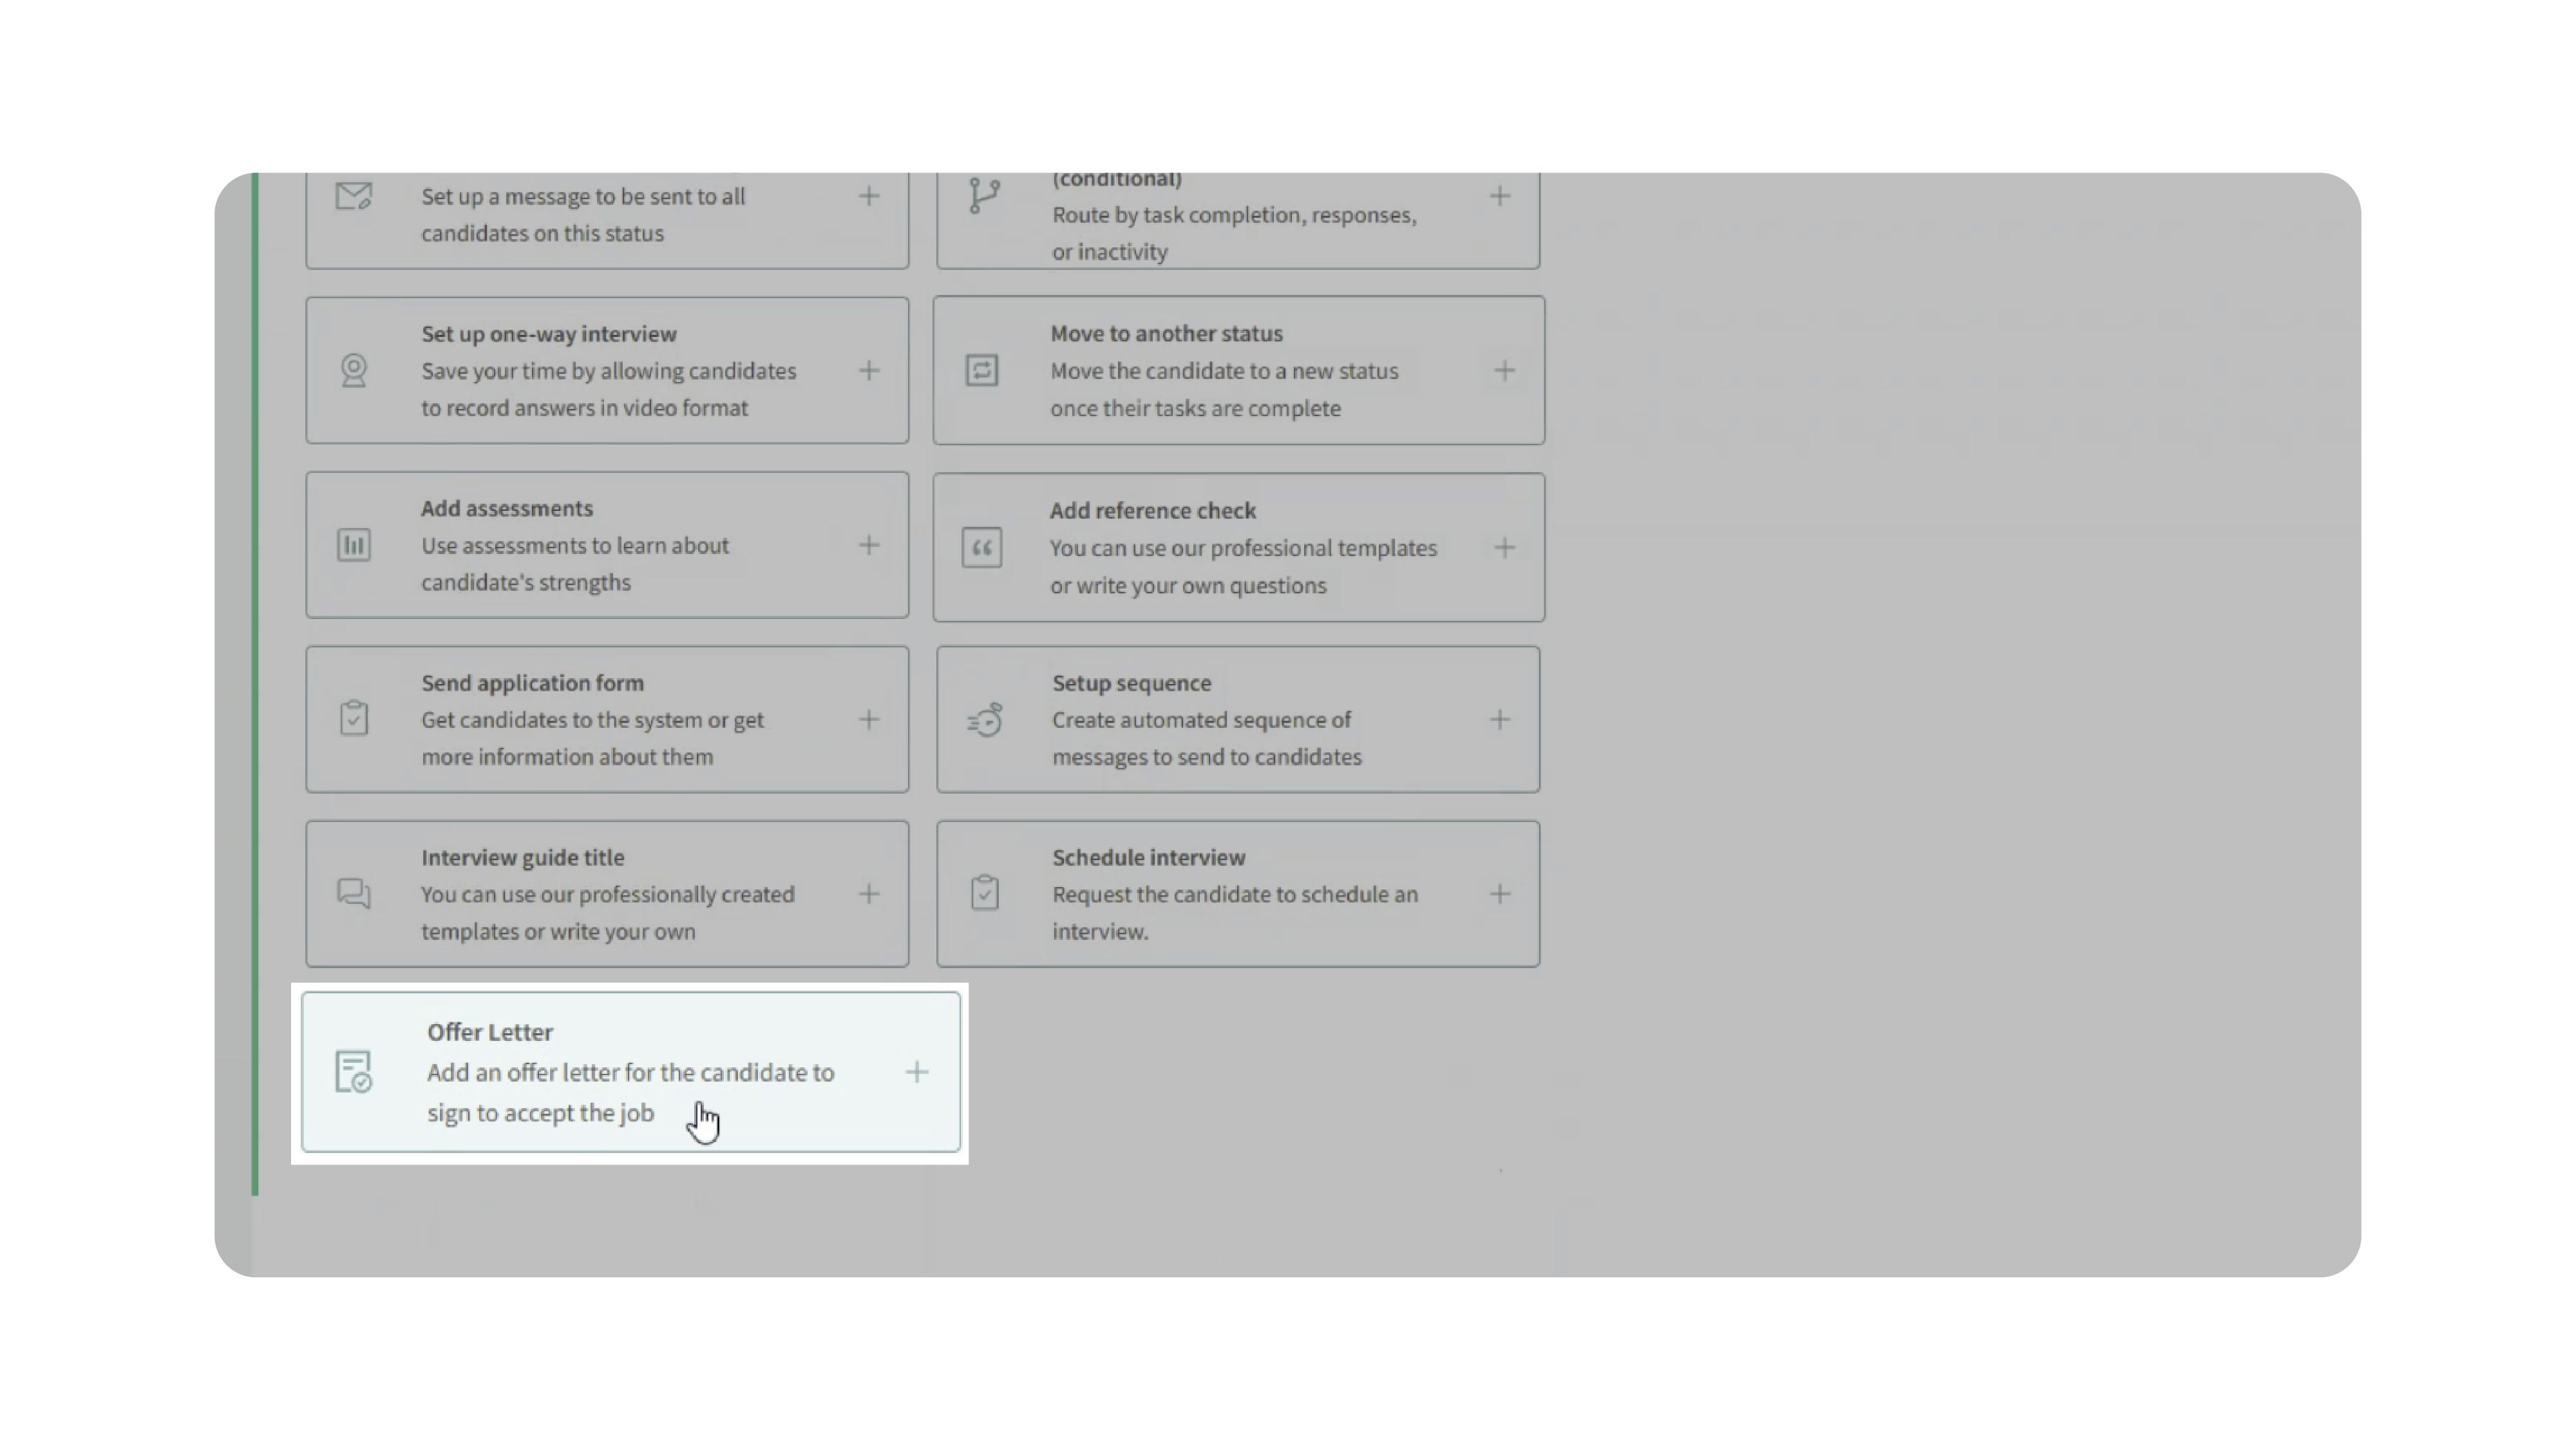
2. Add the Offer Letter Automation
Find and add the Offer Letter automation.
You can create an offer letter from scratch or select an existing offer letter template.
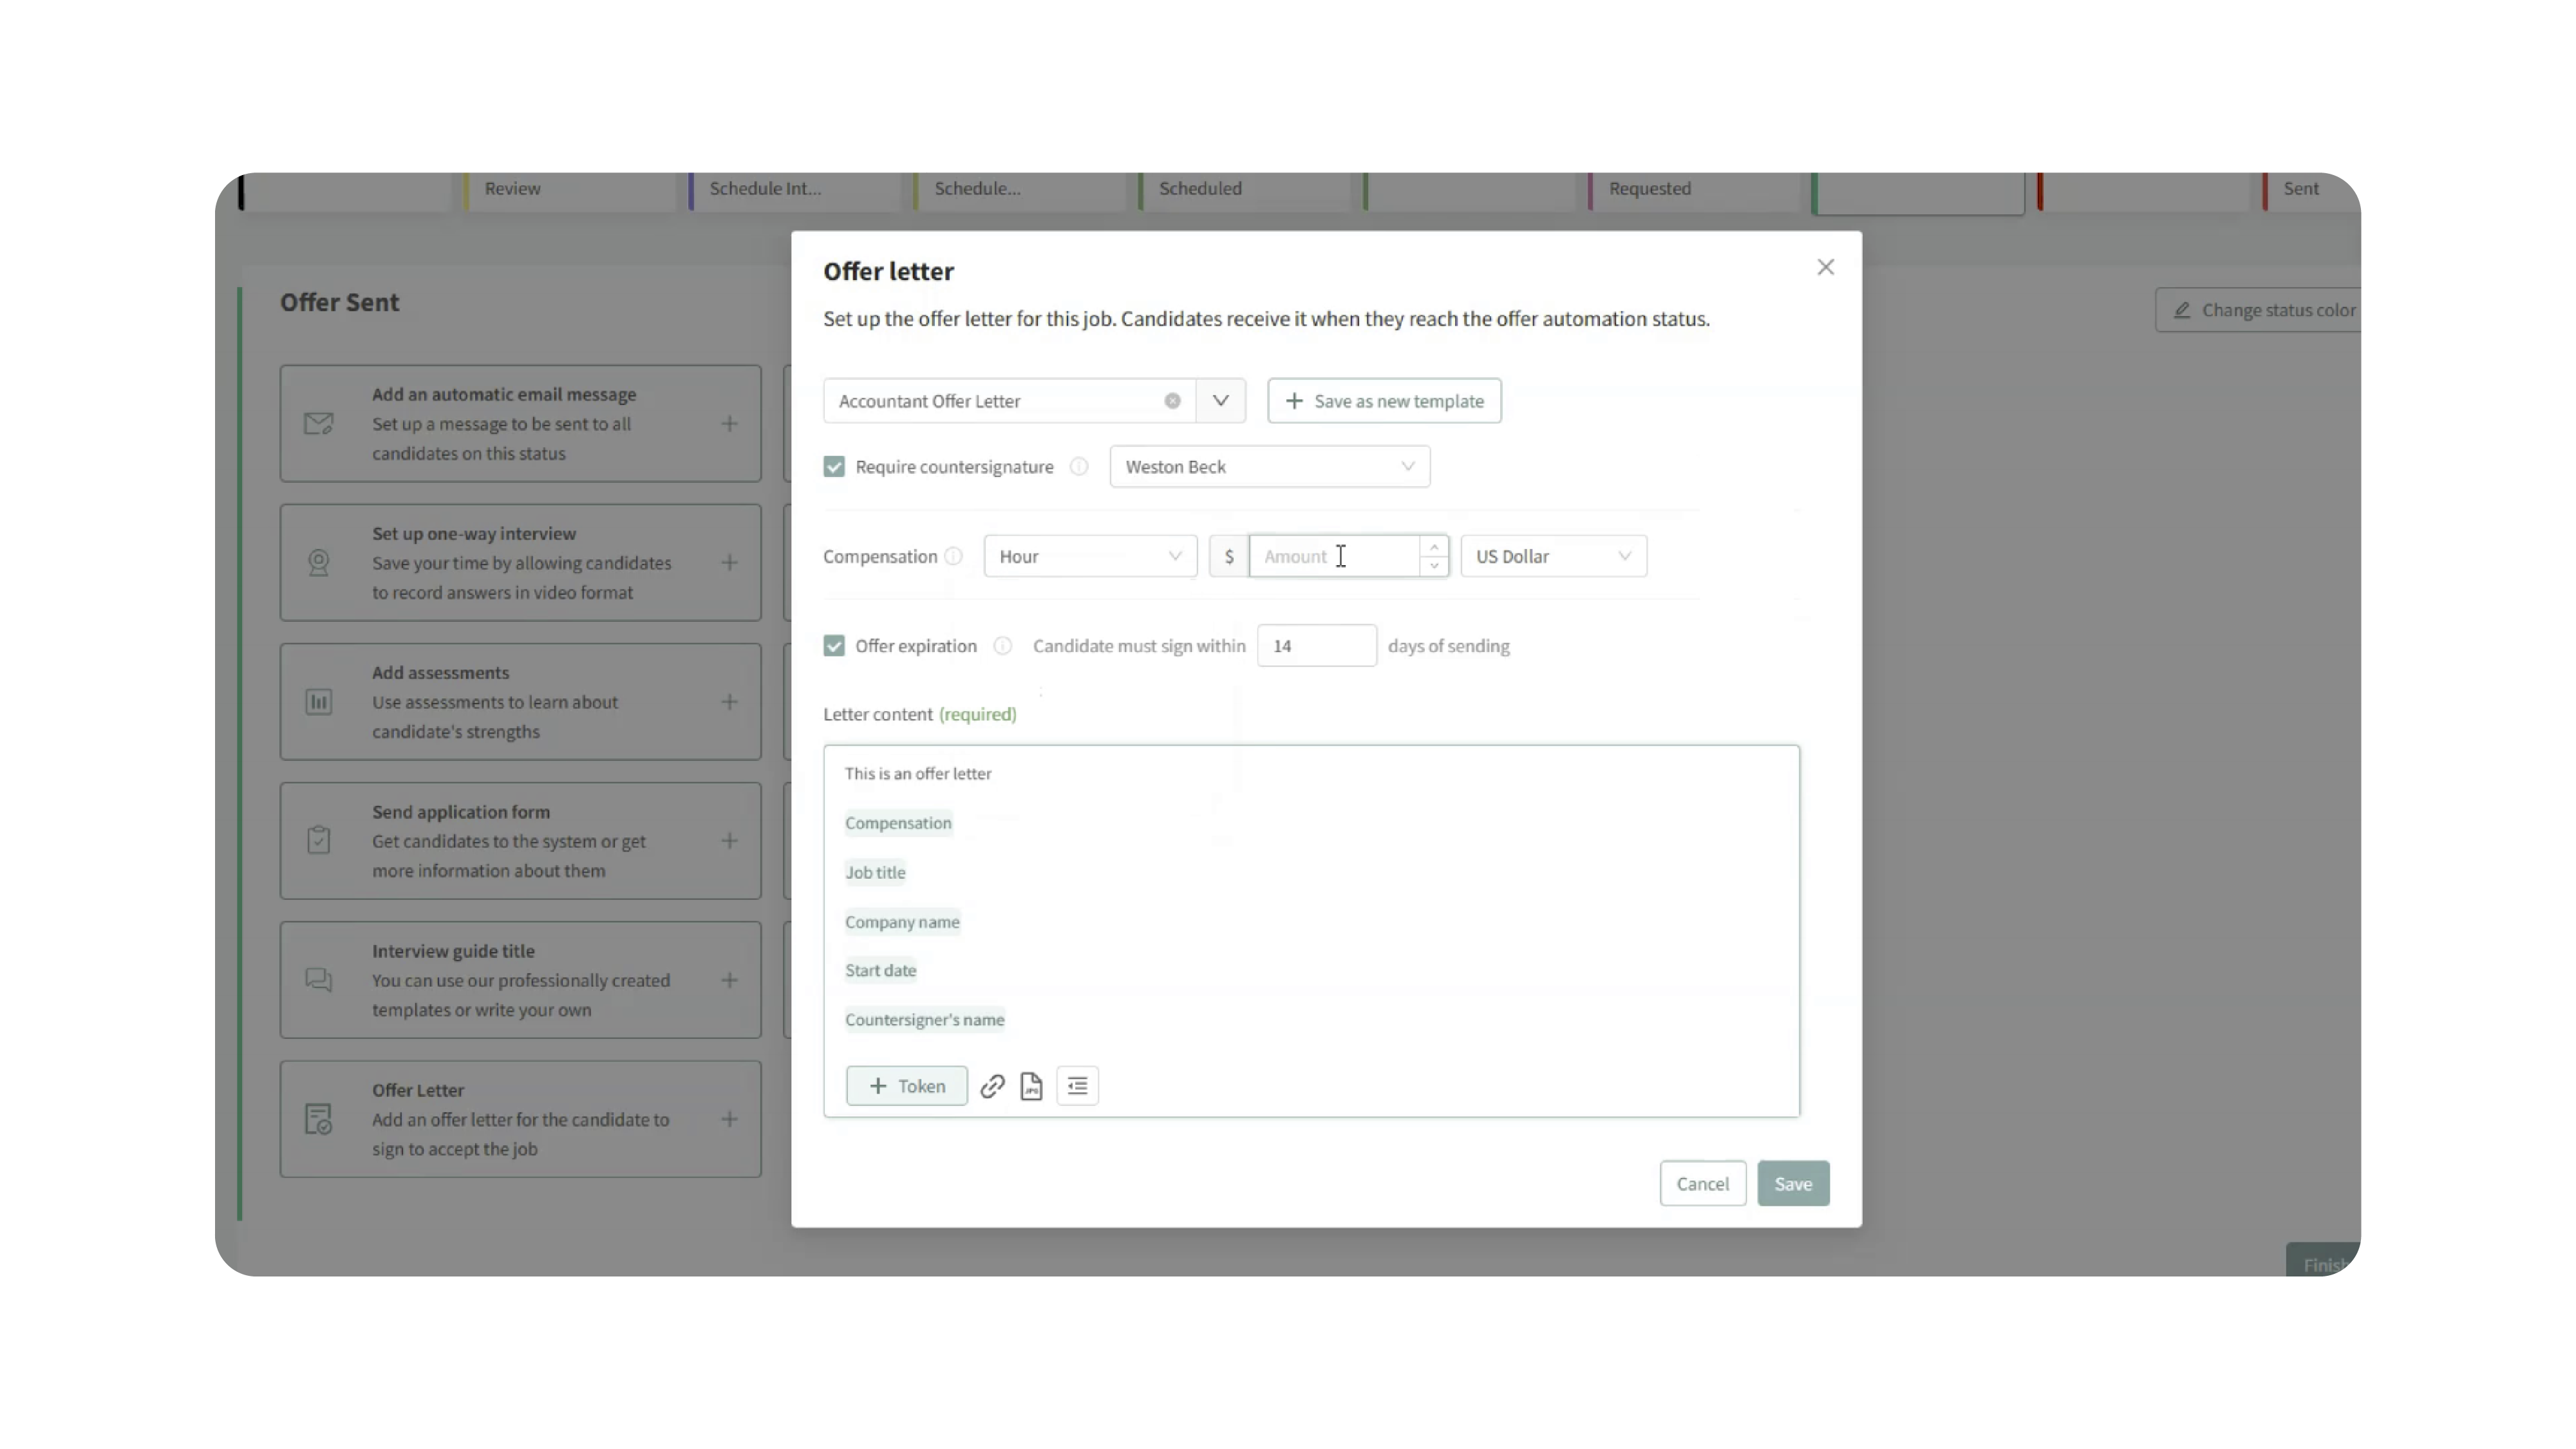
3. Select or Customize the Offer Letter
Choose the offer letter template you want to use.
If the template includes offer-specific fields, such as compensation, enter the details that should appear in the offer letter.
For example, if the template includes a compensation token, enter the compensation amount for the offer.
4. Add a Candidate Message
The offer letter should be sent with a candidate message.
Create or edit the message connected to the status and include the Offer Letter Link token.
This token gives the candidate access to review and sign the offer letter.
Sending the Offer Letter
Once the offer letter automation and message are set up, the offer letter is generated when a candidate enters the selected status.
For example, if the offer letter is attached to the Offer Sent status, moving a candidate into that status creates the offer letter and sends the message containing the offer letter link.
Why This Matters
Adding offer letters to a job workflow helps teams make the offer stage more consistent and easier to track.
Instead of manually creating documents and sending separate emails, users can connect the offer letter directly to a candidate status. This helps reduce missed steps and keeps the offer process inside Discovered.
Use Cases
Use an offer letter automation when you need to:
- Send an offer letter when a candidate reaches a specific status
- Use a saved offer letter template in a job workflow
- Include compensation or role-specific offer details
- Send the candidate an offer letter link
- Track offer activity from the candidate profile
- Standardize the offer process across jobs
Best Practices
- Use the Offer Sent status unless your team has a custom offer process.
- Select the correct offer letter template before activating the workflow.
- Review compensation and other offer-specific fields before sending.
- Always include the Offer Letter Link token in the candidate message.
- Test the workflow before using it with live candidates.
- Make sure the selected countersigner is correct if the offer requires a countersignature.
What Happens Next
After the offer letter is added to the workflow, candidates who enter the selected status can receive the offer letter link.
The offer letter will also appear in the candidate profile so users can track whether it is pending, signed, countersigned, completed, declined, revoked, or expired.